
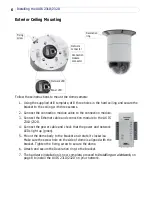
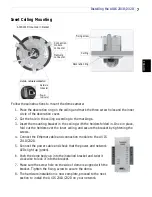


Installing the AXIS 231D/232D
9
EN
GL
ISH
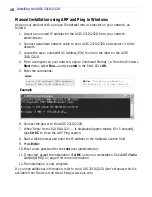
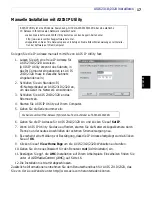
Manual Installation using AXIS IP Utility
Follow these instructions to set the IP address manually using AXIS IP Utility:
1. Acquire an unused IP address for your
AXIS 231D/232D. (AXIS IP Utility
detects the subnet your computer is
connected in. The AXIS 231D/232D must
be installed on the same subnet).
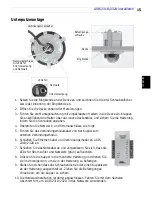
2. Connect a standard RJ-45 network cable
to your AXIS 231D/232D and connect it
to the network.
3. Connect the power to the AXIS
231D/232D.
4. Start AXIS IP Utility on your computer.
5. Enter the serial number:
6. Enter the IP address acquired for your AXIS 231D/232D and click
Set IP
.
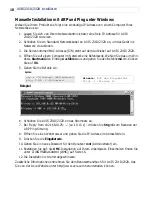
7. When prompted by AXIS IP Utility, restart the Network Dome Camera by
disconnecting and reconnecting the external power supply.
8. A message confirming that the IP address has been set will be displayed, click
OK
.
9. Click
View Home Page
to access the AXIS 231D/232D Web pages.
10.Enter a new password for the
root
user (administrator).
11.If required, accept the installation of
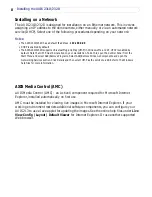
AMC
onto your workstation. See
AXIS Media
Control (AMC)
, on page 8 for more information.
12.The installation is now complete.
If you need additional information, refer to the AXIS 231D/232D User’s Manual which is
available from the Axis web site at http://www.axis.com
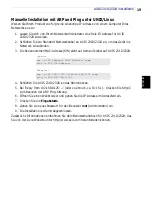
AXIS IP Utility is a Windows software application that installs the AXIS 231D/232D to your local
network using a static IP address.
• Download the AXIS IP Utility software to your computer, free of charge from the Support
pages at http://www.axis.com/techsup/software
• Double-click the setup.exe file and follow the on-screen instructions to install the software
on your computer.
The serial number/MAC address (S/N) is located on the label on the AXIS 231D/232D