background image


WARRANTY 

This instrument is warranted to be free from defects in material and workmanship for a period of one 
Lear. Any instrument found defective within one year from the delivery date and returned to the factory 
with transportation charges prepaid, will be repaired, adjusted, or replaced at no charge to the original 
purchaser. This warranty does not cover expandable items such as batteries or fuses. If the defect has 
been caused by a misuse or abnormal operating conditions, the repair will be billed at a nominal cost. 

SAFETY INFORMATION 

The digital multimeter has been designed according to IEC-61010 concerning electronic measuring 
instruments with a measurement category(CAT II 600V) and Pollution degree 2. 


WARNING 

To avoid possible electric shock or personal injury, follow these guidelines: 

 
a.


Do not use the meter if it is damage. Before you use the meter, inspect the case. Pay particular 

attention to the insulation. 

b.


Inspect the test lead for damage insulation or exposed metal. Check the test lead and test probe 

for continuity. Replace damage test lead before you use the meter. 

c.


Do not use the meter if it operates abnormally. Protection may be impaired. When in doubt,  

have the meter serviced. 

d.


Do not operate the meter around explosive gas, vapor or dust. 

e.


Do not apply more than the rated voltage, as marked on the meter, between terminals or 

between any terminal and earth ground. 

f.


Before use, verify the meter’s operation by measuring a known voltage. 

g.


When measuring current, turn off circuit power before connecting the meter to the circuit. 

Remember to place the meter in series with the circuit. 

h.


When servicing the meter, use only specified replacement parts. 

i.


Use caution when working above 30V ac rms, 42V peak, or 60V dc. Such voltages pose a shock 

hazard. 

j.


When using the probes, keep your fingers behind the finger guards. Never use hand or skin to 

touch the probes and any live conductor. 

k.


When making connections, connect the test lead before you connect the test probe. When you 

disconnect them, disconnect the test probe first. 

Содержание AX-201

Страница 1: ...Pen probe style autorange digital multimeter AX 201 Owners manual...

Страница 2: ...n b Inspect the test lead for damage insulation or exposed metal Check the test lead and test probe for continuity Replace damage test lead before you use the meter c Do not use the meter if it operat...

Страница 3: ...within Measurement Categories III and IV Caution To avoid possible damage to the meter or to the equipment under test follow these guidelines Disconnect circuit power and discharge all capacitors bef...

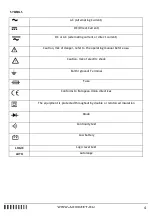
Страница 4: ...tion risk of danger refer to the operating manual before use Caution risk of electric shock Earth ground Terminal Fuse Conforms to European Union directives The equipment is protected throughout by do...

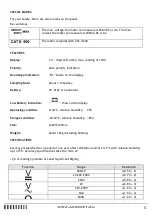
Страница 5: ...Rate About 3 times sec Battery 9V 6F22 or equivalent Low Battery Indication show on the display Operating condition 0 40 C relative humidity 75 Storage condition 20 60 C relative humidity 85 Size 230...

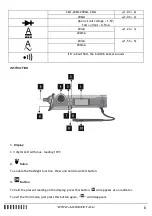
Страница 6: ...the built0in buzzer sounds INSTRUCTION 1 Display 3 digits LCD with max reading 1999 2 Buton To enable the flashlight function Press and hold down this button 3 Button To hold the present reading on t...

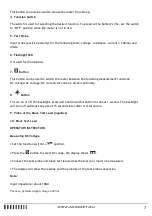
Страница 7: ...tions DC voltage AC voltage DC current AC current diode continuity 8 Button To turn on or off the backlight press and hold down this button for about 1 second The backlight will turn off automatically...

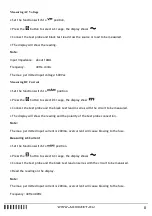
Страница 8: ...he display show Connect the test probe and the black test lead in series with the circuit to be measured The display will show the reading and the polarity of the test probe connection Note The max pe...

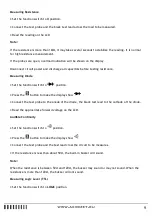
Страница 9: ...he function switch to position Press the button to make the display show Connect the test probe to the anode of the diode the black test lead to the cathode of the diode Read the approximate forward v...

Страница 10: ...ess the button BATTERY REPLACEMENT When the symbol appears on the display it indicates that the battery is low To replace the battery remove the screw from the battery cover replace the exhausted batt...

Страница 11: ...Manual 1 piece DISPOSAL OF THIS ARTICLE Dear Customer If you at some point intend to dispose of this article then please keep in mind that many of its components consist of valuable materials which c...

Отзывы: