background image

2016-06-30 | © AXING AG Schweiz | Technische Änderungen, Änderungen im Design, Druckfehler und Irrtümer vorbehalten.

19

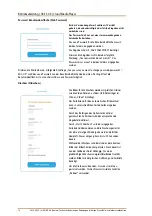
Zeiteinstellungen (Time settings)

In diesem Bereich wird die Zeitzone ausgewählt und es
werden die Datum- und Uhrzeit-Einstellungen des
Gerätes vorgenommen.
Die Auswahl der GMT-Zeitzone erfolgt aus den
Einträgen der Auswahlliste. Mit „CHANGE TIME ZONE“
werden die Änderungen vom Gerät übernommen.
Wenn eine Internetverbindung verfügbar ist, werden die
Zeiteinstellungen des Gerätes automatisch mit dem
Zeitserver synchronisiert. Die Aktualisierung der GMT-
Zeit kann bis zu 10 min dauern.
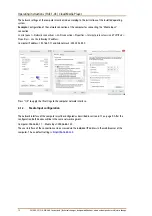
Die Eingabefelder für Datum und Uhrzeit zeigen die
Geräte-Einstellungen beim Laden der Webseite an. Die
aktuellen Werte werden durch das aktualisieren des
Fensters im Browser abgerufen (F5-Taste).
Wenn der Zeitserver nicht verfügbar ist, können die
Datum- und Uhrzeiteinstellungen manuell vorgenommen
werden.
Alternativ können mit „Copy Computer Time“ die
Datum- und Uhrzeiteinstellungen des Computers in die
Eingabefelder kopiert werden.  Mit „SET DATE & TIME“
werden die Änderungen übernommen.

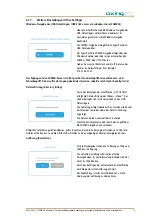
Netzwerkeinstellungen (Network settings)

Bei der Verwendung dieser Funktion ist Vorsicht
geboten, da unbeabsichtigte oder falsche Eingaben
nicht umkehrbar sind.

In diesem Bereich werden die Netzwerkeinstellungen für
den „Media Input“-Anschluss festgelegt.
Die vorgenommenen Änderungen an der IP-Adresse,
Netzwerkmaske sowie Gateway-Adresse werden durch
das Betätigen der Schaltfläche „SAVE CHANGES“
übernommen. Der Vorgang kann bis zu 30 Sekunden
dauern.
Das Gerät ist über die neue IP-Adresse erreichbar.

Содержание HoE 1-03

Страница 1: ...HoE 1 03 Cloud Media Player Betriebsanleitung ...

Страница 2: ...atzszenarien 6 3 1 1 FTP Dienste über das Internet 6 4 Montage 7 5 Installation 8 6 Konfiguration 9 6 1 1 Netzwerkeinstellungen 9 6 1 2 Konfiguration Media Input 10 6 1 3 Konfiguration Media Output 10 6 1 4 Konfiguration HoE 1 01 Empfänger 11 6 1 5 Weboberfläche 12 6 1 6 FTP Einstellungen FTP Settings 12 6 1 7 Weitere Einstellungen Other Settings 15 6 1 8 Wartung Maintenance 17 7 Fehlerbehebung 20...

Страница 3: ...so dass Sie in Gefahrensituationen den Netzstecker leicht erreichen und den Stromkreis unterbrechen können Wählen Sie den Montage bzw Aufstellort so dass Kinder nicht unbeaufsichtigt am Gerät und dessen Anschlüssen spielen können Der Montage bzw Aufstellort muss eine sichere Verlegung aller angeschlossenen Kabel ermöglichen Stromversorgungskabel sowie Zuführungskabel dürfen nicht durch irgendwelch...

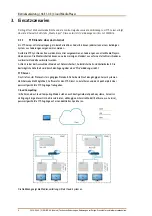
Страница 4: ...m PC beschreiben lässt Durch den Samba Server Windows Freigabe wird der Zugriff auf den USB Datenträger im Netzwerk ermöglicht Nach Aktivierung der FTP Synchronisation werden die auf einem FTP Server hinterlegten Daten mit den Daten auf dem USB Datenträger abgeglichen Die Synchronisation kann mit einen mit dem Internet z B Cloud oder mit einen lokal verbundenen Server erfolgen Eine zentralisierte ...

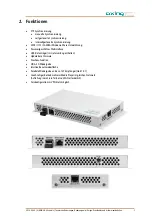
Страница 5: ...Synchronisierung SMB CIFS SAMBA Windows Share Unterstützung Passwortgeschützes Webinterface USB Datenträger im Lieferumfang enthalten Updatebare Firmware Diashow Funktion HD SD Wiedergabe Intuitive Benutzeroberfläche Parallele Wiedergabe an bis zu 127 Empfänger HoE 1 01 Gleichzeitiger Betrieb mehrerer Media Player im gleichen Netzwerk Aufteilung in mehrere Teilnetze VLAN erforderlich Fernkonfigura...

Страница 6: ...te können von einem einzigen Standort aus auf eine Vielzahl verschiedener weltweiter Standorte verbreitet werden Achten Sie bei der Auswahl des Models auf Datensicherheit Ausfallsicherheit und Skalierbarkeit Die bestmögliche Sicherheit wird durch den Zugang über eine VPN Verbindung erreicht FTP Server Das File Transfer Protocol ist ein gängiges Protokoll Daher besteht auf den gängigen Server Syste...

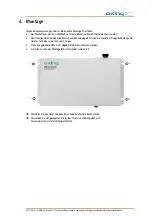
Страница 7: ... montiert werden Damit die im Gerät entstehende Wärme ausreichend abgeführt wird müssen die Lüftungslöcher längs des Gerätes nach oben und nach unten zeigen Die Lüftungslöcher dürfen nicht abgedeckt oder verschlossen werden Es dürfen nur die vier Montagelöcher verwendet werden 1 Montieren Sie das Gerät wie oben beschrieben auf einer ebenen Fläche Verwenden Sie vier geeigneten Schrauben für die vie...

Страница 8: ...t das Begrüßungsvideo zu sehen Sofern bereits eine andere Video Datei auf dem USB Datenträger hinterlegt wurde beginnt der Cloud Media Player mit der Wiedergabe Aufbau in Netzwerken mit einem Switch Wird der Media Input Anschluss über den gleichen Netzwerkswitch wie der Media Output Anschluss und die HoE 1 01 Empfänger betrieben empfehlen wir die Nutzung eines mangebaren Netzwerkswitches für die A...

Страница 9: ...on des installierten Webbrowsers benötigt Die Anbindung der Netzwerkschnittstelle des Gerätes erfolgt über ein handelsübliches Netzwerkkabel z B Axing LAK 200 01 Die Kommunikation erfolgt via HTTP Protokoll was eine weltweite Fernwartung der Anlagen über das Internet an unterschiedlichen Standorten ermöglicht Der Zugriffsschutz wird mittels Passwortabfrage realisiert Der Cloud Media Player verfügt...

Страница 10: ...t werden Nach der Konfiguration befinden sich beide Geräte im gleichen Netzwerksegment Computer 192 168 0 11 Media Input 192 168 0 130 Die Benutzeroberfläche des Anschlusses ist über die eigene IP Adresse im Webbrowser des Computers erreichbar Die Einstellung ab Werk lautet http 192 168 0 130 6 1 3 Konfiguration Media Output Die Netzwerkschnittstelle des Computers muss laut Abschnitt 6 1 1 auf Sei...

Страница 11: ...ichen Netzwerksegment Computer 192 168 168 11 Media Output 192 168 168 56 Die Benutzeroberfläche des Anschlusses ist über die eigene IP Adresse im Webbrowser des Computers erreichbar Die Einstellung ab Werk lautet http 192 168 168 56 In Menüpunkt System werden die Netzwerkeinstellungen für den Empfänger festgelegt Die vorgenommenen Änderungen an der IP Adresse Netzwerkmaske sowie MAC Adresse werde...

Страница 12: ...nträgers befinden Dieser muss bei Bedarf neu erstellt werden Der Ordnername muss hinsichtlich der Groß und Kleinschreibung exakt eingegeben werden Die Dateinamen dürfen keine Leerzeichen enthalten Befinden sich keine Dateien auf den USB Datenträger bootet das Gerät alle 10 Minuten neu Auf den Monitoren erscheint nach dem Start ein Informationsvideo mit dem Hinweis AXING AG Gewerbehaus Moskau Telef...

Страница 13: ...ame des Ordners der synchronisiert werden soll eingegeben Mit SAVE ADDRESS werden die Änderungen übernommen FTP Zugangsdaten FTP account credentials Die FTP Zugangsdaten müssen eingegeben werden Bitte beachten Sie Groß und Kleinschreibung Wenn auf dem FTP Server Anonymous FTP aktiviert ist können sich die Benutzer mit dem Benutzernamen anonymous und einem beliebigen Passwort anmelden Mit SAVE USER...

Страница 14: ...rval wird das Untermenü aufgerufen Alternativ kann die Uhrzeit für Synchronisation Untermenü FTP SYNC TIME eingegeben werden Durch Set single sync time wird das Untermenü aufgerufen Unabhängig von den vorgenommenen Einstellungen kann die Synchronisation über START SYNCHRONIZATION manuell gestartet werden Mit CHECK SYNCHRONIZATION wird abgefragt ob derzeitig eine Synchronisation sync in progress st...

Страница 15: ... mehr benötigt wird Dateiauflistung Directory listing Durch das Betätigen der Schaltfläche GET LISTING erfolgt die Dateiauflistung des Ordners Video Der Ordner befindet sich im Hauptverzeichnis des USB Datenträgers Die Auflistung erfolgt tabellarisch Es werden Größe und Zeit Stempel sowie der Name der Datei mit Endung angezeigt Die Dateien werden eventuell durch laufende Synchronisationsprozesse o...

Страница 16: ...mmen Der Zugriff auf die Benutzeroberfläche ist nur noch durch das neue Passwort möglich Diashow Slideshow Die Bilder für die Diashow werden im gleichen Ordner wie die Video Dateien auf dem USB Datenträger im Ordner Video hinterlegt Der Zeitabstand für den automatischen Bildwechsel kann in unterschiedlichen Zeiteinheiten eingeben werden Durch das Betätigen des Optionsfelds mit der gewünschten Zeit...

Страница 17: ... prozentuale Belegung des angeschlossenen USB Datenträgers angezeigt Die Temperatur darf 85 C nicht überschreiten und vermeiden Sie nach Möglichkeit Temperaturen über 60 C Sofern das Gerät im oberen Temperatur Bereich betrieben wird muss die Temperatur in regelmäßigen Abständen überprüft werden Software Update Um die Software des Gerätes zu aktualisieren müssen Sie eine entsprechende Datei softa z...

Страница 18: ... Konfigurationsdatei export bin auszuwählen Durch das Betätigen der Schaltfläche Restore werden die Einstellungen aus der ausgewählten Datei übernommen Der Media Player startet anschließend neu und ist nur noch über die IP Adresse aus der Konfigurationsdatei erreichbar Die Einstellungen lassen sich mit Hilfe der gleichen Konfigurationsdatei auf weitere Geräte kopieren Sofern die Geräte im gleichen...

Страница 19: ...eite an Die aktuellen Werte werden durch das aktualisieren des Fensters im Browser abgerufen F5 Taste Wenn der Zeitserver nicht verfügbar ist können die Datum und Uhrzeiteinstellungen manuell vorgenommen werden Alternativ können mit Copy Computer Time die Datum und Uhrzeiteinstellungen des Computers in die Eingabefelder kopiert werden Mit SET DATE TIME werden die Änderungen übernommen Netzwerkeins...

Страница 20: ... Videoformat Ihre Videodateien besitzen Beachten Sie dass nur die in der Tabelle Unterstützte Formate angegebenen Formate unterstützt werden Kein Zugriff auf die Benutzeroberfläche Nutzen Sie zu Testzwecken einen alternativen Browser Prüfen Sie die Netzwerkverbindung PING Das Benutzeroberfläche ist passwortgeschützt Geben Sie als Nutzernamen admin und als Passwort ax8262 ein Sie können das Passwor...

Страница 21: ...t und gestartet werden Dieser Modus ist bis zum Neustart des HoE 1 03 aktiv Mehrere Video Streams im Netzwerk funktionieren nicht Soll über ein Netzwerk mehrere HDMI Quellen an verschiedene Empfängernetze verteilt werden so muss der Ethernet Management Switch so konfiguriert werden dass Sender und Empfänger von einer Quelle jeweils in einem eigenen abgeschlossenen VLAN Netz arbeitet Es ist kein Zu...

Страница 22: ...P Media Input Port 192 168 0 130 Default IP Media Output Port 192 168 168 55 Default Credentials User admin Password ax8262 FTP Einstellungen Anonymous FTP with credentials Dateizugriff Windows Share SMB CIFS w o credentials falls aktiviert Integrierter Speicher 8 GB USB 2 0 Konfigurationsoberfläche HTML PHP w CSS Unterstützte Dateisysteme FAT16 FAT32 Video Ausgang HDMI HDCP 1 3 Ethernet 2x RJ45 1...

Страница 23: ...2016 06 30 AXING AG Schweiz Technische Änderungen Änderungen im Design Druckfehler und Irrtümer vorbehalten 23 ...

Страница 24: ...Betriebsanleitung HoE 1 03 Cloud Media Player 24 2016 06 30 AXING AG Schweiz Technische Änderungen Änderungen im Design Druckfehler und Irrtümer vorbehalten ...

Страница 25: ...HoE 1 03 Cloud Media Player Operating instructions ...

Страница 26: ...iption 4 2 Functions 5 3 Application scenarios 6 3 1 1 FTP services via the Internet 6 4 Mounting 7 5 Installation 8 6 Configuration 9 6 1 1 Network settings 9 6 1 2 Media Input configuration 10 6 1 3 Media Output configuration 11 6 1 4 HoE 1 01 receiver configuration 11 6 1 5 Web interface 12 6 1 6 FTP settings 12 6 1 7 Other settings 15 6 1 8 Maintenance 17 7 Troubleshooting 20 8 Technical data ...

Страница 27: ...nting or installation location such that you can easily reach the mains plug and interrupt the electric circuit in dangerous situations Select the mounting or installation location such that children cannot play near the device and its connections without supervision The mounting or installation location must allow a safe installation of all connected cables Power supply cables and supply cables m...

Страница 28: ...vices e g a PC can also write on the stick The Samba server Windows share enables access to the USB stick in the network After the activation of the FTP synchronization the data stored on the FTP server is synchronized with the data on the USB stick The synchronization can be carried out with a server connected to the Internet e g cloud or to a local network A centralized management and automatic ...

Страница 29: ... synchronization SMB CIFS SAMBA Windows share support Password protected web interface USB stick included in the scope of delivery Updateable firmware Slideshow function HD SD playback Intuitive user interface Simultaneous playback on up to 127 receivers HoE 1 01 Simultaneous operation of several Media Players in the same network Division into several subnetworks VLAN required Remote configuration...

Страница 30: ...l Media Players Media contents can be distributed from a single location to a great number of various locations worldwide When selecting the model consider data safety system stability and scalability The best possible safety is achieved by access via a VPN connection FTP server The File Transfer Protocol is a common protocol Therefore software for the FTP service can be usually installed on the c...

Страница 31: ...nly on a flat vertical surface To ensure that the heat produced in the device is sufficiently dissipated the ventilation holes along the device must point upward and downward The ventilation holes must not be covered or sealed Only the four mounting holes must be used 1 Mount the device on a flat surface as described above Use four suitable screws for the four mounting holes 1 They are not include...

Страница 32: ...itor connected to the HoE 1 01 receiver displays the welcome video If a different video file has been stored on the USB stick the Cloud Media Player will begin to play it Installation in networks with a switch If the Media Input connection is operated via the same network switch as the Media Output connection and the HoE 1 01 receivers we recommend the use of a manageable network switch to separat...

Страница 33: ...r is required The network interface of the device is connected via a commercially available network cable e g Axing LAK 200 01 The HTTP protocol is used for communication allowing a worldwide remote maintenance of the systems at various locations via the Internet Access protection is implemented by means of the password prompt The Cloud Media Player has two separate units with a user interface of ...

Страница 34: ...ion Properties Internet protocol version 4 TCP IPv4 Properties Use the following IP address Computer IP address 192 168 0 11 and Subnet mask 255 255 255 0 Press OK to apply the IP settings to the computer network interface 6 1 2 Media Input configuration The network interface of the computer must be configured as described in section 6 1 1 on page 9 After the configuration both devices will be in ...

Страница 35: ...ia Output connection are defined To apply changes to the IP address netmask and MAC address press the Apply button The device can be accessed via the new IP address 6 1 4 HoE 1 01 receiver configuration The network interface of the computer must be configured as described in section 6 1 1 on page 9 After the configuration both devices will be in the same network segment Computer 192 168 168 11 Med...

Страница 36: ...n directory of the USB stick It must be re created if required The folder name must be entered exactly regarding the upper and lower case The file names must not contain spaces If there are no files on the USB stick the device will reboot every 10 minutes After the start the monitors display an information video with the note AXING AG Gewerbehaus Moskau Telefon 41 52 742 83 00 Telefax 41 52 742 83...

Страница 37: ...and the name of the folder to be synchronized are entered in the input window Press SAVE ADDRESS to apply the changes FTP account credentials The FTP account credentials must be entered Please pay attention to lower case and upper case If Anonymous FTP on the FTP server is enabled the users can log on with the user name anonymous and any password Press SAVE USERNAME PASSWORD to apply the changes ...

Страница 38: ...u To call the submenu press Set custom interval Alternatively the time for synchronization can be entered in the FTP SYNC TIME submenu To call the submenu press Set single sync time Regardless of the defined settings the synchronization can be manually started by pressing the START SYNCHRONIZATION button Press CHECK SYNCHRONIZATION to check whether a synchronization is carried out at the moment sy...

Страница 39: ...st be disabled as soon as it is no longer required Directory listing Press the GET LISTING button to display the file listing of the Video folder The folder is located in the main directory of the USB stick The files are listed in tabular form The size the time stamp and the file name with the file extension are displayed The files may still be changed by the running synchronization processes or b...

Страница 40: ...ly the new password to the user interface The user interface can be accessed only by entering the new password Slideshow The images for the slideshow are stored in the same folder as the video files i e on the USB stick in the Video folder The time interval for the automatic image change can be entered in various time units Select the radio button with the desired time unit to enable the correspon...

Страница 41: ... the percentage of the space used on the connected USB stick are displayed The temperature must not exceed 85 C and the temperatures above 60 C must be avoided if possible If the device is operated in the upper temperature range the temperature must be checked at regular intervals Software update To update the software of the device select the corresponding file softa zip on a data carrier using t...

Страница 42: ...ress the Browse button to select the export bin configuration file Press the Restore button to apply settings from the selected file The Media Player will reboot and it will be accessible only via the IP address from the configuration file Use the same configuration file to copy the settings to other devices If the devices are operated in the same network the IP addresses must be changed This prev...

Страница 43: ...and time show the device settings at the moment when the web page was loaded To call the current values update the window in the browser F5 key If the time server is not available the date and time settings can be made manually Alternatively the Copy Computer Time button can be used to copy the date and time settings of the computer into the input fields Press SET DATE TIME to apply the changes Ne...

Страница 44: ...ported No access to the user interface For testing purposes use an alternative browser Check the network connection PING The user interface is password protected Enter admin as user name and ax8262 as password You can change the password later by yourself The device restarts automatically again and again Please check whether video files are available and whether the data of the FTP server in the w...

Страница 45: ...not function If several HDMI sources need to be distributed to different receiving networks then the Ethernet Management switch must be configured in such a way that the transmitter and receiver of one source work in a separate closed VLAN network respectively It is impossible to access any of the IP addresses Please contact our service for a factory reset ...

Страница 46: ...ult IP media input port 192 168 0 130 Default IP media input port 192 168 168 55 Default credentials User admin Password ax8262 FTP Settings Anonymous FTP with credentials File access Windows share SMB CIFS w o credentials if enabled Integrated memory 8 GB USB 2 0 Configuration interface HTML PHP w CSS Supported file systems FAT16 FAT32 Video output HDMI IN 11 3 Ethernet 2x RJ45 10 100 BaseTX half...

Страница 47: ...2016 06 30 AXING AG Switzerland Technical changes design modifications errors and misprints are subject to change 23 ...

Страница 48: ...Operating instructions HoE 1 03 Cloud Media Player 24 2016 06 30 AXING AG Switzerland Technical changes design modifications errors and misprints are subject to change ...

Отзывы: