background image

FM radio

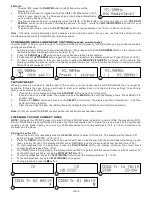
1.       To select FM, press the 

DAB/FM

 button, the FM frequency will be 

displayed. (F. 8)

2.

To activate auto search, press and hold the 

I

◀◀

 or 

▶▶

I

 buttons until it 

starts to scan down or up the frequency band, it will stop automatically 
once a station has been found.  

3.

To  activate  manual  search,  repeatedly  press  the

  I

◀ ◀

  or 

▶ ▶

I

  button;  Or  you  can  press  on  the 

VOL/SKIP/ 

SCROLL

  control  once  and  when  the  display  shows  “<Tuning>”,  rotate  the 

VOL/SKIP/SCROLL

  control  for  your 

desired frequency.

4.       To select audio mode, press the 

PLAY/PAUSE

 button to toggle between the “Auto” or “Mono” selection.

Note:

   The  radio  will  automatically  switch  between  stereo  and  mono  mode,  but  you  can  override  this  and  switch  this 

function manually which is helpful for poor signal reception.


STORING AND RECALLING PRESET STATIONS (remote control only)

In either DAB or FM, you can store up to 10 stations to the favourite presets; this will enable you to get direct access to 
your favourite stations.
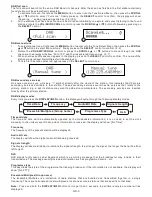
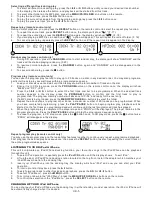
1.     To store a preset, first tune to your desired station, then press and hold the 

PROGRAM

 button on the remote until 

the display shows the preset number and flash. (F. 9)

2.

Press the 

SCROLL 


or


 button to select your desired station preset number.

3.

Finally press the 

PROGRAM 

button again to confirm your selection, the display will show “Preset # stored”. (F.10)

4.

To  recall  a  preset  station  that  you  have  stored,  press  the 

MENU/PS/FOLDER  +/-

  buttons  on  the  remote,  the 

display will show the preset number and the associated information. It would tune to the station in one second after 
the buttons are released. (F.11)

FACTORY RESET

When you move the system to another part of the country, your pre-tuned and stored DAB stations may no longer be 
available.  If  this  is  the  case  then  you  will  need  to  reset  your  system  back  to  its  original  factory  settings;  to  perform  a 
factory reset, please do the following:
1. 

Connect the unit to mains and press the

 STANDBY

 button once to turn the unit on.

2.

Ensure the unit is in DAB mode, then press and hold the 

MENU

 button until the display shows “Press SELECT to 

confirm reset”.

3.

Release the 

MENU

 button and press on the 

SELECT 

control once, the display will show “Restarting…” and then 

perform full scan function.

4.

After the scan has finished, the radio will select and display the first alphanumerically found station. 

Note:

  All of your stored DAB & FM presets will be lost once the reset has taken place.


LISTENING TO YOUR COMPACT DISCS

NOTE :

 Although this CD/MP3 player can read CD-R and CD-RW discs in addition to normal CDs, the playability of CD-

R and CD-RW discs may be affected by the type of software that was used to create the discs, as well as the quality and 
condition  of  the  blank  media  you  are  using,  100%  playability  cannot  be  guaranteed.  This  is  not  an  indication  of  a 
problem with the player.

Playing the entire CD

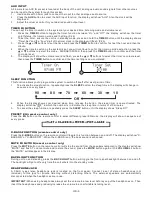
1.      When the unit is ON, repeatedly press the 

iPod/CD

 button to select CD function. The display will first show “CD” 

and then finally “NO DISC”. (F.12) (F.13) 

2.

Press the 

OPEN

 button on the top panel to open the CD door, load the disc with the printed label side facing up and 

then close the CD door. The display will first show “READING” and then the total track number and time. (F.14)

3.

To  start  playback  from  the  beginning,  press  the 

PLAY/PAUSE


button,  the  display  will  show  the  current  track 

number and the elapsed time. (F.15)

4.

If a CD/MP3 disc is being played, the display will show “MP3” together with the current folder and track number. To 
see the ID3 tag if available, press the 

DISPLAY/INFO

 button.   

5.

To interrupt playback, press the 

PLAY/PAUSE

 button once, the display will show “ 

II 

”. (F.16) 

6.

To resume playback, press the 

PLAY/PAUSE

 button again.

7.

To stop playback, press the 

 button.


UK-4

F8

F11

F10

F9

F12

F13

F14

F15

F16

Содержание NE-3277

Страница 1: ...User Manual NE 3277 Integrated DAB DAB FM CD MP3 Micro System w Universal iPod iPhone Docking Station NE 3277 Integrated DAB DAB FM CD MP3 Micro System w Universal iPod iPhone Docking Station ...

Страница 2: ... contact the help line before you return this product back to the place of purchase Contact our Toll Free Warranty Support Help Line 1300 366 144 Email warrantyhelp awa com au Visit our web site for FAQ s or request for service www awa com au ...

Страница 3: ...efer all servicing to qualified service personnel TO REDUCE THE RISK OF ELECTRIC SHOCK DO NOT REMOVE COVER OR BACK NO USER SERVICEABLE PARTS INSIDE REFER SERVICING TO QUALIFIED SERVICE PERSONNEL Conductor dangerous voltage that may be of sufficient magnitude to constitute a risk of electric shock to persons is present within this product s enclosure The owner s manual contains important operating ...

Страница 4: ...nchronise to the current local time you must leave it one DAB station for a short period Manual clock setting is not PUTTING THE BATTERY INTO THE REMOTE CONTROL UNIT UK 2 11 AUX BUTTON 12 SCROLL BUTTON 13 PLAY PAUSE BUTTON 14 MENU PS FOLDER BUTTON 15 STOP MENU BUTTON 16 RANDOM BUTTON 17 BACKLIGHT BUTTON 18 DISPLAY INFO BUTTON 19 EQ BUTTON 20 VOLUME BUTTON I FEATURES AND CONTROLS 1 2 Place the batt...

Страница 5: ...ary services contain extra services that relate to the primary station E g a sports station may want to add extra commentaries The secondary services are inserted directly after the primary station DAB display modes Every time you press the DISPLAY INFO button the display will cycle through the following display modes Time and date The time and date will be automatically updated by the broadcasted...

Страница 6: ...m back to its original factory settings to perform a factory reset please do the following 1 Connect the unit to mains and press the STANDBY button once to turn the unit on 2 Ensure the unit is in DAB mode then press and hold the MENU button until the display shows Press SELECT to confirm reset 3 Release the MENU button and press on the SELECT control once the display will show Restarting and then...

Страница 7: ...s programmed The program memory number will advance to P 02 and ready for the next entry 4 If a MP3 disc is being loaded press the MENU PS FOLDER buttons to select the folder 5 Repeat the above steps to program other tracks a maximum number of 20 tracks can be programmed When you have completed programming press the PLAY PAUSE button to begin program play playback will be started on the first trac...

Страница 8: ...y press the SLEEP button the sleep time in the display will change in sequence on every press 2 When the display shows your desired sleep time release the button the sleep timer is now activated The display will show in which the number is to indicate the sleep time in terms of x10 minutes 3 To cancel the sleep function repeatedly press the SLEEP button until the display shows Sleep Off PRESET EQ ...

Страница 9: ...OF TRACKS ALBUM 999 AUX INPUT INPUT VOLTAGE RANGE 350 500mV IMPEDANCE 47KΩ 1 Always use compact discs bearing the mark as shown 2 Notes on handling discs Removing the disc from its storage case Do not touch the reflective recorded surface Do not stick paper or write anything on the surface Do not bend the disc 3 Storage Store the disc in its case Do not expose discs to direct sunlight or high temp...

Страница 10: ...e in respect of service outside the authorised AWA Service Centre nor pick up and delivery cost incurred Service calls arising from failure to correctly operate the product or to observe noted instructions or repair which reveals the product is in normal working order Cabinet parts user replacement batteries or leads unless the defective items are reported at the time of purchase C Service calls o...

Отзывы: