background image

Notes:

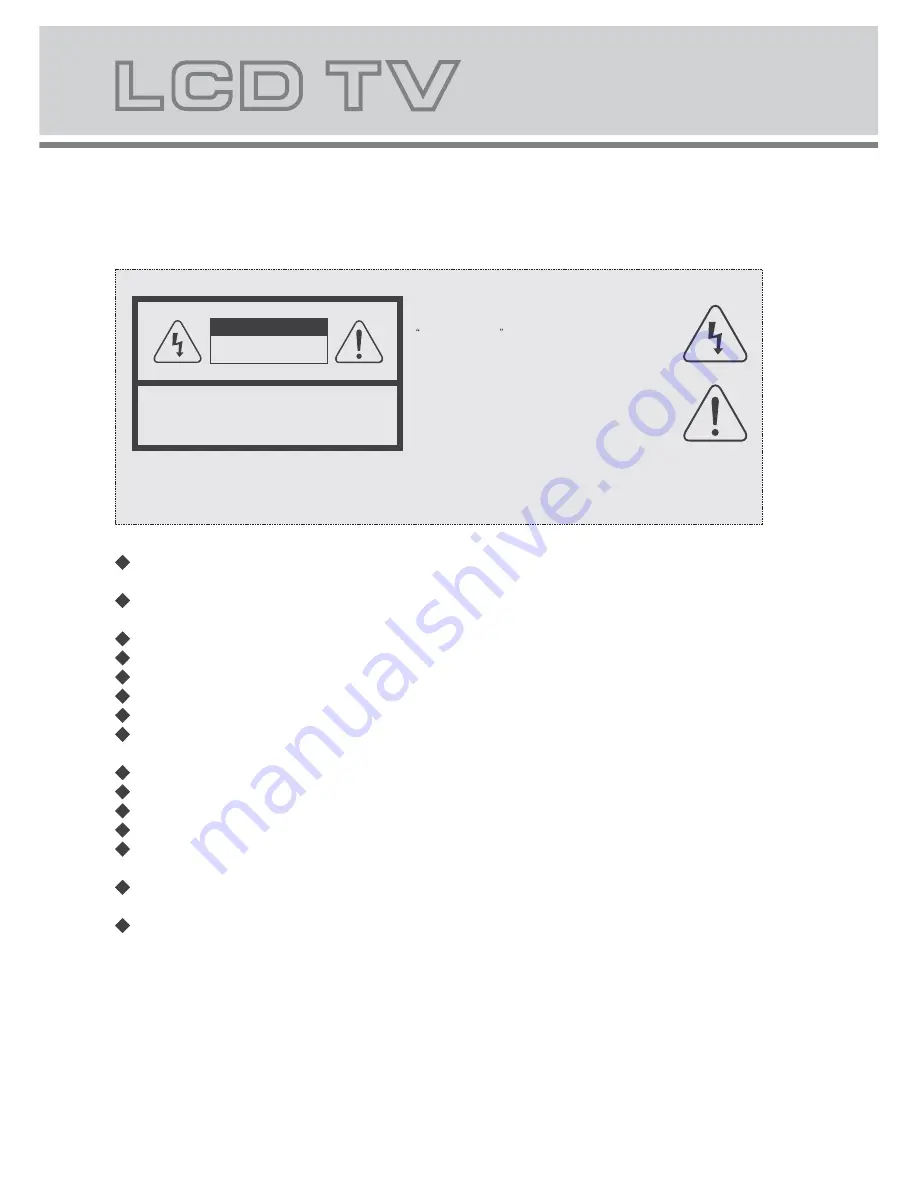
The lightning flash with arrowhead symbol, within an equilateral

triangle, is intended to alert the user to the presence of insinuated

dangerous voltage

within the product's  enclosure that may be

of sufficient magnitude to constitute a risk of electric shock

WARNING:

TO REDUCE THE RISK OF FIRE OR ELECTRIC SHOCK, DO NOT EXPOSE THIS PRODUCT TO RAIN

OR MOISTURE.

The exclamation point within an equilateral triangles is intended

to alert the user to the presence of important operating and

maintenance  (servicing)  instructions in the literature

accompanying the product.

CAUTION:

TO REDUCE THE RISK OF ELECTRIC SHOCK, DO NOT

REMOVE COVER(OR BACK). REFER SERVICING TO

AUTHORISED SERVICE PERSONNEL.

WARNING

RISK OF ELECTRIC SHOCK

DO NOT OPEN

 Always power this product from an outlet with the same rating (voltage and

frequency) as indicated on the rating label on the back of the product.

 If this product has been damaged (including cord or plug) take it to an authorised

o u r service technician for inspection, and if necessary, repair.

 Turn off and disconnect the power cable before cleaning or storing this product.
 Ensure this product does not get wet.

Do not place naked flames, such as lit candles on or near the product.
Do not place objects filled with liquids, such as vases on or near the product.
Do not install this product on top of other electrical equipment or on uneven surfaces.
Do not use or store this product in a place where it is subject to direct sunlight, heat,

excessive dust or vibration.

Do not use this product with wet hands.
Do not clean this product with water or other liquids.
Do not block or cover the slots and holes in the product.
Do not push foreign objects into the slots or holes in the product.
The screen surface is easily scratched. Do not touch the screen with your hands or

any hard object.

Do not pull the power cord when disconnecting power. Turn off at the switch on the

socket and pull the plug not the cord.

Do not attempt to open this product yourself. There are no user serviceable parts
inside.

1

1.Safety precaution

The display panel is a very sensitive and high technology product, giving you finely
detailed pictures. Occasionally, a few non-active pixels may appear on the screen as
a fixed point of black, blue, green or red. Please note that this does not affect the 
performance of your product. These pixels shall not be regarded as a failure.

Содержание LC-16G78

Страница 1: ...USER MANUAL ...

Страница 2: ... contact the help line before you return this product back to the place of purchase Contact our Toll Free Warranty Support Help Line 1300 366 144 Email warrantyhelp awa com au Visit our web site for FAQ s or request for service www awa com au ...

Страница 3: ...Contents Safety precaution Main accessories Remote control Remote control functions LCD TV panel overview Connecting to external devices The OSD menus Specifications 1 2 3 4 5 7 8 15 ...

Страница 4: ...r storing this product Ensure this product does not get wet Do not place naked flames such as lit candles on or near the product Do not place objects filled with liquids such as vases on or near the product Do not install this product on top of other electrical equipment or on uneven surfaces Do not use or store this product in a place where it is subject to direct sunlight heat excessive dust or ...

Страница 5: ...ed by using this product in an unstable position or by failure to follow any other warning or p recaution contained within this user manual will void warranty This product is not intended for use by young children Young children should be properly supervised SAFETY WARNINGS 2 Accessories Check the accessories TV accessories User manual Remote control batteries AV cable connection 2 0 1 2 3 4 5 6 7...

Страница 6: ...REVEAL SUBPAGE SIZE SUBTITLE AUTO X TTX CANCEL INDEX Power button Picture mode button Sound mode button function button Sleep button Numeric button Channel list Return channel button Signal source selection button Main menu Up LEFT ENTER Right Down Information button Exit the OSD menu button Volume adjusting button Channel selection button Mute button Aspect button EPG button If there is light aro...

Страница 7: ...play the index for all the teletext page FAST TEXT For possible future reference The RED GREEN YELLOW CYAN buttons are used for quick access to color coded pages transmitted by FAST TEXT broadcast Example RED selects CITY INFORMATION CYAN selects TRAVEL INFORMATION GREEN selects WEATHER INFORMATION YELLOW selects TV PROGRAMMING POWER Power on off button press once to turn the TV on and press again...

Страница 8: ...5 5 LCD TV panel overview TV Control Panel 1 2 3 3 4 5 1 On off button 2 Selecting exterior signal input 3 Main menu display 4 Channel selecting 5 Volume adjusting 6 AC power switch 6 ...

Страница 9: ...t 3 VGA input 4 Component input terminal 5 S VIDEO input 6 AV input 7 PC audio input 8 Headphone output 9 Antenna input 75 Ohm VHF UHF 10 Coaxial audio signal out plug HDMI VGA Y PB PR S VIDEO VIDEO R L PC AUDIO RF 75 COAXIAL SERVICE 1 2 3 4 5 6 7 8 9 10 ...

Страница 10: ... devices Connecting external devices to your LCD TV The rear of TV Y PB PR AV DVD HDMI S Video Digital Audio System Coaxial Cable Power Amplifier HDMI VGA Y PB PR S VIDEO VIDEO R L PC AUDIO RF 75 COAXIAL SERVICE VCR Digital Audio Input OPTICAL COAXIAL AUDIO OUTPUT AUDIO ...

Страница 11: ... Setup Please select your region Region NSW ACT VIC QLD SA WA TAS NT Back Select Next EXIT Exit Initial Setup Please select your Language Language English Espanol Francais Deutsch Italian Back Select Next EXIT Exit Initial Setup Back Select Next EXIT Exit Channel Scan First please connect antenna Start channel scan now Ify ous kip thiss tep th ec hannel scanc ould bep erformedi nM enu Scan Skip Sc...

Страница 12: ...our Changes the value of colour with the key in the range of 0 to 100 Sharpness Changes the value of sharpness with the key in the rangeof 0 to 7 Colour Temperature Changes the colour temperature in sequence as Standard Warm User Cool also R Gain G Gain B Gain included in each item DNR Changes the DNR in sequence as Strong Auto Off Low Medium Video Picture Mode Brightness Contrast Colour Sharpness...

Страница 13: ...e as Standard Concert Living Room Hall Bathroom Cave Arena Church Balance Changes the value of Balance with the key in the range of 50 to 50 Bass Changes the value of Bass with the key in the range of 0 to 100 Treble Changes the value of Treble with the key in the range of 0 to 100 Auto Volume control Changes the auto volume control Mode is ON or OFF Audio OK Adjust Select EXIT Exit Balance Bass T...

Страница 14: ...range of channels From Channel 6 69 To Channel 0 Digital Channel Range Scan Digital Manual Scan Analog Manual Scan Manual Scan OK Enter Select EXIT Exit Manual Scan Press OK to enter Manual Scan Select one of the following options Digital Channel Range Scan Digital Manual Scan Analog Manual Scan Digital Channel Range Scan Press OK to enter Digital Channel Range Scan Digital Manual Scan Press OK to...

Страница 15: ...D Tiransparency Long Middle Select EXIT Exit Time Setup Time Zone As Broadcaster Time Off Sleep Timer Select EXIT Exit Time Auto Synchronization 2000 01 01 16 51 46 On Date Time Time Setup Press key to this position Then press key to enter Time Setup Other menu options include Time Zone Time Sleep Timer Time Zone As Broadcaster GMT 0 00 GMT 1 00 GMT 2 00 GMT 3 00 Time Auto Synchronization Date Tim...

Страница 16: ...ress key to enter Default Password is 0000 OK Enter Select EXIT Exit Password Parental This menu is used to set the block function Password The initial password is 0000 Exit EXIT Select Enter OK Change Password Clear All Blocks Channel Block Program Block Input Block Parental OK Enter Select EXIT Exit Setup Screen Mode OSD Language 16 9 On English Time Setup Blue Screen Reset Default OSD Timeout O...

Страница 17: ...Block Input block you can block any input source Change password changing of the parental password Clear All Blocks restore your settings SOURCE 1 Press SOURCE button to change from TV to other available inputs 2 Press button to select signal source 3 Press OK button to confirm 4 Press EXIT button to exit signal source menu TV Source AV YPBPR VGA HDMI S VIDEO ...

Страница 18: ... NTSC PAL S Video Input Composite Video input Antenna RF Audio Output Maximum Audio Output Input Connections TV Input Digital tuner 1 RF 75 Ohm VGA Input 1 15 pin D Sub AV Input L R Audio Input For YPBPR S Video 1 Composite Yellow RCA 1 White RCA Red RCA PC Audio in Stereo Mini Phono Jack Input 3 5mm VGA Resolutions Supported 640x480 60Hz 800x600 60Hz 1024x768 60Hz Power 2 3W 4 Ohm 1360x768 60Hz P...

Страница 19: ......

Страница 20: ......

Отзывы: