CONNECTION
4
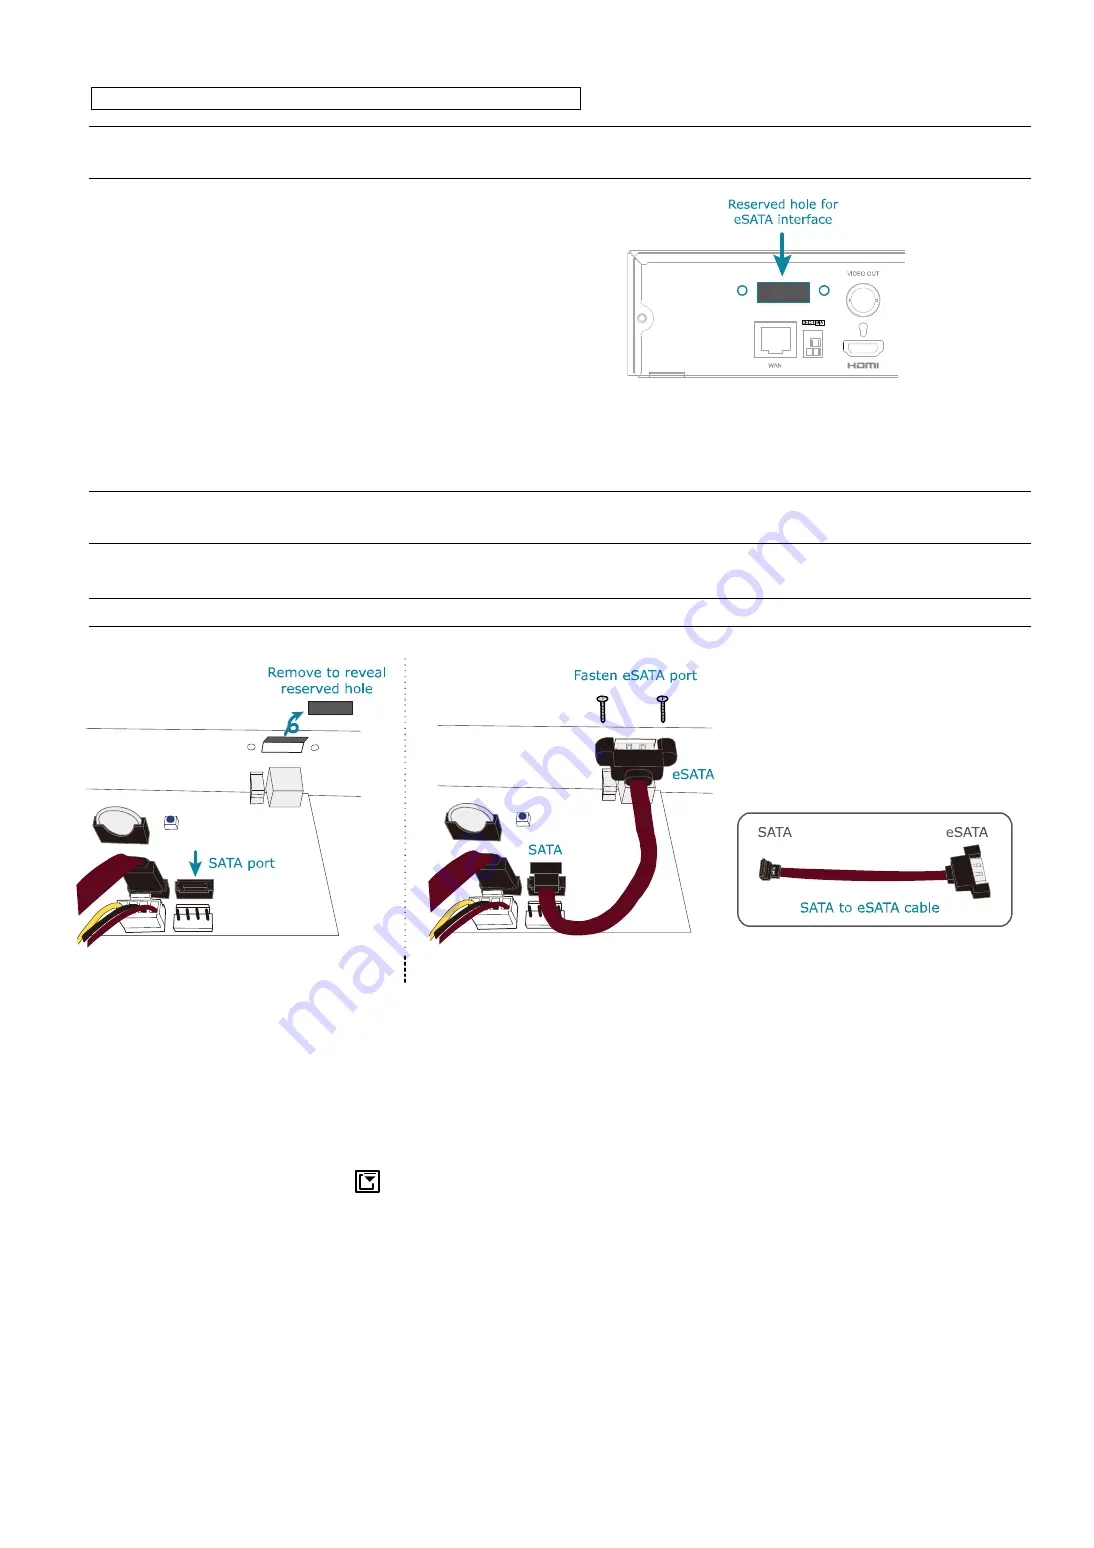
Add eSATA interface with optional SATA-to-eSATA cable
Note:
The illustrations below are using a 16CH model as an example. The methods of how to install the
cable are the same for all models which support this feature.
Step1: Check the specifications of your
recorder and see if it supports this
feature. If yes, find the reserved hole
on the rear panel of your recorder as
illustrated on the right.
Step2: Remove the top cover of the recorder
to reveal its main board. Remove the
thin piece of metal that block the
reserved hole. Then, remove the
SATA cable on the board.
a)
Note:
It will consume one SATA port to add an eSATA interface on the mainboard of your recorder, which
means you’ll lose one hard disk which can be
installed
inside your recorder.
Step3: Get a SATA-to-eSATA cable and connect it to the board as illustrated below.
Note:
The SATA-to-eSATA cable is optional and need to purchase separately.
Figure 1
Figure 2
2.2 Hard Disk Mounting
Power on your recorder and wait till the initialization is completed. Then, check the hard disk indicators on the front
panel to make sure each hard disk installed is detected.
Right click the mouse to exit from the full screen mode. Click
MENU
→
STORAGE
to see if all hard disks you
inserted are detected, and click
one by one to mount them. Wait till the hard disk is mounted and the status
shows
READY
. When you’re prompted to clear the hard disk, choose
YES
.


