


13
3.2.1 DDNS setting
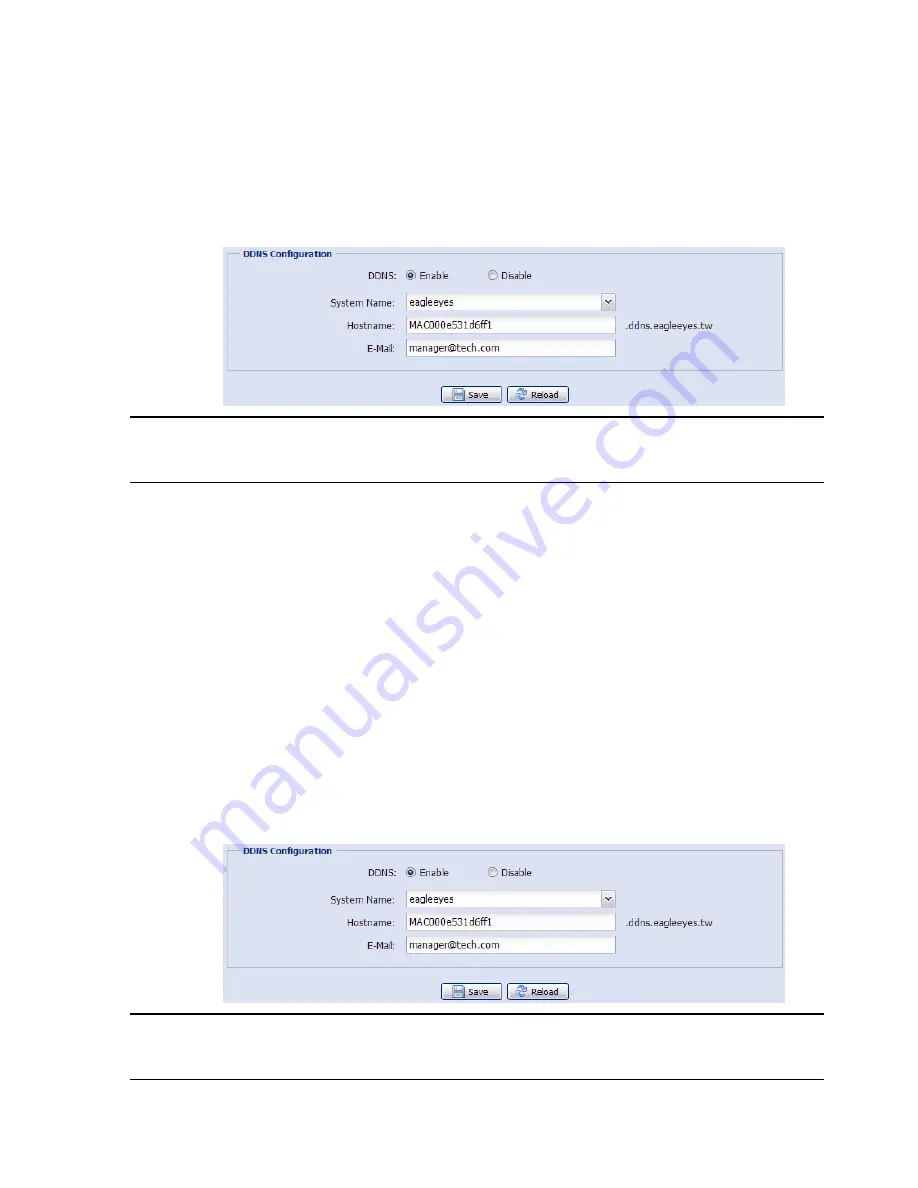
Step1: Click “Network”
“DDNS”, and check “DDNS Enable”.
Step2: Select “eagleeyes” in “System Name”.
In “Hostname”, keep the default value, i.e. the MAC address of this camera, or
change the name to a meaningful one. It’s easier to memorize.
Then, note down the whole address of the camera, for example,
MAC000e531d6ff1.ddns.dvrtw.com.tw
.
Note:
You can also create a DDNS account from a website which provides free DDNS
service. For details, please refer to “APPENDIX 1 CREATING AN ACCOUNT FOR
DDNS SERVICE” at page 15.
13
3.2.1 DDNS setting
Step1: Click “Network”
“DDNS”, and check “DDNS Enable”.
Step2: Select “eagleeyes” in “System Name”.
In “Hostname”, keep the default value, i.e. the MAC address of this camera, or
change the name to a meaningful one. It’s easier to memorize.
Then, note down the whole address of the camera, for example,
MAC000e531d6ff1.ddns.dvrtw.com.tw
.
Note:
You can also create a DDNS account from a website which provides free DDNS
service. For details, please refer to “APPENDIX 1 CREATING AN ACCOUNT FOR
DDNS SERVICE” at page 15.