


9
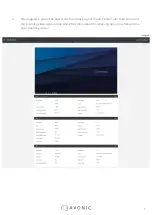
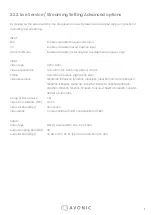
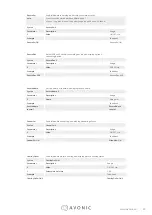
The Live Service/ Streaming Setting page will look like the screenshot below, with the basic options for
the input and output settings .
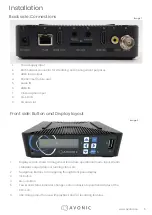
1 .
Input
HDMI, SDI
2 .
Output
UDP, RTMP*, RTMPS*, HLS, RTSP
3 .
IP/URL
IP address or URL on which the streamed content can be found
4 .
Port
Portnumber of the IP or URL
5.
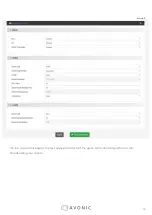
Video Profile
user defined
12mbps 1080p video/ 192kbps audio
8mbps 1080p video/ 192kbps audio
6mbps 1080p video/ 128kbps audio
4mbps 1080p video/ 128kbps audio
8mbps 720p video/ 192kbps audio
6mbps 720p video/ 128kbps audio
4mbps 720p video/ 128kbps audio
4mbps 576p video/ 128kbps audio
2mbps 576p video/ 96kbps audio
4mbps 480p video/ 128kbps audio
2mbps 480p video/ 96kbps audio
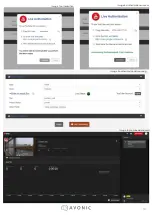
*RTMP/ RTMPS: when one of these options is selected you need to authorize the device for the chosen
service Facebook or Youtube, see pictures on the next page . Follow the steps indicated on the page of
the platform . On page 13 there are a couple of screenshots how the screen of the REC-200 looks when
you have successfully authorised your REC-200 with your account . After the account is registered with
Youtube in the example on the following page (image 7~10) and you click on ‘Start Streaming’ it can
take one or two minutes before the little antenna symbol in the center of the screen turns green, indi-
cating that the REC200 is live and streaming to the platform .
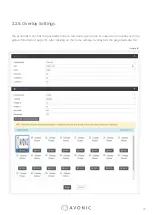
2.2.1. Live Service / Streaming Setting Basic options
Image 6


