


2
Integrated LCD KVM Switch Installer/User Guide
Installation
If you are installing your Integrated LCD KVM Switch to a PS/2
interface, you must turn off all servers before connecting your appliance
to a server for proper installation. USB interfaces do not need to be
turned off before installation.
NOTE:
Linux users may experience mouse failure if hot-plugging directly to the
Integrated LCD KVM Switch. If your mouse becomes locked, use the mouse reset
hotkeys (see
Appendix A) to reset your mouse, or turn the Linux server off before
connecting it to the Integrated LCD KVM Switch.
To install the Integrated LCD KVM Switch:
1.
Plug one end of the supplied power cord into the back of the switch
and the other end into an appropriate power source.
2.
Connect your servers to an available port on the rear of your
Integrated LCD KVM Switch using the appropriate cable.
3.
Turn on all connected servers. Keyboard and mouse recognition is
now activated and your Integrated LCD KVM Switch is ready for
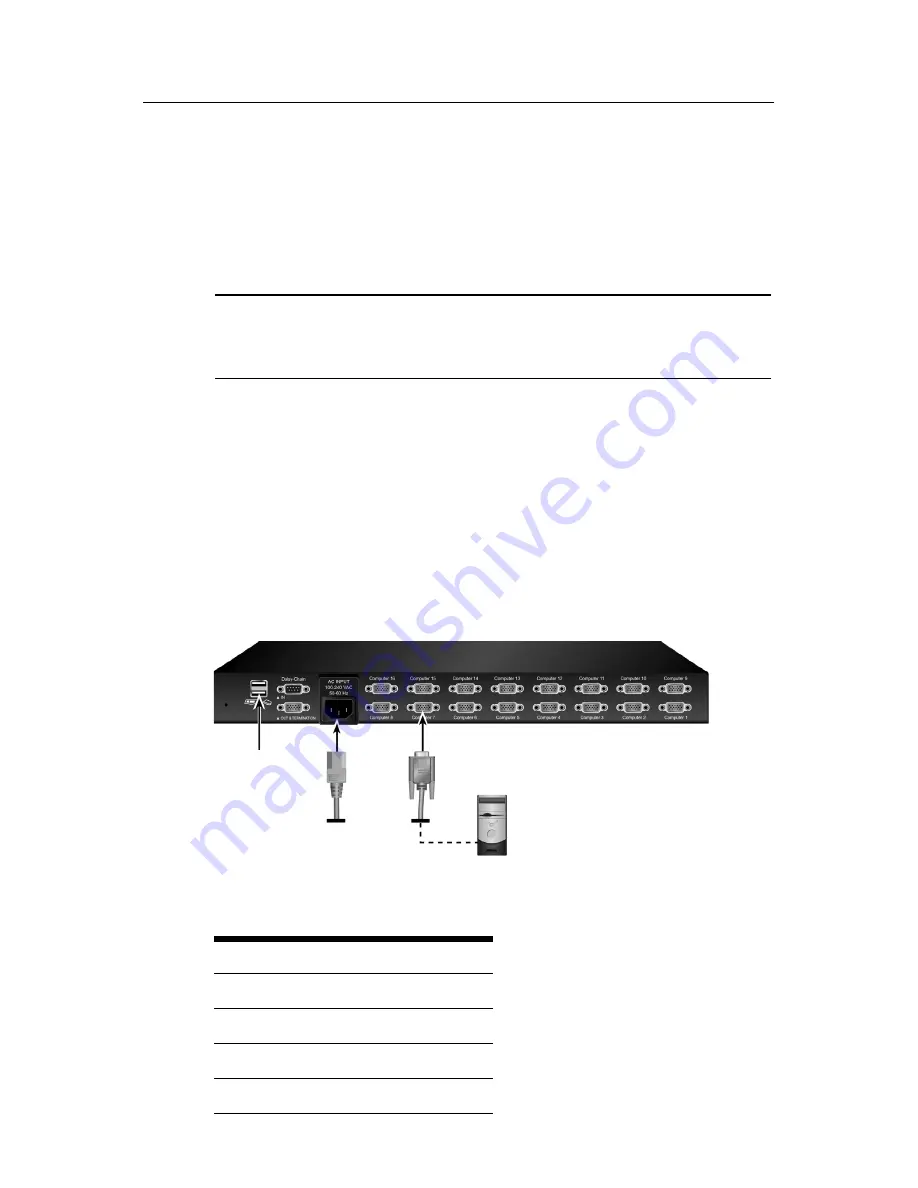
operation. Figure 1.1 shows a basic configuration for the 16-port
Integrated LCD KVM Switch.
Figure 1.1: Basic 16-Port Integrated LCD KVM Switch Server Configuration
Table 1.1: Description of Figure 1.1
Number
Description
1
USB Ports
2
Daisy-chain Ports
3
Power
4
Server
3
4
1
2
Содержание Integrated LCD KVM Switch
Страница 1: ...Installer User Guide Integrated LCD KVM Switch...
Страница 2: ......
Страница 6: ...iv Integrated LCD KVM Switch Installer User Guide...
Страница 16: ...10 Integrated LCD KVM Switch Installer User Guide Figure 1 7 Basic Daisy Chain Example...
Страница 19: ......
Страница 20: ......
Страница 24: ...iv Guide d installation et d utilisation du commutateur KVM cran LCD int gr...
Страница 36: ...12 Guide d installation et d utilisation du commutateur KVM cran LCD int gr...
Страница 40: ...16 Guide d installation et d utilisation du commutateur KVM cran LCD int gr...
Страница 41: ......
Страница 42: ...590 698 616B For Technical Support www avocent com support...


