


Chapter 2: Configuring and Connecting SC48
13
Powering Up the System
Power up the system in the following sequence:
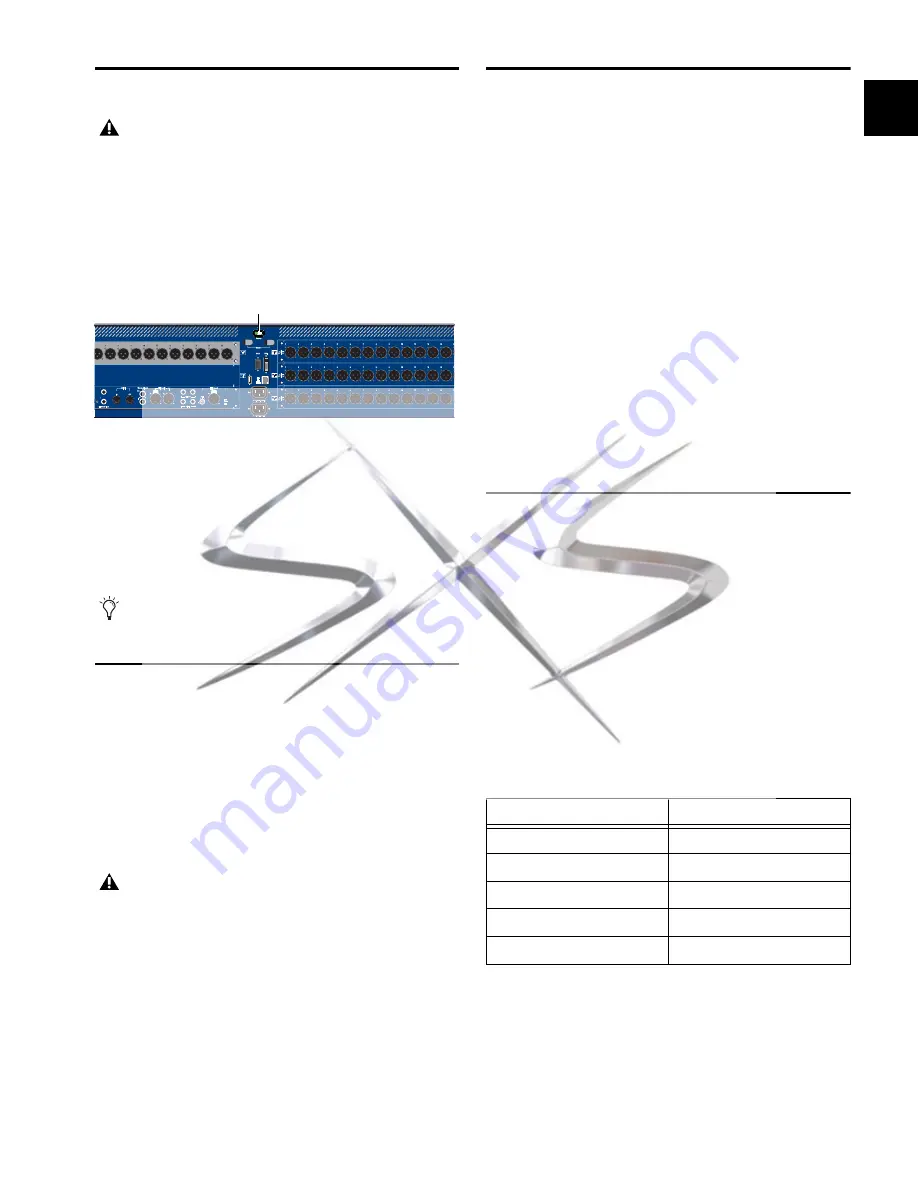
1
Press the Power switch on the back panel of VENUE SC48
(located on the back panel, center top).
2
Turn on any connected computers for recording/playback.
3
Turn on the audio monitoring system.
Powering Down the System
Power down the system in the following sequence:
1
Turn off the audio monitoring system.
2
Turn off any connected computers for recording/playback.
3
Power down VENUE SC48.
Setting the System Clock
When you first work with a VENUE system, make sure the sys-
tem clock time, date and time zone are set appropriately. The
system clock setting can affect data synchronization with por-
table storage devices. See “Synchronizing Settings, Shows and
Presets” on page 165.
The system clock time can be shown in the Status bar for con-
stant time-of-day display. For more information, see “System
Clock” on page 57.
After setting the system clock, do either of the following:
• To get started learning the console and configuring it, see
Chapter 3, “VENUE SC48 Control Overview.”
– or –
• If you want to install any other optional software first
(such as ECx, or included plug-ins) see the next section
(“Installing Other Optional Software” on page 13).
Installing Other Optional Software
ECx, Plug-ins, and Other
After having unpacked, assembled, connected, and powered
up your SC48 system, you can go ahead and add any addi-
tional software and plug-ins as explained in the following sec-
tions.
VENUE SC48 is loaded at the factory with the most recent ver-
sion of its operating software (VENUE D-Show software), as
well as the core set of VENUE plug-ins. You must manually in-
stall software for the following:
ECx Ethernet Control
If you want to take advantage of the
built-in Ethernet remote control option, install the ECx soft-
ware from its included installer disc. For instructions, see
Chapter 31, “ECx.”
Plug-ins
All plug-ins (except the included plug-ins) must be in-
stalled manually from their installer discs, or from copies of
the installers transferred to your USB key disk or other storage
device. For more information, see Chapter 19, “Plug-Ins.”
About Digital Input and Sample Rate
Conversion
VENUE systems operate at a native sample rate of 48 kHz. The
2-Track AES inputs on the SC48 provide sample rate conver-
sion on input, letting you connect a wide variety of digital
sources without having to be concerned with synchronization
and clock connections.
Sample rate conversion does, however, induce processing de-
lay to the incoming digital signal.
Sample Rate Conversion Latency
The following table illustrates the sample rate conversion pro-
cessing delay at various sample rates.
Faders move when power is turned on. Before powering up
the system, make sure all fader paths are clear.
Power switch
It is not possible to accidentally power off the console by
pressing the Power switch momentarily.
Changing the system clock while using a timed iLok license
(for a plug-in with a demo period, or for a plug-in rental)
may expire the plug-in authorization.
Power
Minimum Additional Latency due to Sample Rate Conversion
External Sample Rate
SRC Process Delay
32 kHz
1.50 ms
44.1 kHz
1.09 ms
48 kHz
1.00 ms
88.2 kHz
0.848 ms
96 kHz
0.833 ms
courtesy of
www.sxsevents.co.uk
Phone: 0870 080 2342
email: [email protected]
Event production and Audio-Visual Services
www.sxsevents.co.uk