


English
–2
Chapter 2
The Unit Parts
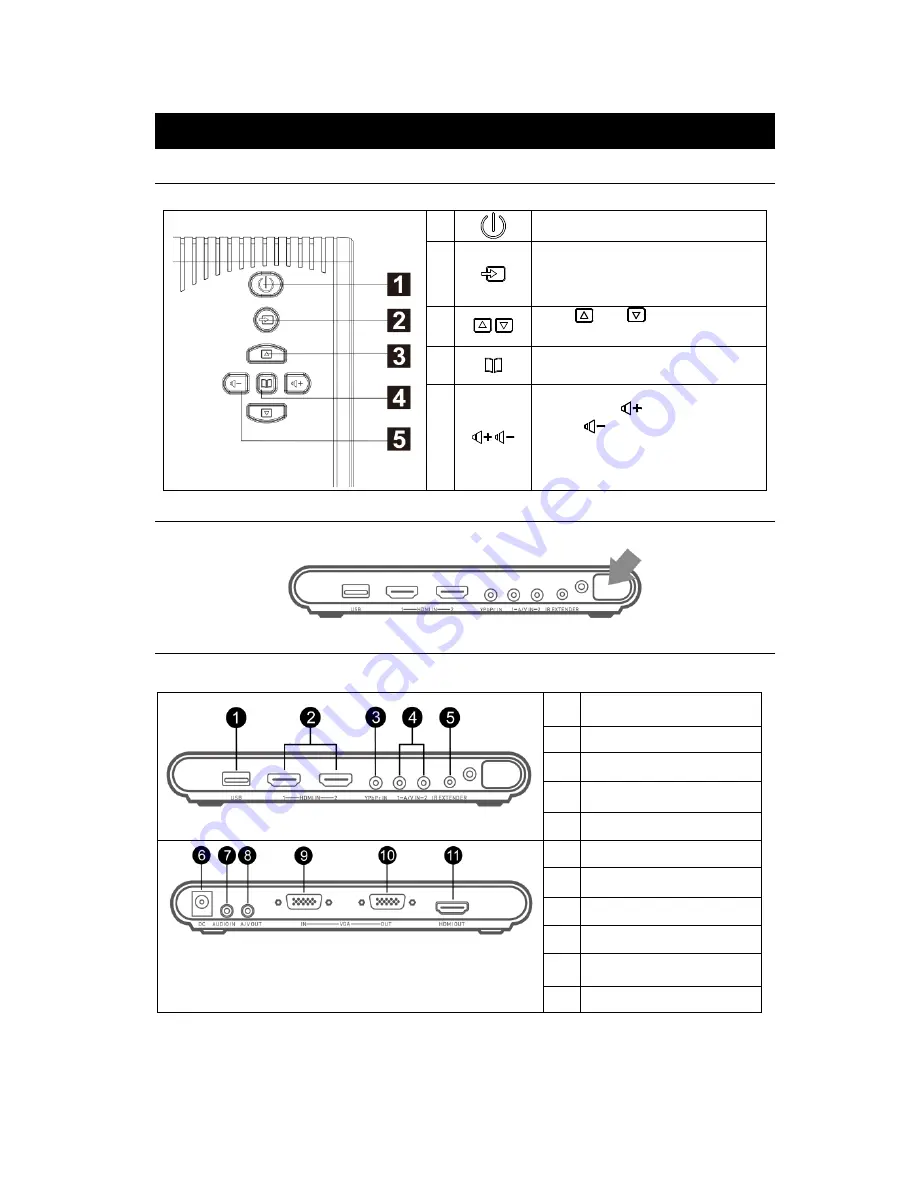
2.1 Touch Button Control Panel
The Touch Button Panel found on the top side of the unit provides quick access to commonly used functions.
1
Turn the unit on/off
2
Press this button to switch between PC
and other available video sources.
OSD Menu
: Function as OK
3
/
Press
and
to make the
selection in the menu or picture setting
4
Call up/close the menu display
5
/
Press Volume
to increase and
Volume
to decrease the volume
level. Use these buttons to adjust the
menu or picture setting
2.2 Infrared Sensor
When using the remote control, aim it at the Infrared Sensor which is located at the front panel of the unit.
2.3 Connection Ports
The port connectors allow connection of your PC, VGA Monitor, LCD Monitor or Projector, speakers,
DVD Players, Camcorders, Gaming Console, or other Video Devices.
Front Panel
1
USB port
(for firmware upgrade)
2
HDMI input 1 and 2
3
Component (YPbPr) input
4
A/V input 1 and 2
5
IR extender port
Back Panel
6
DC port
7
Audio input
8
A/V output
9
VGA input
10
VGA output
11
HDMI output


