WWW.AVENTURACCTV.COM
VERSION V1.02
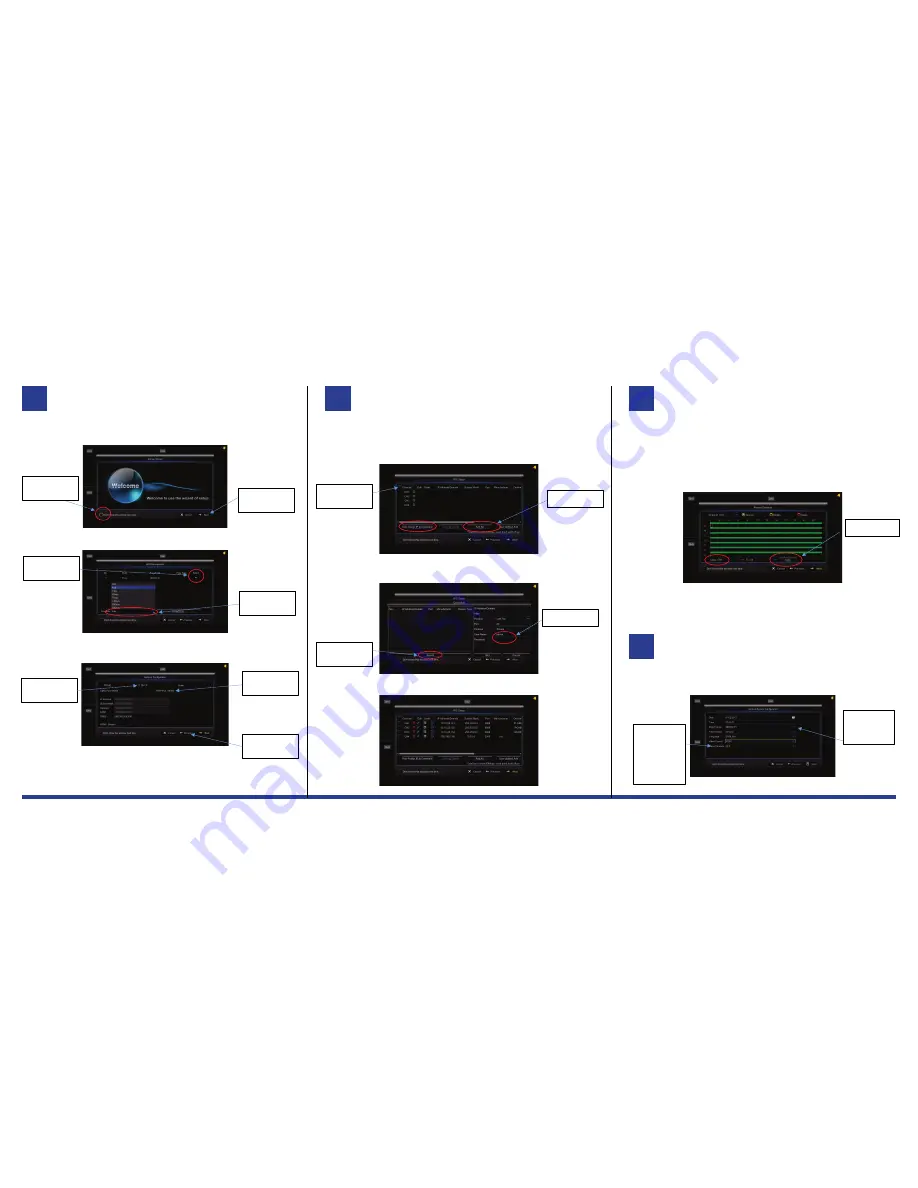
FIRST POWER ON SETUP WIZARD
Use the wizard to set the most common needed parameters; this will enable the device to be running
in the simplest steps. Each step is processed by the next selection icon.
1. HDD setup and initialization. Select day retention for recordings and format drives if
required.
2. Network Address setting. Default DHCP is can be changed to a fixed address to reflect your
network cameras or your local network settings. Change HTTP port and Client Port also can
be modified. UPnP is disabled, enable only if you
NOTE: Router access does not require port forwarding to be done, the system has a secure and encrypted P2P
tunnel. Care should be taken for remote access and security on the device, never use simple passwords, keep
your P2P / login information safe.
ADD CAMERAS
The recorder must have valid IP address information and connection credentials to enable
successful communication for recording.
1. Multiple or single IP cameras connected to the LAN can be added from the wizard.
2. The unit will search the local network for a device which it can connect to, Onvif device will
be found which can be added. If you select Auto Assign IP, the device will detect and
change the IP of the unit to follow a 10.10.25.xx range of addresses.
3. After a successful Search will populate the display with found devices. Here we found
Aventura branded IPCs with IP address automatically set, and a generic Onvif IPC.
SCHEDULE
Use Schedule recording for better use of storage capacity. Motion detection recordings or
alarm will allow for a longer duration of stored recordings to be achieved.
4. Select
Normal, Motion
or
Alarm.
Use the mouse to draw a box selection area to
enable as each color selected, and blank as unselected. Channels can be set
independently of each other. The default is all channels are set to Normal recording
24x7.
5. Use the Copy to quickly set others channel to an identical recording pattern.
6.
The. Display layout shown is 0 – 22 to represent the hours in the day, and each row of
single letters S M T ~~ S is the day of the week: S Sunday M Monday and ends on S
Saturday.
NOTE: Default is all channels are recording to a 24x7 constant recording schedule.
General System Configuration
The last wizard step sets the Device display time / system format and allows changing of
menu language to modified.
5
3
4
Tick to skip the
Start-up wizard on
next device restart.
Select drive(s) as
required first.
Change Auto to
selected days if
required.
6
Copy the schedule
to other channels.
Select the little
arrow for a pull-
down menu
selection options.
Menu Timeouts
allow user to keep
the on-screen
GUI visible for a
set duration. OFF
will never close
automatically
after a set time.
Next to proceed to
the next setup
page.
HTTP port for
device browser
access,
Leave set to DHCP
if you connect to
router device.
Previous, will let
you step back to
prior menu option.
Top left tick will
allow selection for
all free channels.
Select either option
as required.
Enter the device(s)
login detail here.
The Search will
commence with the
add / adding IP.


