background image

8

Using the Features

Answering and Placing a Call

To answer a call 

1

Lift the handset.

2

Speak with the other party.

To place a call

1

Lift the handset or press the SPEAKERPHONE button. 

When you press the SPEAKERPHONE button, the light 

next to the button goes on. 

2

 Dial the desired number. 

Note: You can also dial a number with one of the 
memory-dialing buttons. For more information, see “The 
Memory-Dialing Feature” later in this section.

3

When you have finished the call, hang up the handset or 
press the SPEAKERPHONE button again. 

4

The light next to the SPEAKERPHONE button goes off.

To use the TONE button to change from Pulse to Touch-Tone

Use this feature if your telephone is set for the Pulse feature, but you 
need to use Touch-Tones in order to dial the number or use a 
particular banking or long-distance service.

1

Lift the handset or press the SPEAKERPHONE button.

When you press the SPEAKERPHONE button, the light 

next to the button goes on. 

2

Dial the portion of the number required in Pulse format (that 
is, when the Tone/Pulse button is set to Pulse). 

3

Press the TONE button (a 3.6-seconds pause is 
automatically inserted). 

4

Dial the service's command digits (in Tone mode) as 
required.

Note: The telephone returns to Pulse mode when the call is 
completed.

Содержание 9110

Страница 1: ... 7HOHSKRQH QVWUXFWLRQ 0DQXDO VVXH RPFRGH HEUXDU ...

Страница 2: ...reted as references to Avaya Inc The exception is cross references to books published prior to April 1 2001 which may retain their original Lucent titles Avaya Inc formed as a result of Lucent s planned restructuring designs builds and delivers voice converged voice and data customer relationship management messaging multi service networking and structured cabling products and services Avaya Labs ...

Страница 3: ... limits are designed to provide reasonable protection against harmful interference when the equipment is operated in a commercial environment This equipment generates uses and can radiate radio frequency energy and if not installed and used in accordance with the instruction manual may cause harmful interference to radio communications Operation of this equipment in a residential area is likely to...

Страница 4: ...ries 6 Desk Table Installation 7 Using the Features 8 Answering and Placing a Call 8 The Memory Dialing Feature 10 Redialing a Number with the SAVE Button or the REDIAL Button 11 Hold 12 Conference 12 Transfer 13 General Care and Maintenance 14 Cleaning 14 Failure to Operate and Service Difficulties 14 ...

Страница 5: ...t the receiving television or radio antenna 2 To the extent possible relocate the television radio or other receiver with respect to the telephone equipment 3 If your telephone product runs on AC power plug your product into an AC outlet that s not on the same circuit as one used by your radio or television Registration Information Part 68 The following information is applicable only to equipment ...

Страница 6: ...et is determined to be malfunctioning it should not be reconnected until repairs are made 5 Repairs to this equipment other than routine repairs can be made only by Lucent Technologies or its authorized agents 6 If a telephone set causes harm to the telephone network the local telephone company may temporarily discontinue your service and if possible notify you in advance If advance notice is not ...

Страница 7: ...g the telephone back in until it has dried thoroughly Avoid using the telephone during electrical storms in your immediate area There is a risk of electric shock from lightning Urgent calls should be brief Even though protective measures may have been installed to limit electrical surges from entering your business absolute protection from lightning is impossible If you suspect a natural gas leak ...

Страница 8: ...ols described in these instructions Do not attempt to adjust any other controls since doing so may result in damage to the telephone and will require extensive work by a qualified technician to restore the telephone to normal operation If the telephone has been dropped or the housing has been damaged If you note a distinct change in the performance of the telephone WARNING When this product is loc...

Страница 9: ...listen operation Ten memory dialing buttons which can hold twenty memory dialing numbers Flashing ringer light which indicates incoming call Flashing Message light Flash button for using such features as Hold and Transfer Last Number Redial feature Save feature which allows you to save a number in memory for a temporary period of time Mute function Speaker volume control User selectable ringer vol...

Страница 10: ... 7 8 9 ABC DEF MNO JKL GHI PQRS TUV WXYZ O 9110 FLASH TOP VIEW 4 9 15 16 BOTTOM VIEW 2 1 RINGER PITCH 17 19 20 21 1 2 SPEAKER PHONE SAVE PROGRAM PAUSE TONE REDIAL 6 7 10 12 13 14 PULSE TONE 3 MUTE TEL NO EXT NO 01 02 03 04 05 11 12 13 14 15 16 17 18 19 20 5 8 11 18 06 07 08 09 10 ...

Страница 11: ...e light also flashes when you have a message 5 Ten Memory Dialing buttons These 10 buttons located at the top of the dial pad provide easy dialing of 20 frequently dialed numbers Each memory button can store two separate numbers of up to 24 digits A pause or flash counts as two digits In order to dial the number programmed on the upper portion of each button numbered 01 through 10 press the button...

Страница 12: ...you subscribe such as telephone answering messaging systems or electronic banking by phone may require dialed command digits using Tone format following the access telephone number for that service The Tone command can be used manually and is storable in memory 12 PAUSE button With this feature you can insert a 3 6 second pause into the dialing sequence A pause in a dialing sequence may be needed ...

Страница 13: ...erphone It is set to midway for normal listening level 19 Tone Pulse switch This switch is used to select the dialing mode either TONE DTMF or PULSE Decadic The correct mode depends on the telephone network 20 Ringer Volume switch The settings on this switch affects the ringer volume during an incoming call There are three available ringer volume positions Low Medium and High 21 Ringer pitch contr...

Страница 14: ... the batteries 2 Locate the battery compartment on the right side on the bottom of the telephone See Figure 1 for its location 3 Insert a small pointed tool or a small screwdriver in the D shaped hole to the left of the compartment 4 Press down and slide the cover to the right to open it 5 Insert two AA batteries in the battery compartment The negative end of the battery should be placed against t...

Страница 15: ...k on the top rear of the telephone See Figure 1 for the location of the line jack 2 Plug one end of the coiled handset cord into the handset jack on the side of the telephone See Figure 1 3 Plug the other end of the handset cord into the handset 4 Hang up the handset 5 Plug the free end of the line cord into a modular jack 6 Lift the handset and listen for dial tone Note When you have installed th...

Страница 16: ... 4 The light next to the SPEAKERPHONE button goes off To use the TONE button to change from Pulse to Touch Tone Use this feature if your telephone is set for the Pulse feature but you need to use Touch Tones in order to dial the number or use a particular banking or long distance service 1 Lift the handset or press the SPEAKERPHONE button When you press the SPEAKERPHONE button the light next to th...

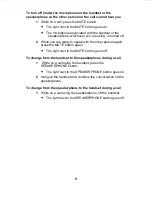
Страница 17: ... speak with the other person again press the MUTE button again The light next to the MUTE button goes off To change from the handset to the speakerphone during a call 1 While on a call using the handset press the SPEAKERPHONE button The light next to the SPEAKERPHONE button goes on 2 Hang up the handset and continue the conversation on the speakerphone To change from the speakerphone to the handse...

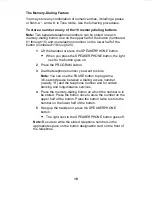
Страница 18: ... to the button goes on 2 Press the PROGRAM button 3 Dial the telephone number you want to store Note You can use the PAUSE button to program a 3 6 second pause between a dialing access number usually 9 and the telephone number and for certain banking and long distance services 4 Press the memory dialing button on which the number is to be stored Press the button once to store the number on the upp...

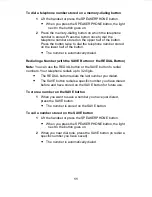
Страница 19: ... Button Note You can use the REDIAL button or the SAVE button to redial numbers Your telephone redials up to 32 digits The REDIAL button redials the last number you dialed The SAVE button redials a specific number you have dialed before and have stored on the SAVE button for future use To store a number on the SAVE button 1 When you want to save a number you have just dialed press the SAVE button ...

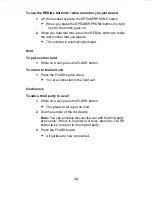
Страница 20: ...o put a call on hold 1 While on a call press the FLASH button To return to the held call 1 Press the FLASH button twice You are connected to the held call Conference To add a third party to a call 1 While on a call press the FLASH button The present call is put on hold 2 Dial the number of the third party Note You can privately discuss the call with the third party at this time if there is no answ...

Страница 21: ...ress the FLASH button The present call is put on hold 2 Dial the number to which the call is to be transferred Remain on the line and announce the call if the dialed number is busy or not answered press the FLASH button twice to return to the held call 3 Hang up Transfer is completed ...

Страница 22: ... Failure to Operate and Service Difficulties If telephone service problems occur at any time it is recommended that the installation procedure described in this manual be rechecked If a fault occurs try to determine if the fault is with the telephone or with the network or system to which the telephone is connected Disconnect the faulty telephone and test the line with a substitute telephone If th...

Отзывы: