background image

Avaya 6120 and 6140 WLAN 
Handset User Guide

Avaya Communication Server 1000

Document Status:

 Standard

Document Version:

 05.01

Part Code: 

NN43150-100

Date: 

November 2010

Содержание 6120

Страница 1: ...Avaya 6120 and 6140 WLAN Handset User Guide Avaya Communication Server 1000 Document Status Standard Document Version 05 01 Part Code NN43150 100 Date November 2010 ...

Страница 2: ...RIZING OTHERS TO DO SO YOU ON BEHALF OF YOURSELF AND THE ENTITY FOR WHOM YOU ARE INSTALLING DOWNLOADING OR USING THE SOFTWARE HEREINAFTER REFERRED TO INTERCHANGEABLY AS YOU AND END USER AGREE TO THESE TERMS AND CONDITIONS AND CREATE A BINDING CONTRACT BETWEEN YOU AND AVAYA INC OR THE APPLICABLE AVAYA AFFILIATE AVAYA Copyright Except where expressly stated otherwise no use should be made of the Doc...

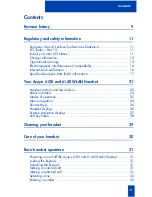
Страница 3: ...Rate SAR information 17 Your Avaya 6120 and 6140 WLAN Handset 21 Handset controls and descriptions 22 Status indicators 24 Modes of operation 25 Menu navigation 26 Shortcut Keys 26 Handset Displays 26 Feature Activation displays 27 Soft key labels 28 Cleaning your handset 29 Care of your handset 30 Basic handset operation 31 Powering on and off the Avaya 6120 and 6140 WLAN Handset 31 Locking the k...

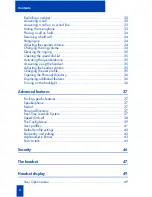
Страница 4: ... 35 Answering using the headset 35 Adjusting the headset volume 35 Changing the user profile 35 Opening the Personal Directory 36 Displaying additional features 36 Turning on the backlight 36 Advanced features 37 Facility specific features 37 Speakerphone 37 Redial 37 Personal Directory 37 Real Time Location System 37 Speed dial call 38 The Config Menu 39 User profiles 41 Default profile settings ...

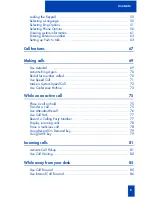
Страница 5: ...last number called 70 Use Speed Call 71 Make a System Speed Call 72 Use Conference Hotline 73 While on an active call 75 Place a call on hold 75 Transfer a call 75 Use Attendant Recall 76 Use Call Park 77 Record a Calling Party Number 77 Display incoming calls 78 Trace a malicious call 78 Using Record On Demand key 79 Using SAVE key 79 Incoming calls 81 Activate Call Pickup 81 Use Call Waiting 82 ...

Страница 6: ...ge Switchhook Flash 95 Charge a call or charge a forced call 96 Use Enhanced Override 98 Use Forced Camp on 98 Use Privacy Release 99 Branch Office 101 Normal Mode 101 Local Mode 101 Troubleshoot Branch Office 101 Hospitality features 103 Activate Message Registration 103 Use Maid Identification 104 Display Room Status 105 Battery packs 107 Low battery indicators 107 Removing and inserting the bat...

Страница 7: ...ts Cleaning the Desktop Charger 111 Dual Charger 113 Using the Dual Charger 114 Cleaning the Dual Charger 114 Quad Charger 116 Using the Quad Charger 116 Cleaning the Quad Charger 117 Terms you should know 119 ...

Страница 8: ...8 Draft 0 01 Contents ...

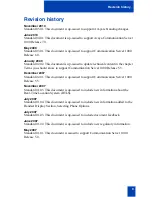
Страница 9: ...munication Server 1000 Release 5 5 December 2007 Standard 02 01 This document is up issued to support Communication Server 1000 Release 5 5 November 2007 Standard 01 05 This document is up issued to include new information about the Real Time Location System RTLS July 2007 Standard 01 04 This document is up issued to include new information added to the Handset Display Section Selecting Phone Opti...

Страница 10: ...10 Revision history ...

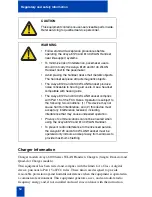
Страница 11: ...s portable device with its antenna complies with FCC s RF radiation exposure limits set forth for an uncontrolled environment To maintain compliance this transmitter must not be co located or operating in conjunction with any other antenna or transmitter Industry Canada IC Notice This device complies with RSS 210 of Industry Canada Operation is subject to the following two conditions 1 This device...

Страница 12: ... 6140 WLAN Handset near life support systems To minimize risk of interference pacemaker users should not carry the Avaya 6120 and 6140 WLAN Handset next to the pacemaker Avoid placing the handset near small metallic objects The handset earpiece attracts magnetic objects The Avaya 6120 and 6140 WLAN Handset produce noise noticeable to hearing aid users Use a headset compatible with hearing aids The...

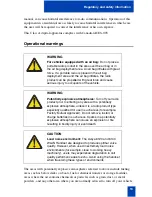
Страница 13: ...deployment area An air bag inflates with great force If a portable radio is placed in the air bag deployment area and the air bag inflates the radio product can be propelled with great force and cause serious injury to occupants of the vehicle WARNING Potentially explosive atmospheres Turn off your radio product prior to entering any area with a potentially explosive atmosphere unless it is a radi...

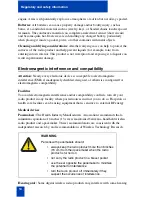
Страница 14: ...ce EMI if inadequately shielded designed or otherwise configured for electromagnetic compatibility Facilities To avoid electromagnetic interference and or compatibility conflicts turn off your radio product in any facility where posted notices instruct you to do so Hospitals or health care facilities can be using equipment that is sensitive to external RF energy Medical devices Pacemakers The Heal...

Страница 15: ...Give full attention to driving and to the road Use handsfree operation if available Pull off the road and park before making or answering a call if driving conditions so require Handset operation normal position Hold the handset as you would any other tele phone with the earpiece to your ear and speak into the microphone The internal antenna is then positioned properly Handset operation body worn ...

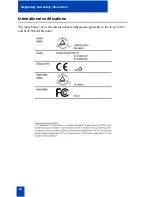
Страница 16: ...16 Regulatory and safety information International certifications The table below shows the international certifications applicable to the Avaya 6120 and 6140 WLAN Handset ...

Страница 17: ...y set by both U S and international standards bodies ANSI C95 1 1992 American National Standards Institute NCRP Report 86 1986 National Council on Radiation Protection and Measurements ICNIRP 1996 International Commission on Non Ionizing Radiation Protection DHWC Safety Code 6 Department of Health and Welfare Canada These standards are developed by independent scientific organizations through peri...

Страница 18: ...eed the limit established by the government adopted requirement for safe exposure The tests are performed in positions and locations e g at the ear and worn on the body as required by the FCC for each model While there may be differences between the SAR levels of various telephones and at various positions they all meet the government requirement for safe exposure The FCC has granted an Equipment ...

Страница 19: ...19 Regulatory and safety information ...

Страница 20: ...20 Regulatory and safety information ...

Страница 21: ...hich features are available for your use WARNING To minimize risk of interference pacemaker users should not carry the Avaya 6120 and 6140 WLAN Handset next to the pacemaker Avoid placing the handset near small metallic objects The handset earpiece attracts magnetic objects The Avaya 6120 and 6140 WLAN Handset produce noise noticeable to hearing aid users Use a headset compatible with hearing aids...

Страница 22: ...t on This key also affects some of the states of the handset Press the End button to terminate an active call Press the Start button to place a call Press the Line button to access the key labels for line appearances and line features Attention Line emulates the six feature keys on a IP Phone 2004 desktop telephone Attention All features activated by Line are locally programmed and may or may not ...

Страница 23: ...re accessed via the Actv soft key Soft keys self labeled are located below the display area The liquid crystal display LCD indicator above the key changes based on the state of the handset Use the four soft keys to activate the displayed soft key feature Use the Nav buttons and Enter to navigate and activate the various menu options ...

Страница 24: ...ne is on hold or forwarded have a plus sign in front of the entry for that line Up and down arrows are displayed when the menu has additional options above or below Left or right arrows are displayed during editing when the cursor can be moved left or right The telephone ring icon indicates a regular incoming telephone call The messaging ring icon indicates an incoming call from a Messaging applic...

Страница 25: ...tor icon takes priority over the RTLS icon Table 1 The Avaya 6120 and 6140 WLAN Handset Modes of operation Part 1 of 2 Mode Description Standby This is the normal state when the handsets are online but inactive In the standby state the handset can receive calls and access the User Option menu To perform other operations the handsets must be active off hook The standby state uses less power than th...

Страница 26: ...s status indicators for various handset conditions It is referred to as the status bar The middle row displays information about the handset identity user profile calls in progress menu options and data from the telephone The bottom row displays soft key labels Message Alert Custom text messaging applications can be programmed for your facility This mode is activated through FCN 8 9 or if programm...

Страница 27: ...ive idle mode or while in an active call the soft key labels shown below display additional features that can be activated for call handling Additionally when FCN is pressed during active or active idle mode a Feature List displays that lists features that have been configured for your facility The Exit soft key or END returns to the previous display Features may also be programmed to the Line key...

Страница 28: ...turns to the previous menu display CAPS caps Change case Toggles to allow a change in case when you enter alphabetical text Clr Clear Deletes the entry Cncl Cancel Returns to the previous menu display without saving any data that is entered Del Delete Deletes the character to the left of the cursor Done Finished Exits a list when more than one selection is possible Exit Exit Exits the menus Hold H...

Страница 29: ... clean water dampened cloth Do not immerse Spray the cleaner on a soft cloth or paper towel and then wipe the handset Pre treated cloths like those used for eyeglasses or cameras Pre moistened towelettes Avoid those containing lanolin or aloe as it leaves a slippery residue Isopropyl alcohol applied by a damp cloth or paper towel When you use alcohol do not rub the keypad characters vigorously as ...

Страница 30: ...rical contacts of the charger while cleaning Keep the headset jack covered when not in use Use a carrying case to help protect the surfaces and to help prevent liquids for example rain from entering into the interior of the handset If your handset gets wet follow the procedure below 1 Power off the handset 2 Remove the battery pack from the handset 3 Shake excess liquid from the handset 4 Place th...

Страница 31: ... End to turn on Press and hold End to turn off Locking the keypad Press Cfg Enter to manually lock the keypad Unlocking the keypad Press Unlk to unlock the keypad Making an internal call To make an internal call 1 Press Start and wait for a dial tone 2 Enter the internal extension Making an external call To make an external call 1 Press Start and wait for a dial tone 2 Enter the external number ...

Страница 32: ...ile the handset is in standby mode press Start 2 Listen for the dial tone 3 Press the number pad to enter the number Redialing a number To redial a number 1 While the handset is in standby mode press the Actv soft key 2 Press the Redl soft key A list of recently called numbers is displayed 3 Use the Nav keys to select the number you wish to redial 4 Press the Dial soft key Answering a call The han...

Страница 33: ...Press Enter to answer the call Muting the microphone To mute the microphone Your Mute functionality is enabled or disabled by your system administrator Contact your system administrator to determine if your Mute key is enabled If your Mute functionality is enabled press the Mute key to listen to the receiving party without transmitting Press the Mute key again to return to two way conversation Not...

Страница 34: ...g up a call Press End To return to the standby mode do this action at the end of each call Adjusting the speaker volume To adjust the speaker volume Press volume up down on the side of the handset during the call Changing the ring volume To change the ring volume Press volume up down on the side of the handset while the phone is ringing The default ring volumes are set in the User Profile menus ...

Страница 35: ...kr soft key and speak into the handset Note that this feature may not be activated at your facility Answering using the headset To answer using the headset Press any key other than End to answer a call when the headset is plugged in Adjusting the headset volume To adjust the headset volume Press volume up down on the side of the handset during the call Changing the user profile To change the user ...

Страница 36: ...ctories and press Enter 4 Navigate to the number you wish to call 5 Press the Dial soft key Displaying additional features To display additional features During a call press FCN to display additional features that are customized for your facility Turning on the backlight To turn on the backlight The backlight illuminates when any key is pressed or when there is an incoming call and stays on for 10...

Страница 37: ... highlight the number and then press Start to enter the number Personal Directory The Personal Directory in your Avaya 6120 and 6140 WLAN Handset can store up to 20 user defined numbers Open the Personal Directory list by selecting FCN from the inactive state and use the navigation keys You can add delete or edit an entry in the Personal Directory The Personal Directory list is sorted alphabetical...

Страница 38: ...40 WLAN Handset to assign up to 10 speed dial call keys to numbers in the Personal Directory From standby mode open the speed dial call list by selecting the Spdc soft key If programmed the first item on this list is the system wide speed dial call number set by the system administrator It is marked with a greater than symbol on the left side of the row It is usually reserved for emergency situati...

Страница 39: ...e Config Menu The handset cannot make or receive calls while in the Config Menu You can set your user preferences in the Config Menu Scroll through the menu options using the Nav keys When an asterisk appears to the left of an option it indicates that the option is selected Press Exit to return to standby mode Press Back to return to the previous menu Speed Dial Key 3 Choose a Number System Name N...

Страница 40: ...Silent Vibrate Loud Soft Custom Set as Active Ring Settings Noise Mode Ring in Headset Ring in Speaker Warning Tones Key Tones Push to talk Ring Cadence Ring Tone Ring Volume Vibrate Cadence Ring Delay continued on next page Telephone Message Alert 1 Message Alert 2 ...

Страница 41: ...Profiles Silent Vibrate Loud Soft Custom The currently active user profile is shown on the standby display While the handset is in standby mode you can change the ring behavior by pressing Prof and selecting a new profile from the list The currently active profile is marked with an asterisk ...

Страница 42: ...by repeatedly pressing the corresponding key until the desired letter is displayed on the screen Use CAPS to change the case as needed To edit during entry 1 Press Del to delete the character to the left of the entry 2 Press Clr to delete an entry 3 Enter the new data To edit an existing entry 1 Scroll using the Nav keys to move the cursor position Setting Profile Silent Vibrate Soft Loud Custom R...

Страница 43: ...y on the Avaya 6140 WLAN Handset In PTT mode the Avaya 6140 WLAN Handset can be used in a group broadcast mode in which the handsets operate like walkie talkies and in which a single handset can transmit to multiple listeners Table 3 Alphanumeric entries Key caps CAPS 1 1 2 2abc 2ABC 3 3def 3DEF 4 4ghi 4GHI 5 5jkl 5JKL 6 6mno 6MNO 7 7pqrs 7PQRS 8 8tuv 8TUV 9 9wxyz 9WXYZ 0 0 0 _ space ...

Страница 44: ... To select a different PTT channel 1 Press and release Push to talk 2 Select a new channel from the list by scrolling using Nav keys To end one PTT call and start another call 1 Press End to exit the PTT call 2 Press Push to talk and select a different channel from the list 3 Press Push to talk to begin to transmit on the new channel To receive a PTT call while in a telephone call 1 Press End to e...

Страница 45: ... answer a call during a PTT transmission Press Start The PTT transmission is preempted by the telephone call To start a telephone call during a PTT transmission 1 Press Start 2 Enter the number that you wish to call The PTT transmission is preempted during the telephone call To turn off PTT Change to a different profile Silent and Vibrate disable PTT by default or unsubscribe from all PTT channels...

Страница 46: ...urity Your handset is preprogrammed by the system administrator for the type of security you need For more information talk to your system administrator ATTENTION Do not change the security level through your handset ...

Страница 47: ...ed to have your hands free while talking To use the headset plug it into the jack on the bottom of the handset The headset is specifically designed for the Avaya 6120 and 6140 WLAN Handset When you receive a call using a headset the headset and the handset ring Use only authorized headsets with Avaya 6120 and 6140 WLAN Handset ...

Страница 48: ...48 The headset ...

Страница 49: ... profile calls in progress menu options and data from telephone The lower display area shows the soft key labels User Option menu When the Avaya 6120 and 6140 WLAN Handset are in standby mode power is on but the handset is not in use press the Cfg button to display the User Option menu This section describes the following standard User Option menu items Lock Keys Language Ring Options Phone Option...

Страница 50: ...languages you can select the display language from a list of supported languages If the Language setting is password protected you must enter a password SCPW to change the language If you enter an incorrect password an error message is displayed If you enter an incorrect password more than three times the password functionality is locked Contact your system administrator to unlock the password To ...

Страница 51: ... see the following note 2 Message Alert 1 reserved for future use Message Alert 2 reserved for future use Note 1 Ring Tone does not appear in the menu when Ring Cadence is off Note 2 Ring Delay does not appear in the menu when Ring Cadence or Vibrate Cadence is off To select Ring Cadence 1 While the handset is in standby mode select the Cfg soft key 2 Use the Nav keys to scroll to User Profiles 3 ...

Страница 52: ...e default Continuous Short Pulse Long Pulse 11 Press Enter to choose the cadence 12 Do one of the following Press Back to return to the previous menu and choose another option Press the End button to exit all menus and return to the standby state To select Ring Tone Ring Tone does not appear in the menu when Ring Cadence is off 1 While the handset is in the standby mode press the Cfg soft key 2 Us...

Страница 53: ...s to select Telephone Ring 9 Press Enter to select the option 10 Use the Nav keys to scroll through the menu and select Ring Tone 11 Press Enter to select the option 12 Use the Nav keys to scroll through the list and to highlight one of the following Tone 1 This is the default Tone 2 Tone 3 Tone 4 Tone 5 13 To play the highlighted setting press Play 14 Press Enter to choose the tone 15 Do one of t...

Страница 54: ...menu and highlight one of the settings an asterisk indicates the selected active setting 5 Press Enter to select the option 6 Use the Nav keys to scroll to Ring Setting 7 Press Enter to select the option 8 Use the Nav keys to select Ring Volume 9 Press Enter to select the option 10 Do one of the following Press the Back to return to the previous menu and choose another option Press the End button ...

Страница 55: ...se the Nav keys to scroll to Vibrate Cadence 7 Press Enter to select the option 8 Use the Nav keys to highlight one of the following Off This is the default PBX Continuous Short Pulse Long Pulse 9 Press Enter to choose the cadence 10 Do one of the following Press Back to return to the previous menu and choose another option Press the End button to exit all menus and return to the standby state To ...

Страница 56: ...select the option 6 Use the Nav keys to scroll to Ring Delay 7 Press Enter to select the option 8 Use the Nav keys to highlight one of the following No Delay This is the default 5 Second Delay 10 Second Delay 9 Press Enter to choose the delay 10 Do one of the following Press Back to return to the previous menu and choose another option Press the End button to exit all menus and return to the stand...

Страница 57: ...ayed when out of range or during power up and power down Display Contrast controls the amount of contrast for the display Keypad Autolock controls automatic locking of the keypad when the handset is in standby mode To select Noise Mode 1 While the handset is in standby mode press the Cfg soft key 2 Use the Nav keys to scroll through the menu and highlight Phone Options 3 Press Enter to select the ...

Страница 58: ...st of menu items and highlight User Profiles 3 Press Enter to select the setting 4 Use the Nav keys to scroll through the menu and highlight one of the following settings an asterisk indicates the selected setting Enable Tones This is the default Disable Tones 5 Press Enter to choose this setting 6 Navigate to enable disable key tones 7 Press Enter to toggle between Enable Disable 8 Do one of the ...

Страница 59: ...g settings an asterisk indicates the selected setting Enable Warnings This is the default Disable Warnings 7 Press Enter 8 Do one of the following Press Back to return to the previous menu and choose another option Press the End button to exit all menus and return to the standby state To change the display contrast 1 While the handset is in the standby state press the Cfg soft key 2 Use the Nav ke...

Страница 60: ...ode press the Cfg soft key 2 Use the Nav keys to scroll through the menu and highlight Phone Settings 3 Press Enter to select the setting 4 Use the Nav keys to scroll through the menu and highlight Keypad Autolock 5 Press Enter to select the setting 6 Use the Nav keys to scroll through the menu and highlight one of the following settings an asterisk indicates the selected setting Disable this is t...

Страница 61: ... cannot edit this information To view the handset IP address 1 While the handset is in the standby state press the Cfg soft key 2 Use the Nav keys to scroll through the menu and highlight System Information 3 Press Enter to select the setting 4 Use the Nav keys to scroll through the menu and highlight Phone IP Address 5 Press Enter to view the IP address 6 Do one of the following Press Back to ret...

Страница 62: ...To view the Firmware information 1 While the handset is in the standby state press the Cfg soft key 2 Use the Nav keys to scroll through the menu and highlight System Info 3 Press Enter to select the setting 4 Use the Nav keys to scroll through the menu and highlight FirmwareVersion 5 Press Enter to view the hardware identification number MAC address downloader version function file version and ph...

Страница 63: ...eturn to the previous menu and choose another option Press the End button to exit all menus and return to the standby state Setting up Push to talk Note The Push to talk feature is only available on the Avaya 6140 WLAN Handset Push to talk PTT mode enables two way radio communication with another handset user You can configure PTT by using the following Channel selects the channel to be used Enabl...

Страница 64: ... and return to the standby state To enable or disable Push to talk 1 While the handset is in the standby state press the Cfg soft key 2 Use the Nav keys to scroll through the menu and highlight User Profiles 3 Select the profile option The next menu level is displayed 4 Use the Nav keys to scroll through the menu and select Enable Disable Push to talk 5 Use the Nav keys to scroll through the menu ...

Страница 65: ...he menu and select Push to talk 3 Press Enter to select the profile option The next menu level is displayed 4 Use the Nav keys to scroll through the menu and highlight Push to talk Audio Volume 5 Press Enter to select the option 6 Use the Nav keys to adjust the volume up or down 7 Press Enter to select the setting 8 Do one of the following Press Back to return to the previous menu and choose anoth...

Страница 66: ...4 Use the Nav keys to scroll through the menu and highlight Tone Volume 5 Press Enter to select the option 6 Use the Nav keys to adjust the volume 7 Press Enter to select the setting 8 Do one of the following Press Back to return to the previous menu and choose another option Press the End button to exit all menus and return to the standby state ...

Страница 67: ...se features are supported by the system software and to configure them on your handset ATTENTION Access to the features and functions in the following sections are dependent on your system configuration Contact your system administrator to determine whether specific features are accessible through your Avaya 6120 and 6140 WLAN Handset ...

Страница 68: ...68 Call features ...

Страница 69: ...t is in standby mode press the End button 2 Press the Line button to view the first page of Autodial numbers 3 Press the Line button again to view the next page of Autodial numbers To store an Autodial number 1 Press the Line button to access the Feature Keys menu 2 Press a number one through six that corresponds to the desired location to store the number 3 Enter the telephone number including th...

Страница 70: ... Press the End button 2 Enter a number 3 If you hear a busy tone or there is no answer press the RngA soft key To call a RngA party when you receive notification 1 After you receive the visual notification press End 2 Press the RngA soft key to automatically call the number To quit RngA before notification Before you see the visual notification press the RngA soft key a second time Redial last num...

Страница 71: ...ers To store a Speed Call Spdc number 1 Press the End button 2 Press the Actv soft key 3 Press the Spdc soft key one through six corresponding to the Speed Call Controller feature The triangular icon flashes indicating programming mode 4 At the prompt enter a two digit code 01 99 and the telephone number This number can be internal external or long distance 5 Enter the access code if required ...

Страница 72: ... Speed Call 1 Press the End button 2 Select the Actv soft key 3 Select the speed dial number that you wish to call Make a System Speed Call Use the System Speed Call feature to enter Speed Call codes that override all restrictions on a call To make a System Speed Call 1 Press the Start button 2 Press the Spdc soft key 3 Select the system speed call number that you wish to call ...

Страница 73: ...all Redirection to the Conference Hotline Call Redirection redirects a Conference Hotline call so that it is answered only by one person To use Conference Hotline 1 Press Start 2 To access the Feature Keys menu press the Line button 3 Press the number key one through six that corresponds to the Conference Hotline feature to automatically enter the number ...

Страница 74: ...74 Making calls ...

Страница 75: ...old is enabled the active call is automatically placed on hold when you answer the second call To retrieve a call on hold 1 Press the Line button plus the line number of the call that you wish to retrieve to access the Feature Keys menu in the active off hook state 2 Press Enter Transfer a call Use the Transfer feature to redirect a call to the appropriate person To use the Transfer feature to dir...

Страница 76: ...nd to connect the call to the attendant To contact the attendant while on a call 1 Press the Line button to access the Feature Keys menu 2 Press the number key that corresponds to the Attendant Recall feature Stay on the line until the attendant answers 3 Press the End button The caller remains connected to the attendant ...

Страница 77: ...abled to automatically park calls on the system To park a call on a DN other than the System Park DN or your own DN 1 Select the Park soft key 2 Enter the seven digit DN where you want to park the call Note For more information on seven digit Directory Numbers DN contact your system administrator 3 Select the Park soft key again To retrieve a parked call 1 Select a free extension 2 Dial SPRE Speci...

Страница 78: ... call in progress To view the information on an incoming call while on a call in progress 1 Press the Line button to access the Feature Keys menu 2 Press the number that corresponds to the Display feature to activate the feature 3 Press the Line button to access the Feature Keys menu 4 Press the number key that corresponds to the flashing line The call waiting information displays Trace a maliciou...

Страница 79: ...stered DN Position ID call recording is initiated even though the ROD key is not pressed Using SAVE key Use the SAVE feature key to save the recording of an active call This key is associated with the active user ID and is operational only if a call is active The SAVE key is displayed in the following scenarios Normal operations If the SAVE key is pressed during an active call the call is saved CR...

Страница 80: ...80 While on an active call be saved then the lamp is lit 1 Press the ROD key during an active call 2 To stop the call recording press the ROD key again 3 Press the SAVE key to save the conversation ...

Страница 81: ... group 1 Press the Start button 2 Press Pickup To answer an incoming call in another Call Pickup group 1 Press the Start button 2 Press the Line button to access the Feature Keys menu 3 Press the number key that corresponds to the Group Pickup feature 4 Enter the pickup group number of the ringing handset To answer a call at a specific extension in any pickup group 1 Press the End button 2 Press t...

Страница 82: ...o display the Hold soft key Press the Hold soft key to place the current call on hold If Automatic Hold is enabled it is not necessary to put the current call on hold Begin with step two 2 Press the Line button to access the Feature Keys menu 3 Press the number key that corresponds to the Call Waiting feature To return to the first telephone call 1 Choose one of the following Select FCN to display...

Страница 83: ...ming calls 2 Press the Line button to access the Feature Keys menu 3 Press the number key that corresponds to the first call The first call that is on hold flashes so the number indicator for that line flashes ...

Страница 84: ...84 Incoming calls ...

Страница 85: ...e forwarded To forward your calls or change the forward number 1 Press the End button 2 Place the handset in the active idle state by pressing the Actv soft key 3 Press Fwrd 4 Enter the seven digit DN where you want to forward your calls Note For more information on seven digit Directory Numbers DN contact your system administrator 5 Press Fwrd a second time 6 Press the End button to turn off the ...

Страница 86: ...the seven digit DN to which your internal calls are to be forwarded Note For more information on seven digit Directory Numbers DN contact your system administrator 4 Press the Line button to access the Feature Keys menu 5 Press the number key that corresponds to the Internal Call Forward feature To quit Internal Call Forward 1 Press the Line button to access the Feature Keys menu 2 Press the numbe...

Страница 87: ...hat corresponds to the number of the caller that you want to connect to your current call 4 Press the Conference soft key a second time to add the person on hold to your conversation Set up a conference call Use the Conference feature to set up a conference call for three people or six people depending on your handset configuration including yourself To set up a conference call 1 While on a call p...

Страница 88: ...riginal call Use Conferee Selectable Display Use the Conferee Selectable Display feature to list active conferees and to disconnect a conferee from the conference call To view active conferees 1 While on a conference call press the Line button to access the Feature Keys menu 2 Press the number key that corresponds to the Conferee Selectable Display feature to turn on the LCD indicator Each key pre...

Страница 89: ...key that corresponds to the line on which the conference call is established 4 Choose one of the following For a single conferee press the End button If configured the Conference Count Display returns an updated total count of conferees The LCD indicator turns off For multiple conferees repeat steps one two and three until all the conferees are disconnected 5 Press the End button Use Group Call Us...

Страница 90: ...ey are not connected to your group call After everyone in the group answers only the party who made the group call can put the call on hold To answer a group call Press the End button About Notification tones If you are on a call and receive three 10 second tones this is the notification of a group call on your current exten sion If you are on a call on another line on your handset when a group ca...

Страница 91: ...oup call Press the End button When the party who made the group call disconnects the call terminates for all members of the group However the other members of the group call can disconnect from the call and not affect the members still on the call ...

Страница 92: ...92 Talk with more than one person ...

Страница 93: ... the Feature Keys menu 2 Scroll using the Nav keys and highlight the Make Set Busy feature a second time 3 Select Enter Call Deflect Use the Make Set Busy feature to make your handset appear busy to all callers If Call Deflect is configured on your Avaya 6120 and 6140 WLAN Handset you can press the press the Line key to access your Feature keys and then press the Deflect feature key to deflect you...

Страница 94: ...94 Work without interruption 1 If you press the Deflect key and no special call treatment has been configured your caller receives a busy signal ...

Страница 95: ...in active mode enter the Page Trunk Access Code to complete the connection to the page system 2 Make your announcement To disconnect Call Page 3 Press the End button Use Centrex Exchange Switchhook Flash Use the Centrex Exchange Switchhook Flash feature during an established call to use a Centrex service such as Call Transfer or Three Way Calling To use Centrex Exchange Line Switchhook Flash 1 Whi...

Страница 96: ...count before you dial 1 Select More 2 Select the Charge soft key 3 Enter the charge account number 4 Press the Charge soft key again 5 At the tone dial the number To charge a call in progress 1 Select the Transfer soft key or the Conference soft key The call is placed on hold 2 Press the Charge soft key 3 Enter the charge account number 4 Press the Line button to access the Feature Keys menu 5 Pre...

Страница 97: ...be transferred 6 Press the Transfer soft key when you hear the handset ring You can talk privately to the person at the transfer number before you press the Transfer soft key To charge a call to an account when you add someone to a conference call 1 Place the call on hold by pressing FCN and then pressing Hold 2 Press the More soft key until the Charge soft key is displayed 3 Press the Charge soft...

Страница 98: ...ime you hear an overflow fast busy engaged signal 3 Press the number key that corresponds to the Override feature again The two parties remaining on the call hear an override tone and a conference call is established between all three participants If a participant disconnects the other two remain connected To end the connection Press the End button Use Forced Camp on Use the Forced Camp on feature...

Страница 99: ...et automatically enters the number Both your handset and their handset rings To answer a call camped on to your extension When the handset rings press the Start button You can program your handset for either Camp on or Call Waiting but not both Use Privacy Release Use the Privacy Release feature to enable one or more people who share your DN to join a call To use Privacy Release 1 Press the Line b...

Страница 100: ...100 Other call features ...

Страница 101: ...ffice TPS The handset then registers with the Branch Office and receives services from the Branch Office When in Local Mode Local Mode displays on the handset Troubleshoot Branch Office When using Branch Office you can see error messages on your screen Table 4 lists error messages and corrective actions Table 4 Troubleshoot Branch Office Display Message Probable Cause Actions Local Mode Network pr...

Страница 102: ...102 Branch Office ...

Страница 103: ...ter the room Directory Number DN 4 Press the number key that corresponds to the Message Registration feature again To change a meter 1 Press the Line button to access the Feature Keys menu 2 Press the number key that corresponds to the Message Registration feature 3 Enter the room DN number 4 Enter the correct meter count 5 Press the key 6 Press the Line button to access the Feature Keys menu 7 Pr...

Страница 104: ...the information from the telephone in each room To enter cleaning status 1 Press the Line button to access the Feature Keys menu 2 Press the number key that corresponds to the Room Status feature 3 Enter the Directory Number DN for the room for which the cleaning status is being changed 4 Enter one of the following cleaning status codes The interrupted dial tone sounds 5 Press the key 6 Enter the ...

Страница 105: ... Line button to access the Feature Keys menu 2 Press the number key that corresponds to the Room Status feature 3 Enter the Directory Number DN for the room The DN displays followed by a two digit code The first digit indicates the occupancy status The second digit indicates the cleaning status of the room 4 Press the Line button to access the Feature Keys menu 0 Room vacant 1 Room occupied 1 Clea...

Страница 106: ...es the occupancy status The next digit indicates the cleaning status of the room 4 Enter the status code for the room A three digit code appears The first digit indicates the occupancy status the second the old cleaning status and the third the new status 5 Press the Line button to access the Feature Keys menu 6 Press the number key that corresponds to the Room Status feature 0 Room vacant 1 Room ...

Страница 107: ... temperature is an important deterioration factor for all types of batteries The cooler a battery is kept the slower it will deteriorate as long as its temperature remains above freezing Damaging changes can occur in some types of batteries below freezing so generally batteries should not be stored in a freezer or otherwise in freezing temperatures Low battery indicators The Battery Pack icon on t...

Страница 108: ...the battery pack into the handset Charging your handset To charge a battery pack You must charge the battery pack before its first use 1 Press End to terminate any calls The handset can be off or in standby state during charging 2 Place the handset face forward into the Desktop Charger An animated charge icon indicates that charging is in progress 3 Charge the battery pack If the handset is in sta...

Страница 109: ...109 Battery packs It is normal for the battery pack to become warm when charging 4 When the handset is fully charged Charge Complete is displayed Remove the handset from the charger ...

Страница 110: ...tandby mode or powered off mode Figure 5 The Avaya 6120 and 6140 WLAN Handset Desktop Charger Single Charger Charges one handset with an installed battery pack Dual Charger Charges the handset and a spare battery pack Quad Charger Charges up to four battery packs at one time ATTENTION Do not place anything in the Desktop Charger other than the Avaya 6120 and 6140 WLAN Handset Because you might dam...

Страница 111: ...played and the handset cannot receive calls It is normal for the battery pack to become warm when charging 4 When the handset is fully charged Charge Complete is displayed Remove the handset from the charger Cleaning the Desktop Charger Clean the Desktop Charger by wiping the surface with a plain water dampened cloth or paper towel A mild detergent solution can be used Be sure to wipe away any det...

Страница 112: ...the original plug in power adapter for the Desktop Charger Do not dip the battery pack in water or throw into a fire Do not dispose of the battery pack with your domestic waste Take used battery packs to an appropriate collection point for recycling or send them back to your supplier or servicing agent Replacement battery packs are available from your supplier or servicing agent ...

Страница 113: ...iate power supply for the site Place the Dual Charger on a flat horizontal surface Plug the power supply into the Dual Charger and into an appropriate wall outlet The handset and spare battery cannot charge simultaneously If both require charging the handset has priority and recharges first After the handset is fully charged the spare battery is charged ATTENTION Do not place anything in the Dual ...

Страница 114: ...al for the battery pack to become warm when charging 3 When the handset is fully charged Charge Complete is displayed Remove the handset from the charger The battery pack starts to charge The LED indicates the status of the Battery Pack in the rear bay The handset displays its charging status as described for the Single Charger When the handset is fully charged or is removed the Battery Pack begin...

Страница 115: ...MPORTANT Always use the Desktop Charger provided to charge the battery pack Other chargers can damage the battery pack Only use the original plug in power adapter for the Desktop Charger Do not dip the battery pack in water or throw into a fire Do not dispose of the battery pack with your domestic waste Take used battery packs to an appropriate collection point for recycling or send them back to y...

Страница 116: ... above the occupied bay indicates the charging status of the battery pack in the bay Figure 7 The Avaya 6120 and 6140 WLAN Handset Quad Charger The Quad Charger includes the appropriate power supply for the site Place the Quad Charger on a flat horizontal surface Plug the power supply into the Quad Charger and into an appropriate wall outlet Using the Quad Charger To charge a battery pack 1 Insert...

Страница 117: ...inistrator for service information 2 When charging is complete the LED turns off Remove the battery pack from the charger Cleaning the Quad Charger Clean the Quad Charger by wiping the surface with a plain water dampened cloth or paper towel A mild detergent solution can be used Be sure to wipe away any detergent residue with a plain water dampened cloth You can clean the battery pack contacts on ...

Страница 118: ...e original plug in power adapter for the Quad Charger Do not dip the battery pack in water or throw into a fire Do not dispose of the battery pack with your domestic waste Take used battery packs to an appropriate collection point for recycling or send them back to your supplier or servicing agent Replacement battery packs are available from your supplier or servicing agent ...

Страница 119: ...e battery pack for the Avaya 6120 and 6140 WLAN Handset and a spare battery pack DNS Domain Name System DNS an industry standard protocol locates computers on an IP based network Directory Number DN A number consisting of one to seven digits for a handset This number is also known as an extension number Dual Charger The Dual Charger is used to recharge the battery pack for the Avaya 6120 and 6140 ...

Страница 120: ... feature You hear two beeps followed by dial tone Primary Directory Number The main extension number on your handset It is also called the Primary Directory Number PDN key Private Line You can assign the Private Line feature to your handset With this line you can reach an outside number without dialing a code to access an outside line Internal extensions cannot be dialed from a private line Quad C...

Страница 121: ...followed by a dial tone that you hear when you access handset features Status Messages A message displayed to inform the user of important information A right arrow appears if more than one Status Message is present Examples of Status Messages include Message Waiting All Lines Forwarded to 6453 Do Not Disturb On Ring Again active Ringer is OFF and Line x Unavailable System or switch Your office co...

Страница 122: ...122 Terms you should know ...

Страница 123: ... Charge the Wireless Handset 109 112 Clean the Desktop Charger 109 Clean the Dual Charger 112 Clean the Quad Charger 115 Clean the Wireless Handset 29 Conferee Selectable Display 86 Conference call 85 Conference Hotline 73 D Desktop Charger 108 109 117 Directory Number 117 Display incoming calls 78 DN 117 Dual Charger 111 112 117 E Enhanced Override 95 Extension 62 F Feature display 117 Feature Ke...

Страница 124: ... Release 97 Private Line 118 Push to Talk 38 63 Q Quad Charger 114 118 R Record a Caller s Number 77 Redial last number called 70 Remove the battery pack 106 Ring Again 70 Ring Type 51 Room Status 103 S Secondary Directory Number 119 Security 46 Shared Directory Numbers 119 Soft key 23 Soft keys 119 speakerphone 24 Special dial tone 119 Speed Call 71 System 72 Standby state 25 Standby time 105 Sta...

Страница 125: ...125 Index V Volume Ring 42 ...

Страница 126: ...126 Index ...

Отзывы: