background image

14 


HOW TO USE THE TOP BURNERS 


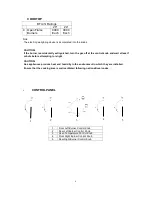
GAS BURNERS 

Gas flow to the burners is adjusted by turning the knobs which control the valves. Turning 

the knob so that the indicator line points to the symbols printed on the panel achieves the 

following functions:                   

When knob is rotated to the maximum position it will permit the rapid boiling of liquids, 

whereas the minimum position allows the simmer warming of food or maintaining boiling 

conditions of liquids. 


To reduce the gas flow to minimum, rotate the knob further counter-clockwise to point the 

Lo


position.  

Other intermediate operating adjustments can be achieved by positioning the indicator 

between the 

HI


flame

 and

 Low flame

 positions, and never between the

 HI flame

 and 

OFF 

positions. 

When the range is not being used, set the gas knobs to their 

OFF

 positions and also close 

the gas shut-off valve placed on the main gas supply line. 


LIGHTING GAS BURNERS  

In order to light the burner, you must:


1 – Push and turn the knob in a counterclockwise direction up to the 

 HI flame

 position 

(maximum rate), push in and hold the knob until the flame has been lit. The sparks produced 

by the internal igniter will light the designated burner. 

In the event that the local gas supply conditions make it difficult to light the burner in the 

HI 

flame

 position, try again with the knob in 

Low flame

 position. 

2 – Adjust the gas valve to the desired position. 


To re-light the burner, return the knob to the 

OFF

 position and repeat the operations for 

lighting. 

Caution! The range becomes very hot during operation.  Keep children well 
out of reach. 

Содержание GR2011CW

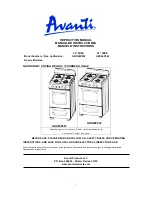
Страница 1: ...FETY RULES AND OPERATING INSTRUCTIONS AND SAVE FOR LOCAL GAS AND ELECTRICAL INSPECTOR S USE Avanti Products has a policy of continuous improvement on its products and reserves the right to change materials and specifications without notice Avanti Products LLC P O Box 520604 Miami Florida 33152 www avantiproducts com GRO20P0W GRO24P0W Actual design color may vary Diseño color real puede variar Conc...

Страница 2: ...nge 9 10 Important Precautions and Recommendations 11 13 How to use the top burners 14 How to use the Gas oven 15 Care and Maintenance 20 22 Troubleshooting Guide 23 24 Service for Your Appliance 24 Your Avanti Products Warranty 25 Instrucciones en Español 26 45 Instructions en Français 46 69 Registration Information and Registration Card Last Page ...

Страница 3: ...l codes or in the absence of local codes with the National Fuel Gas Code ANSI Z223 1 NFPA 54 latest edition In Canada installation code CAN CGA B149 1 or the current Propane installation code CAN CGA B149 2 and with local codes where applicable Installation in Manufacturered Mobile Homes The installation must conform with the Manufactured Home Construction and Safety standard Title 24 CFR Part 328...

Страница 4: ...nd free from combustible materials gasoline and other flammable vapors Do not obstruct the flow of ventilation air Disconnect the electrical supply to the appliance before servicing When removing appliance for cleaning and or service Disconnect AC power supply Carefully remove the range by pulling outward CAUTION Range is heavy Use care in handling The misuse of oven door e g stepping sitting or l...

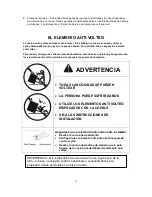
Страница 5: ...ce the appliance must be secured by properly installed anti tip devices packed with the appliance WARNING ALL RANGES CAN TIP INJURY TO PERSON COULD RESULT INSTALL ANTI TIP DEVICE PACKED WITH RANGE SEE INSTALLATION INSTRUCTIONS Range Foot Anti tip Bracket Making sure the anti tip bracket is installed Slide range forward Look for the anti tip bracket securely attached to floor Slide range back so re...

Страница 6: ..._____________ Serial Number Use these numbers in any correspondence or service calls concerning your Gas Range If you received a damaged Gas Range immediately contact the dealer or builder that sold you the Gas Range Save time and money Before you call for service check the Troubleshooting Guide It lists causes of minor operating problems that you can correct yourself IF YOU NEED SERVICE We re pro...

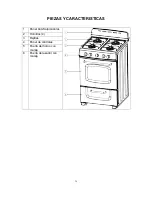
Страница 7: ...7 PARTS FEATURES 1 Backsplash 2 Open Burners Total 4 3 Pan Racks 4 Control Panel 5 Oven Door with Handle 6 Broiler Door with Handle ...

Страница 8: ... Right Burner Control Knob Note The electric gas lighting device is incorporated into the knobs CAUTION If the burner is accidentally extinguished turn the gas off at the control knob and wait at least 1 minute before attempting to relight CAUTION Gas appliances produce heat and humidity in the environment in which they are installed Ensure that the cooking area is well ventilated following nation...

Страница 9: ...n Manual Clean the interior surface with lukewarm water using a soft cloth Have the installer show you the location of the range s gas shut off valve and how to shut it off if necessary Have your range installed and properly grounded by a qualified installer in accordance with the installation instructions Do not attempt to repair or replace any part of your range unless it is specifically recomme...

Страница 10: ...regulations It is advised to follow these instructions Clean the interior of the oven with a clean cloth soaked in water and mild detergent then dry carefully Furnish the interior of the oven by inserting the shelves and tray Turn the oven on to the maximum temperature to burn off or eliminate any possible traces of grease from the oven broiler burner NOTE This appliance can be used with LP gas an...

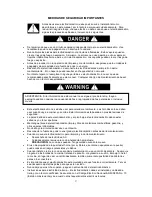
Страница 11: ...se of the range certain parts will become very hot Do not touch hot parts Keep children away from the range when it is in use Fire risk Do not store flammable material in the oven or in the broiler drawer Make sure that electrical cables connecting other appliances in the proximity of the range cannot come into contact with the hob or become entrapped in the oven door Do not line the oven walls to...

Страница 12: ...ion air 5 Disconnect the electrical supply to the appliance before servicing 6 When removing appliance for cleaning and or service A Shut off gas at main supply B Disconnect AC power supply C Disconnect gas line to the inlet pipe D Carefully remove the range by pulling outward CAUTION Range is heavy use care in handling 7 The misuse of oven door e g stepping sitting or leaning on them can result i...

Страница 13: ...ts may be used in performing service on the range Replacement parts are available from factory authorized parts distributors Contact the nearest AVANTI parts distributor in your area CARBON MONOXIDE WARNING Carbon Monoxide is a possible danger when using any gas powered appliance All gas appliances MUST be installed by a licensed professional who is familiar with the Carbon Monoxide levels appropr...

Страница 14: ... and never between the HI flame and OFF positions When the range is not being used set the gas knobs to their OFF positions and also close the gas shut off valve placed on the main gas supply line LIGHTING GAS BURNERS In order to light the burner you must 1 Push and turn the knob in a counterclockwise direction up to the HI flame position maximum rate push in and hold the knob until the flame has ...

Страница 15: ...r Oven burner mounted on the lower part of the oven Broil burner mounted on the upper part of the broiler drawer USING THE OVEN FOR THE FIRST TIME It is advised to follow these instructions Insert shelves and broiler grid and tray Turn the oven on to the maximum temperature position 500F to burn off and eliminate possible traces of grease from the oven burner Unplug the power cord let the oven coo...

Страница 16: ...ERMOSTAT The numbers printed on the control panel indicate the increasing oven temperature value F To regulate the temperature set the chosen number onto the control knob indicator The position BROIL serves only to turn on the broil burner NOTE When the range will not be used for long periods of time set the gas knobs to their OFF positions and also close the gas shut off valve placed on the main ...

Страница 17: ...nually light the burner by pressing the knob inward and immediately approach a lighted match to the opening A see the diagram above Never continue this operation for more than 15 seconds If the burner has still not ignited wait for about 1 minute prior to repeating the ignition 4 When using the range for the first time or after long period of non usage keep pressing the knob inward for approximate...

Страница 18: ...ise Hold the knob pressed inward until the oven burner is lit Once the oven burner is lit release the knob In case of power outage you can manually light the burner by pressing the knob inward and immediately approach a lighted match to the area A see the diagram above Never continue this operation for more than 15 seconds If the burner has still not ignited wait for about 1 minute prior to repeat...

Страница 19: ...iling pan should be placed above the shelf and it should be centered with the broil burner WARNING WARNING VERY IMPORTANT NOTICE Never obstruct the oven vent slots on the backsplash Do not broil without using the broiling pan Important Use always suitable protective gloves when inserting removing the broiling pan shelves pans on other cooking utensils from the oven Attention the range becomes very...

Страница 20: ... temperature eliminates most grime reducing it to ashes ENAMELED PARTS All the enameled parts must be cleaned with a sponge and soapy water only or other non abrasive products Dry preferably with a chamois leather If acid substances such as lemon juice tomato conserve vinegar etc are left on the enamel for a long time they will etch it making it opaque INSIDE OF OVEN This must be cleaned regularly...

Страница 21: ...the full extends Lift the left and right hooks on the hinge Hold the door as shown in the figure Gently close the door and lift the door with two hands when the hooks touch the door Set the door on a soft flat surface To replace the door repeat the above steps in reverse order The oven racks are provided with a safety catch to prevent accidental extraction They must be inserted as shown To pull th...

Страница 22: ...TION To reduce the risk of tipping the range by abnormal usage or improper door loading the range must be secured by properly installing the anti tip device packed with the appliance Place the anti tip bracket on the floor as shown figure Anti tip bracket can be installed on either right or left side Make the locations of 2 holes of ant tip bracket on the floor Use a 5 16 masonry drill bit and ins...

Страница 23: ...llation manual Flame is orange Dust particles in main line Allow burner to operate for a few minutes until flame turns blue Range is not set for appropriate gas input See range conversion section of installation manual Oven or broiler does not heat Range is not set for appropriate gas input See range conversion section of installation manual Temperature control not set properly Make sure temperatu...

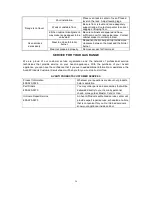
Страница 24: ... are proud of our customer service organization and the network of professional service technicians that provide service on your Avanti appliances With the purchase of your Avanti appliance you can have the confidence that if you ever need additional information or assistance the Avanti Products Customer Service team will be here for you Just call us toll free AVANTI PRODUCTS CUSTOMER SERVICES Pro...

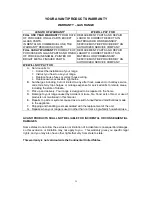
Страница 25: ...harges including but not limited to any after hour weekend or holiday service calls tolls ferry trip charges or mileage expense for serviced calls to remote areas including the state of Alaska C Pick up and delivery Your range is designed to be repaired in the home D Damage to your range caused by accident misuse fire flood acts of God or use of products not mentioned in this manual E Repairs to p...

Страница 26: ...CES La instalación de esta estufa debe cumplir con todos los códigos locales o en ausencia de códigos locales con el Código Nacional de Gas Combustible ANSI Z223 1 NFPA 54 última edición En Canadá el código de instalación CAN CGA B149 1 o el código de instalación de gas propano actual CAN CGA B149 2 y con los códigos locales de su estado Instalación Manufacturered Homes móviles en La instalación d...

Страница 27: ... de este electrodoméstico y el piso bajo este electrodoméstico deben estar sellados y no tener aperturas Mantenga el área del electrodoméstico limpia y libre de materiales combustibles gasolina y otros vapores inflamables No obstruya la circulación del aire o ventilación Desconecte la fuente de poder o energía del electrodoméstico antes de darle mantenimiento Cuando mueva el electrodoméstico para ...

Страница 28: ... este debe ser instalado y asegurado con los elementos anti volteo incluídos en el paquete de su electrodoméstico ADVERTENCIA TODAS LAS COCINAS SE PUEDEN VOLTEAR LA PERSONA PUEDE SUFRIR DAÑOS UTILICE LOS ELEMENTOS ANTI VOLTEO EMPACADOS CON LA COCINA SIGA LAS INSTRUCCIONES DE INSTALACION Asegúrese que el elemento anti volteo esté instalado Deslice la cocina hacia adelante Verifique que el elemento ...

Страница 29: ...29 PIEZAS Y CARACTERISTICAS 1 Panel Anti Salpicaduras 2 Hornillas 4 3 Rejillas 4 Panel de controles 5 Puerta del horno con manija 6 Puerta del asador con manija ...

Страница 30: ...cia 9000 btu cada una Nota El elemento para encender el gas está incorporado a las perillas PRECAUCION Si la hornilla se apaga por accidente gire la perilla apagando el gas Espere por lo menos un minuto antes de tratar de encenderla otra vez PRECAUCION Los electrodomésticos de gas producen calor y humedad en el ambiente en el cual son instalados Asegúrese que el área donde se cocina esté bien vent...

Страница 31: ... esté correctamente ajustada por un técnico instalador calificado de acuerdo al tipo de gas natural o LP que se use No retire las etiquetas permanentes advertencias o placas de la cocina Esto puede eliminar la garantía El técnico instalador debe dejarle estas instrucciones a ud por favor reténgalas para uso futuro y para uso del inspector local Por favor siga todos los códigos de seguridad y orden...

Страница 32: ...ar la cocina algunas partes quedan muy calientes No las toque Mantenga a los niños lejos de la cocina cuando la esté usando Riesgo de fuego No almacene material inflamable dentro del horno o en la gaveta inferior Asegúrese que los cables eléctricos de otros electrodomésticos cercanos no estén en contacto con la cocina la placa o que se puedan enredar con la puerta del horno o quedar atrapados dent...

Страница 33: ...ico descalzo No permita que los niños o personas incapacitadas usen el electrodoméstico sin su supervisión El fabricante declina cualquier responsabilidad de daño a personas o propiedad causado por el uso inapropiado o incorrecto del electrodoméstico Este aparato se puede utilizar con gas LP y gas NG Se sale de fábrica ajustado para su uso con gas natural gas natural Orificios de conversión se inc...

Страница 34: ...ropiado de la puerta del horno por ej Pararse sentarse o apoyarse en ella puede resultar en riesgos potenciales y o daños 8 Cuando instale o retire la cocina para darle mantenimiento use un carrito deslizante No empuje ninguno de los bordes de la cocina tratando de sacarla o regresarla a su sitio Empujar o halar la cocina en lugar de usar un carrito deslizante también aumenta la posibilidad de dob...

Страница 35: ... posible cuando use cualquier electrodoméstico de gas Todos los electrodomésticos de gas DEBEN ser instalados por un instalador profesional licenciado que este familiarizado con los niveles apropiados de Monóxido de Carbón para cada electrodoméstico La Asociación Americana de Gas publica las emisiones de CO para electrodomésticos y equipos de calefacción a través del ANSI Std Z21 1 La Agencia de P...

Страница 36: ...F Cuando la cocina no esté siendo usada ajuste las perillas a la posición OFF y también cierre la válvula general del cierre de gas localizada en la línea de entrada de gas principal ENCENDIENDO LAS HORNILLAS DE GAS Para encender las hornillas ud debe 1 Girar la perilla en sentido contra horario hasta la posición HI máxima presione la perilla al mismo tiempo y manténgala presionada hasta que la ll...

Страница 37: ...MERA VEZ Se recomienda seguir estas instrucciones Inserte las rejillas y la bandeja Encienda el horno a la temperatura máxima posición 500 para quemar y eliminar posibles rastros de grasa en el Calentadores Siga la misma operación para el CALENTADOR del horno y para el de la parrilla perilla en posición BROIL Deje que el horno enfríe y limpie el interior del horno con un trapito mojado con agua y ...

Страница 38: ...rol indican la temperatura creciente del horno en grados F Para regular la temperatura gire la perilla hasta que el indicador apunte al grado de temperatura elegido La posición BROIL sirve solamente para encender el Calentador en el área de la parrilla N B Cuando la cocina no se utilizará por largos tiempos las perillas del panel de control deben estar en la posición OFF y también debe cerrar la v...

Страница 39: ...orno se encienda En caso que falte la electricidad presione la perilla e inmediatamente acerque un fósforo encendido a la apertura A Nunca continúe esta operación por más de 15 segundos Si el calentador aún no ha encendido espere 1 minuto antes de repetir el encendido 4 Cuando use el horno por primera vez o después de un largo período sin uso espere 10 15 segundos después que encienda el calentado...

Страница 40: ...resionando la perilla hasta que el calentador de la parrilla esté encendido En caso que se apague presione la perilla e inmediatamente acerque un fósforo encendido a la apertura A Nunca continúe esta operación por más de 15 segundos Si el calentador aún no ha encendido espere 1 minuto antes de repetir el encendido 4 Cuando use el horno por primera vez o después de un largo periodo sin uso espere 1...

Страница 41: ...rejilla y debe estar centrada en línea con el calentador de la parrilla ADVERTENCIA ADVERTENCIA NOTA MUY IMPORTANTE Nunca obstruya las aperturas de ventilación del panel anti salpicaduras No use la parrilla sin la bandeja de cocción Importante Siempre use guantes protectores apropiados cuando inserte o remueva la bandeja de parrilla rejillas ollas cacerolas u otros utensilios de cocina en el horno...

Страница 42: ...e cloro o ácida El horno siempre debe ser limpiado después de cada uso usando productos apropiados y teniendo en cuenta que operar la cocina por 30 minutos a la temperatura máxima elimina la mugre reduciéndola a cenizas PARTES ESMALTADAS Todas las partes esmaltadas deben ser limpiadas con una esponja y agua jabonosa solamente o con otros productos no abrasivos De preferencia seque con una gamusa S...

Страница 43: ...ornillas y las tapitas distribuidoras de la llama y colóquelas nuevamente en su sitio Es muy importante verificar que la tapita distribuidora de llama sea colocada correctamente de lo contrario podría causar serios problemas En electrodomésticos con encendido eléctrico mantenga el electrodo limpio para que las chispas siempre salgan Nota Para evitar daño al sistema de encendido eléctrico no lo use...

Страница 44: ...dos manos cuando los ganchos toquen la puerta Saque los ganchos superiores de las bisagras Coloque la puerta en una superficie suave y plana Para colocar la puerta nuevamente repita estos mismos pasos pero en orden reverso NIVELANDO LA COCINA La cocina debe estar nivelada para que funcione correctamente Las cuatro patas niveladoras con tornillos ajustables que están en las esquinas inferiores de l...

Страница 45: ...de plástico Asegure el elemento anti volteo al piso usando los tornillos incluídos en el paquete Deslice el electrodoméstico para encajarlo con el elemento anti volteo NOTA Si la cocina luego es movida de sitio el elemento debe ser removido e instalado en el nuevo lugar designado para la cocina Instale el elemento anti volteo en el lado izquierdo o derecho cerca de la parte posterior del electrodo...

Страница 46: ...on de cette cuisinière doit être conforme à tous les codes locaux ou en l absence de codes locaux avec le Code National Fuel Gas ANSI Z223 1 NFPA 54 dernière édition Au Canada le code d installation CAN CGA B149 1 ou le code actuel d installation du propane CAN CGA B149 2 et aux codes locaux le cas échéant Installation dans manufacturered Mobile Homes L installation doit être conforme à la constru...

Страница 47: ...combustibles essence et autres vapeurs inflammables Ne pas obstruer le flux d air de ventilation Débranchez l alimentation électrique de l appareil avant l entretien Lors du retrait de l appareil pour le nettoyage et ou d un service Débranchez l alimentation secteur Retirez délicatement la gamme en tirant vers l extérieur MISE EN GARDE Le gamme est lourd Faites attention à la manipulation L utilis...

Страница 48: ...xé par des dispositifs installés correctement anti renversement inclus avec l appareil AVERTISSEMENT TOUS les cuisinières peuvent basculer ATTEINTES AUX PERSONNES PEUT PROVOQUER INSTALLER DISPOSITIF ANTI TIP EMBALLÉE AVEC GAMME Voir notice de montage Range Foot Anti tip Bracket Faire en sorte que le support anti basculement est installé La faire glisser vers l avant Vérifier que la bride antibascu...

Страница 49: ...ez ces numéros dans toute correspondance ou services appels concernant votre gamme de gaz Si vous avez reçu une cuisinière à gaz endommagé contactez immédiatement le revendeur ou le constructeur qui a vendu l vous Gaz Gamme Gagnez du temps et de l argent Avant d appeler le service consultez le Guide de dépannage Il répertorie les causes des problèmes de fonctionnement mineurs que vous pouvez vous ...

Страница 50: ...50 PIÈCES ET CARACTÉRISTIQUES 1 Dosseret 2 Feux ouverts Total 4 3 Pan Racks 4 Panneau de contrôle 5 Porte du four avec poignée 6 Poulet de chair porte avec poignée ...

Страница 51: ...ère droit Brûleur bouton de commande Note Le Dispositif gaz éclairage électrique est incorporé dans les boutons MISE EN GARDE Si le brûleur est accidentellement éteint coupez le gaz au bouton de commande et attendez au moins 1 minute avant de tenter de rallumer MISE EN GARDE Les appareils à gaz produisent de la chaleur et de l humidité dans l environnement dans lequel ils sont installés Assurez vo...

Страница 52: ...ttoyer la surface intérieure à l eau tiède avec un chiffon doux Avoir l installateur de vous montrer l emplacement de la vanne d arrêt de gaz de la gamme et la façon de l éteindre si nécessaire Demandez à votre gamme installé et correctement mis à la terre par un installateur qualifié en conformité avec les instructions d installation Ne pas tenter de réparer ou de remplacer une partie de votre ga...

Страница 53: ...est conseillé de suivre ces instructions Nettoyez l intérieur du four avec un chiffon propre imbibé d eau et de détergent doux puis sécher soigneusement Fournir à l intérieur du four par l insertion les étagères et bac Allumez le four à la température maximale de brûler ou éliminer les éventuelles traces de graisse du brûleur du four gril NOTE Cet appareil peut être utilisé avec du gaz propane et ...

Страница 54: ...ignez les enfants de la plage quand il est en cours d utilisation Le risque d incendie Ne stockez pas de matériaux inflammables dans le four ou dans le tiroir gril Assurez vous que les câbles électriques reliant d autres appareils à proximité de la plage ne peuvent pas entrer en contact avec la table de cuisson ou de rester coincé dans la porte du four Ne pas aligner les parois du four haut et en ...

Страница 55: ...tion électrique de l appareil avant l entretien 6 Lors du retrait de l appareil pour le nettoyage et ou d un service A Fermez le gaz à l alimentation principale Alimentation B Déconnecter AC C Débranchez la conduite de gaz à la conduite d entrée D Retirez délicatement la gamme en tirant vers l extérieur MISE EN GARDE Le gamme est lourde utilisez des soins dans la manipulation 7 L utilisation abusi...

Страница 56: ...E Des pièces de rechange autorisées peuvent être utilisées dans l exécution de service sur le cuisinière à gaz Les pièces de rechange sont disponibles auprès des distributeurs de pièces autorisé Contactez le distributeur de pièces AVANTI plus proche dans votre région MONOXYDE DE CARBONE AVERTISSEMENT Le monoxyde de carbone est un danger possible lors de l utilisation de tout appareil alimenté au g...

Страница 57: ...mme et LO positions Lorsque la plage est pas utilisé placer le bouton de gaz à leur LO positions et fermer aussi le gaz vanne d arrêt placé sur la ligne d alimentation de gaz principale FEUX DE GAZ D ÉCLAIRAGE Pour allumer le brûleur vous devez 1 Pousser et tourner le bouton dans le sens antihoraire jusqu à la HI flamme position taux maximum appuyez et maintenez le bouton jusqu à ce que la flamme ...

Страница 58: ...ur gril monté sur la partie supérieure du tiroir gril UTILISATION DU FOUR POUR LA PREMIÈRE FOIS Il est conseillé de suivre ces instructions Insérez des étagères et des poulets de chair grille et bac Faire tourner le four à la position de température maximum 500F Pour brûler et d éliminer d éventuelles traces de graisse de le brûleur du four Débranchez le cordon d alimentation Laissez refroidir le ...

Страница 59: ...rimés sur le panneau de commande indique la valeur de la température du four croissante F Pour réguler la température réglez le nombre choisi sur l indicateur de bouton de commande La position BROIL ne sert qu à allumer le brûleur du gril NOTE Lorsque la plage ne sera pas utilisé pendant de longues périodes de temps placer le bouton de gaz à leurs positions et fermer également la vanne de gaz d ar...

Страница 60: ...pouvez manuellement allumer le brûleur en appuyant sur le bouton vers l intérieur et aborder immédiatement une allumette à l ouverture A voir le schéma ci dessus Jamais continuer cette opération pour plus de 15 secondes Si le brûleur n a toujours pas pris feu attendre environ 1 minute avant de répéter l allumage 4 Lors de l utilisation de la gamme pour la première fois ou après une longue période ...

Страница 61: ...intérieur jusqu à le brûleur du four est allumé Une fois le brûleur du four est allumé relâchez le bouton En cas de panne de courant vous pouvez allumer manuellement le brûleur en appuyant sur le bouton vers l intérieur et aborder immédiatement une allumette à la région A voir le schéma ci dessus Jamais continuer cette opération pour plus de 15 secondes Si le brûleur n a toujours pas pris feu atte...

Страница 62: ...u dessus du plateau et il doit être centré avec le brûleur du gril AVERTISSEMENT Avertissement TRÈS IMPORTANT Ne jamais obstruer les fentes d aération du four sur le dosseret Ne pas griller sans utiliser la lèchefrite Important Utilisez toujours adaptés des gants de protection lors de l insertion retrait de la griller de la viande des étagères des casseroles sur d autres ustensiles de cuisine du f...

Страница 63: ... plupart crasse réduisant en cendres appropriés PIÈCES émaillé Toutes les pièces émaillées doivent être nettoyés avec une éponge et de l eau savonneuse ou d autres produits non abrasifs Séchez de préférence avec une peau de chamois Si des substances acides comme le jus de citron tomates confites vinaigre etc sont laissées sur l émail pendant longtemps ils vont graver ce qui rend opaque INTÉRIEUR D...

Страница 64: ... étend Soulevez les crochets gauche et à droite sur la charnière Tenir la porte comme indiqué dans la figure Fermez doucement la porte et soulever la porte à deux mains lorsque les crochets touchent la porte Réglez la porte sur une surface plate et douce Pour remplacer la porte répéter les étapes ci dessus dans l ordre inverse Les grilles sont munies d un loquet de sécurité pour empêcher l extract...

Страница 65: ...basculement de la plage par une utilisation anormale ou abusive chargement de la porte la plage doit être assuré par l installation correctement le dispositif anti renversement inclus avec l appareil Placez le support anti renversement sur le sol comme le montre la figure Anti tip support peut être installé sur chaque côté gauche ou droit Faire les emplacements des trous de 2 ant pointe support su...

Страница 66: ...igneusement les instructions section de gamme de nettoyage dans Range est pas défini pour l entrée de gaz approprié Voir la section de conversion de gamme de manuel d installation La flamme est orange Les particules de poussière dans la conduite principale Laissez le brûleur fonctionner pendant quelques minutes jusqu à ce que la flamme devienne bleue Range est pas défini pour l entrée de gaz appro...

Страница 67: ... fournir plus d espace entre la viande et le brûleur du gril Viande pas correctement préparée Enlever l excès de gras de la viande SERVICE POUR VOTRE GAZ Nous sommes fiers de notre organisation de service à la clientèle et le réseau de techniciens de services professionnels qui offrent des services sur vos appareils Avanti Avec l achat de votre appareil Avanti vous pouvez avoir la certitude que si...

Страница 68: ...s s y limiter toute après heure les appels week end ou de services de vacances les péages les frais de voyage de convoyage ou les frais de kilométrage pour les appels desservis dans les régions éloignées y compris l état de l Alaska J Ramassage et livraison Votre gamme est conçu pour être réparé à domicile K Dommages à votre gamme causée par un accident incendie inondation actes de Dieu ou l utili...

Страница 69: ...ur future needs detach here Avanti Registration Card Name Model Serial Address Date Purchased Store Dealer Name City State Zip E mail Address Area Code Phone Number Occupation Did You Purchase An Additional Warranty As your Primary Residence Do You Extended Own Rent None Your Age Reason for Choosing This Avanti Product Please indicate the most important factors That influenced your decision to pur...

Страница 70: ...70 PRINTED IN CHINA GRO20P0W GRO24P0W 04062016 ...

Отзывы: