background image

User’s  Manual   

EAX-Q170P 

User’s  Manual   


59 

Primary Display 

Auto

[Default]


IGFX 

PEG 

PCIE 

Select which of IGFX/PEG/PCI Graphics 

device should be Primary Display Or 

select SG for Switchable Gfx. 

Internal Graphics 

Auto

 [Default]


Disabled 

Enabled 

Keep IGFX enabled based on the setup 

options. 


3.6.3.1.2   DMI/OPI Configuration   


3.6.3.1.3   PEG Port Configuration   


Содержание EAX-Q170P

Страница 1: ...Part No E2047AQ1701R EAX Q170P Intel Core Processors with Intel Q170 ATX Motherboard User s Manual 2nd Ed 17 August 2017...

Страница 2: ...E USER WILL BE REQUIRED TO CORRECT THE INTERFERENCE AT HIS OWN EXPENSE Notice This guide is designed for experienced users to setup the system within the shortest time For detailed information please...

Страница 3: ...bly expected to cause the failure of the life support device or system or to affect its safety or effectiveness A Message to the Customer Avalue Customer Services Each and every Avalue s product is bu...

Страница 4: ...acement materials service time and freight Please consult your dealer for more details If you think you have a defective product follow these steps 1 Collect all the information about the problem enco...

Страница 5: ...2A 21 2 3 6 COM2 RS485 422 connector JCOM2B 21 2 3 7 Serial port 3 4 5 6 connector JCOM3 4 5 6 22 2 3 8 General purpose I O connector JDIO1 22 2 3 9 SGPIO connector JSGPIO1 23 2 3 10 ATX Power connect...

Страница 6: ...1 3 6 2 4 PCH FW Configuration 41 3 6 2 4 1 Firmware Update Configuration 42 3 6 2 5 Super IO Configuration 43 3 6 2 5 1 Serial Port 1 Configuration 44 3 6 2 5 2 Serial Port 2 Configuration 44 3 6 2 5...

Страница 7: ...tion 60 3 6 3 1 5 GT Power Management Control 61 3 6 3 2 PCH IO Configuration 61 3 6 3 2 1 PCI Express Configuration 62 3 6 4 Save and exit 68 3 6 4 1 Save Changes and Reset 68 3 6 4 2 Discard Changes...

Страница 8: ...hould open the PC chassis Caution Always ground yourself to remove any static charge before touching the CPU card Modern electronic devices are very sensitive to static electric charges As a safety pr...

Страница 9: ...User s Manual EAX Q170P User s Manual 9 1 3 Document Amendment History Revision Date By Comment 1st December 2015 Avalue Initial Release 2nd August 2017 Avalue Update System Specifications...

Страница 10: ...carefully before attempting to set up EAX Q170P or change the standard configurations Whilst all the necessary information is available in this manual we would recommend that unless you are confident...

Страница 11: ...PCI e x 1 4 x PCI 1 x M 2 2230 KeyA Slot support WiFi module 1 x SIM card slot 1 x Full Size Mini PCIe with mSATA Support SATA III S3 S4 Yes S0 S3 S4 S5 Display Chipset Intel Q170 Express chipset Reso...

Страница 12: ...OS Setting 1 x 1 x 4 pin pitch 2 54mm CPU fan connector with smart fan function supported 1 x 1 x 4 pin pitch 2 54mm System fan connector with smart fan function supported 1 x 1 x 3 pin pitch 2 54mm S...

Страница 13: ...or 1 x VGA 1 x DP 1 x HDMI COM1 support RS 232 DB9 connector Pin 9 with 5V 12V RI Supported 1 x Line out 1 x Mic In 1 x Line in PS2 KB MS USB2 0 connector Mechanical Environmental Power Requirement 12...

Страница 14: ...EAX Q170P User s Manual 14 EAX Q170P User s Manual 1 6 Architecture Overview Block Diagram The following block diagram shows the architecture and main components of EAX Q170P...

Страница 15: ...User s Manual EAX Q170P User s Manual 15 2 Hardware Configuration...

Страница 16: ...EAX Q170P User s Manual 16 EAX Q170P User s Manual 2 1 Product Overview...

Страница 17: ...drives a keyboard or floppy drives In addition the board has a number of jumpers that allow you to configure your system to suit your application If you have any doubts about the best hardware config...

Страница 18: ...yboard mouse connector 2 x USB 2 0 connector JKBMS1 PS 2 keyboard mouse connector 6 x 1 wafer pitch 2 50 mm LAN1 2 2 x RJ 45 with Dual deck USB 3 0 connector JUSB1 USB connector 1 10 x 2 wafer pitch 2...

Страница 19: ...User s Manual EAX Q170P User s Manual 19 2 3 Setting Jumpers Connectors 2 3 1 Serial port 1 pin9 signal select JRI1 Default Ring 5V 12V 2 3 2 Serial port 2 pin9 signal select JRI2 Default Ring 5V 12V...

Страница 20: ...EAX Q170P User s Manual 20 EAX Q170P User s Manual 2 3 3 AT ATX Power Mode Select JATATX1 Default AT ATX 2 3 4 Clear CMOS JCMOS1 Default Protect Clear CMOS...

Страница 21: ...s Manual 21 2 3 5 Serial port 2 connector JCOM2A Signal PIN PIN Signal RXD 2 1 DCD DTR 4 3 TXD DSR 6 5 GND CTS 8 7 RTS 9 RI 2 3 6 COM2 RS485 422 connector JCOM2B Signal PIN PIN Signal 485TX 1 2 422RX...

Страница 22: ...nector JCOM3 4 5 6 Signal PIN PIN Signal RXD 2 1 DCD DTR 4 3 TXD DSR 6 5 GND CTS 8 7 RTS NC 10 9 RI 2 3 8 General purpose I O connector JDIO1 Signal PIN PIN Signal DI0 1 2 DO0 DI1 3 4 DO1 DI2 5 6 DO2...

Страница 23: ...GND 1 2 GND SGIO_LOAD 3 4 SGIO_DATOUT0 SGIO_CLK 5 6 SGIO_DATOUT1 2 3 10 ATX Power connector ATXPWR1 Signal PIN PIN Signal 3 3V 12 24 GND 12V 11 23 5V 12V 10 22 5V V5SB 9 21 5V ATX_PWRGD 8 20 5V GND 7...

Страница 24: ...EAX Q170P User s Manual 2 3 11 Power connector ATX12V1 Signal PIN PIN Signal 12V 5 1 GND 12V 6 2 GND 12V 7 3 GND 12V 8 4 GND 2 3 12 SMBus connector JSMB1 Signal PIN SMB_CLK_MAIN 1 SMB_DATA_MAIN 2 SMB_...

Страница 25: ..._R_DP13 9 12 USB_R_DN14 USB_R_DN13 8 13 GND GND 7 14 SS_USB_TXP_C_6 SS_USB_TXP_C_5 6 15 SS_USB_TXN_C_6 SS_USB_TXN_C_5 5 16 GND GND 4 17 SS_USB_RXP_C_6 SS_USB_RXP_C_5 3 18 SS_USB_RXN_C_6 SS_USB_RXN_C_5...

Страница 26: ...AX Q170P User s Manual 2 3 15 USB connector 4 JUSB4 Signal PIN PIN Signal USBVCC_BC 1 2 USBVCC_BC USB_R_DN12 3 4 USB_R_DN11 USB_R_DP12 5 6 USB_R_DP11 GND 7 8 GND 10 NC 2 3 16 Battery connector JBAT1 S...

Страница 27: ...GND 7 LINE2_LIN 9 10 LINE2_JD 2 3 17 1 Signal Description Audio connector JAUDIO1 Signal Signal Description LINE2_JD AUDIO IN LINE_RIN LIN sense pin MIC2_JD MIC IN MIC_RIN LIN sense pin 2 3 18 LPC co...

Страница 28: ...EAX Q170P User s Manual 2 3 19 SPI connector JSPI1 Signal PIN PIN Signal 3 3V 1 2 GND SSPI_CS0 _R 3 4 SSPI_SCLK_R SSPI_SO_R 5 6 SSPI_SI_R SSPI_HOLD 0 7 2 3 20 Speaker connector JSPK1 Signal PIN SPK_L...

Страница 29: ...Manual 29 2 3 21 Miscellaneous setting connector JFP1 Signal PIN PIN Signal HDD_LED 1 2 PWR_LED HDD_LED 3 4 PWE_LED RSET_BTN 5 6 PWRBTN GND 7 8 GND NC 9 2 3 22 CPU fan connector CPUFAN1 Signal PIN GND...

Страница 30: ...70P User s Manual 30 EAX Q170P User s Manual 2 3 23 System fan connector 1 SYSFAN1 Signal PIN GND 1 12V 2 SYSFANIN1 3 SYSFANOUT1 4 2 3 24 System fan connector 2 SYSFAN3 Signal PIN GND 1 12V 2 SYS_FAN_...

Страница 31: ...User s Manual EAX Q170P User s Manual 31 2 3 25 PS 2 keyboard mouse connector JKBMS1 Signal PIN MSCK 6 5V 5 GND 4 MSDT 3 KBDT 2 KBCK 1 2 3 26 S PDIF connector JSPDIF1 Signal PIN 5V 1 SPDIF_O 3 GND 4...

Страница 32: ...tor JBZ1 Signal PIN 5V 1 NC 2 NC 3 5V 4 2 3 28 LPT connector LPT1 Signal PIN PIN Signal PT STB 1 2 PT_AFD PTD0 3 4 ERR PTD1 5 6 PT_PAR_INIT PTD2 7 8 PT_SLIN PTD3 9 10 GND PTD4 11 12 GND PTD5 13 14 GND...

Страница 33: ...JAUXP1 Signal PIN PIN Signal 5V 1 2 NC NC 3 4 SMB_CLK_MAIN CASEOPEN 5 6 NC GND 7 8 GND ERROR_LED 9 10 SMB_DATA_MAIN ERROR_LED 11 12 5V FRONT_LAN1_ACT 13 14 FRONT_LAN1_LINK100 GND 15 16 FRONT_LAN1_LINK...

Страница 34: ...EAX Q170P User s Manual 34 EAX Q170P User s Manual 3 BIOS Setup...

Страница 35: ...ol over to the operating system While the BIOS is in control the Setup program can be activated in one of two ways By pressing Del or F2 immediately after switching the system on or By pressing the De...

Страница 36: ...nu Quit and not save changes into NVRAM Status Page Setup Menu and Option Page Setup Menu Exit current page and return to Main Menu key Increase the numeric value or make changes key Decrease the nume...

Страница 37: ...uter no longer is able to boot the AMI BIOS supports an override to the NVRAM settings which resets your system to its defaults The best advice is to only alter settings which you thoroughly understan...

Страница 38: ...configurations in your computer and set the system clock 3 6 1 1 System Language This option allows choosing the system default language 3 6 1 2 System Date Use the system date option to set the syste...

Страница 39: ...her system devices for basic operation through the following sub menus 3 6 2 1 Trusted Computing Item Options Description Security Device Support Disable Enable Default Enables or Disables BIOS suppor...

Страница 40: ...CPI sleep state the system will enter when the SUSPEDN button is pressed ErP Function Disabled Default Enabled ErP Function Deep S5 Pwr On After PWR Fail Always Off Default Always On Keep Last state S...

Страница 41: ...ble Disable Intel Active Management Technology BIOS Extension Note iAMT H W is always enabled This option just controls the BIOS extension execution If enabled this requires additional firmware in the...

Страница 42: ...ult PTT Selects TPM device dTPM The discrete TPM chip PTT Intel Platform Trust Technology Warning If PTT dTPM was disabled All data saved on it will be lost 3 6 2 4 1 Firmware Update Configuration Ite...

Страница 43: ...Configuration Set Parameters of Serial Port 1 COMA Serial Port 2 Configuration Set Parameters of Serial Port 2 COMB Serial Port 3 Configuration Set Parameters of Serial Port 3 COMC Serial Port 4 Conf...

Страница 44: ...tion Description Serial Port Enabled Default Disabled Enable or Disable Serial Port COM Change Settings Auto Default Select an optimal setting for Super IO Device 3 6 2 5 2 Serial Port 2 Configuration...

Страница 45: ...2 422 485 RS232 Default RS422 RS485 Set COM Port as RS232 RS422 or RS485 mode 3 6 2 5 3 Serial Port 3 Configuration Item Option Description Serial Port Enabled Default Disabled Enable or Disable Seria...

Страница 46: ...able or Disable Serial Port COM Change Settings Auto Default Select an optimal setting for super IO Device 3 6 2 5 5 Serial Port 5 Configuration Item Option Description Serial Port Enabled Default Dis...

Страница 47: ...Description Serial Port Enabled Default Disabled Enable or Disable Serial Port COM Change Settings Auto Default Select an optimal setting for super IO Device 3 6 2 5 7 Parallel Port Configuration Item...

Страница 48: ...efault Select an optimal setting for Super IO Device Device Mode STD Printer Mode Default SPP Mode EPP 1 9 and SPP Mode EPP 1 7 and SPP Mode ECP Mode ECP and EPP 1 9 Mode ECP and EPP 1 7 Mode Change t...

Страница 49: ...duty 0 to 255 SYSFAN1 Mode Manual SmartFan IV Default Smart Fan Mode Selection Manual Mode No Smart Fan SmartFan IV Mode 3 6 2 7 S5 RTC Wake Settings Item Options Description Wake system from S5 Disa...

Страница 50: ...Options Description Console Redirection Disabled Default Enabled Console Redirection Enable or Disable 3 6 2 8 1 Legacy Console Redirection Settings Item Option Description Legacy Serial Redirection P...

Страница 51: ...or Cores All Default 1 2 3 Number of cores to enable in each processor package Intel Virtualization Technology Disabled Enabled Default When enabled a VMM can utilize the additional hardware capabilit...

Страница 52: ...Enabled Default supported Turbo Mode Disabled Enabled Default Turbo Mode CPU C states Disabled Enabled Default Enable or disable CPU states Package C State limit C0 C1 C2 C3 C6 C7 C7s AUTO Default Pac...

Страница 53: ...Configuration Item Options Description SATA Controller s Disabled Enabled Default Enable or disable SATA Device SATA Mode Selection AHCI Default RAID Determines how SATA controller s operate SATA Por...

Страница 54: ...State Drive or Hard Disk Drive 3 6 2 11 1Software Feature Mask Configuration Item Option Description HDD Unlock Disabled Enabled Default If enabled indicates that the HDD password unlock in the OS is...

Страница 55: ...ual EAX Q170P User s Manual 55 3 6 2 12 AMI Graphic Output Protocol Policy 3 6 2 13 Network Stack Configuration Item Options Description Network Stack Enabled Disabled Default Enable Disable UEFI Netw...

Страница 56: ...ser s Manual 3 6 2 14 CSM Configuration Item Options Description CSM Support Enabled Disabled Default Enable Disable CSM Support 3 6 2 15 USB Configuration The USB Configuration menu helps read USB in...

Страница 57: ...t value for Control Bulk and Interrupt transfers Device reset time out 10 sec 20 sec Default 30 sec 40 sec USB mass storage device Start Unit command time out Device power up delay Auto Default Manual...

Страница 58: ...Configuration Item Option Description VT d Enabled Default Disabled VT d capability 3 6 3 1 1 Graphics Configuration Item Option Description Skip Scanning of External Gfx Card Enabled Disabled Default...

Страница 59: ...FX PEG PCIE Select which of IGFX PEG PCI Graphics device should be Primary Display Or select SG for Switchable Gfx Internal Graphics Auto Default Disabled Enabled Keep IGFX enabled based on the setup...

Страница 60: ...evice Disabled Default Enabled Detect Non Compliance PCI Express Device in PEG Program PCIe ASPM after OpROM Disabled Default Enabled Enabled PCIe ASPM will be programmed after OpROM Disabled PCIe ASP...

Страница 61: ...ment Control Item Option Description RC6 Render Standby Disabled Enabled Default Check to enable render standby support 3 6 3 2 PCH IO Configuration Item Option Description LAN PHY Controller Disabled...

Страница 62: ...nual Serial IRQ Mode Quiet Continuous Default Configure Serial IRQ Mode 3 6 3 2 1 PCI Express Configuration 3 6 3 2 1 1 PCI E Root Port 1 PCIe x4 Slot Item Option Description PCIe x4 Slot Enabled Defa...

Страница 63: ...f enable it will take more time at POST time 3 6 3 2 1 2 PCI E Root Port 5 mPCIe mSATA Slot Item Option Description mPCIe PCI E Root Port Enabled Default Disabled Control the PCI Express Root Port ASP...

Страница 64: ...64 EAX Q170P User s Manual 3 6 3 2 1 3 PCI E Root Port 6 PCI E to PCI Bridge Item Option Description PCI E to PCI Bridge Enabled Default Disabled Control the PCI Express Root Port 3 6 3 2 1 4 PCI E R...

Страница 65: ...s to L0s State AUTO BIOS auto configure DISABLE Disables ASPM PCIe Speed Auto Default Gen1 Gen2 Gen3 Select PCI Express port speed Detect Non Compliance Device Disabled Default Enabled Detect Non Comp...

Страница 66: ...PCI Express Root Port ASPM Support Disabled Default L0s L1 L0sL1 Auto Set the ASPM Level Force L0s Force all links to L0s State AUTO BIOS auto configure DISABLE Disables ASPM PCIe Speed Auto Default...

Страница 67: ...Express Root Port ASPM Support Disabled L0s L1 L0sL1 Auto Default Set the ASPM Level Force L0s Force all links to L0s State AUTO BIOS auto configure DISABLE Disables ASPM PCIe Speed Auto Default Gen1...

Страница 68: ...S setup program are discarded The setup program then exits and reboots the controller 3 6 4 3 Restore Defaults This option restores all BIOS settings to the factory default This option is useful if th...

Страница 69: ...er s Manual EAX Q170P User s Manual 69 4 Drivers Installation Note Installation procedures and screen shots in this section are for your reference and may not be exactly the same as shown on your scre...

Страница 70: ...ue s products automatically If not locate Index htm and choose the product from the menu left Note The installation procedures and screen shots in this section are based on Windows 10 operation system...

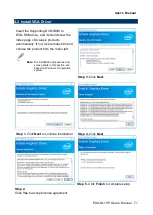
Страница 71: ...products automatically If not locate Index htm and choose the product from the menu left Note The installation procedures and screen shots in this section are based on Windows 10 operation system Step...

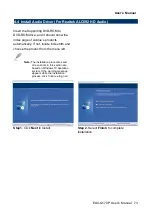
Страница 72: ...the index page of Avalue s products automatically If not locate Index htm and choose the product from the menu left Note The installation procedures and screen shots in this section are based on Windo...

Страница 73: ...age of Avalue s products automatically If not locate Index htm and choose the product from the menu left Note The installation procedures and screen shots in this section are based on Windows 10 opera...

Страница 74: ...page of Avalue s products automatically If not locate Index htm and choose the product from the menu left Note The installation procedures and screen shots in this section are based on Windows 10 oper...

Страница 75: ...of Avalue s products automatically If not locate Index htm and choose the product from the menu left Note The installation procedures and screen shots in this section are based on Windows 10 operatio...

Страница 76: ...EAX Q170P User s Manual 76 EAX Q170P User s Manual Step 6 Click Finish to complete setup...

Страница 77: ...User s Manual EAX Q170P User s Manual 77 5 Mechanical Drawing...

Страница 78: ...EAX Q170P User s Manual 78 EAX Q170P User s Manual Unit mm...

Страница 79: ...User s Manual EAX Q170P User s Manual 79 Unit mm...

Отзывы: