background image

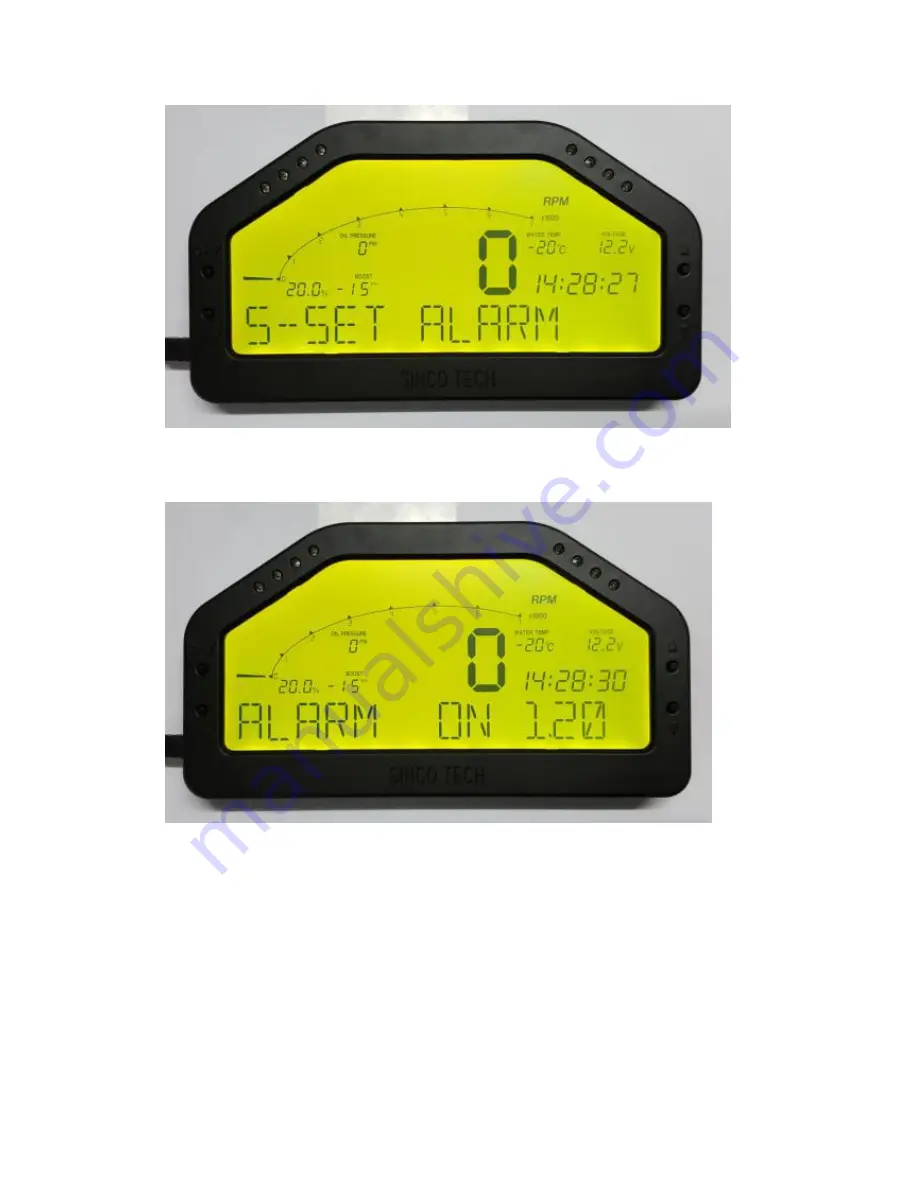
Press the “↑” and “↓” buttons to switch the alarm "ON" and "OFF". Press "

Menu/OK

" to

confirm the action. When alarm is "ON", three digits will appear.

Press the "

Menu/OK

" button to move the bottom right dot to the next digit, use the “↑” and

“↓” buttons to change the value of the digit selected by the bottom right dot, press "

Menu/OK

"

to confirm.

IMPORTANT: There are two types of alarms: 1. Speed alarm. 2. RPM alarm. When alarm is
selected "ON", when any of the following two factors is satisfied, the alarm will be triggered:

a) Exceeding the speed limit. (set in 5-SET ALARM)
b) Exceeding the red LED light's RPM value. (set in 4-SET LED)

6

Calibrating the speed: Press the "↓" button again to display "

6-SPEED CAL

"

Содержание D0904

Страница 1: ...ensor Wires 11 and the Monitor Stand 12 二 The Monitor has two sockets one is on the left edge and the other is on the right edge only one socket can be connected to a cord at a time The sockets are MiniUSB sockets IMPORTANT This socket is incompatible with normal MiniUSB cords specialised cords must be used Usage of incompatible cords may damage the device 三 The Monitor has four buttons positioned...

Страница 2: ...ellow red 五 Wiring the Sensor and DPU The DPU has 11 sockets as shown below Sockets 1 to 11 are connected to the devices with corresponding numbers 1 spare socket 2 spare socket 3 power 4 Boost sensor 5 Oil Pressure sensor 6 Air Fuel Ratio sensor 7 Oil Temp sensor 8 Water Temp sensor 9 Exhaust Gas Temp sensor 10 RPM green wire and Speed meter red wire 11 spare socket 六 Before connecting to power s...

Страница 3: ...s receiving the sensor data successfully it will switch to the normal display as shown below 1 RPM 2 Speed 3 Oil Pressure 4 Air Fuel Ratio 5 Turbo 6 Coolant Temp 7 Voltage 8 Time 9 Multi purpose display section Displays the date by default The display can be changed by using the and button ...

Страница 4: ...g the and button the multi purpose display section can display different data Press the button to display to the RPM Press the button again to display the Oil Pressure Press the button again to display the Oil Temp ...

Страница 5: ...as Temp The multi purpose display will memorize which data has been selected to be displayed and will display that data the next time when it is connected to power 九 Press and hold the Menu OK button to access the Settings Menu See the figure below ...

Страница 6: ...ngs are 1 SET DATE 2 SET TIME 3 SET UNIT select to change the measurement unit for pressure 4 SET LED select to turn the LED on and off 5 SET ALARM select to adjust the speed limit alarm 6 SPEED CAL select to calibrate the speed Each setting will be explained below 1 Press and hold the Menu OK button to access the Settings Menu then press the Monitor shows 1 SET DATE press the Menu OK button again...

Страница 7: ...hen you finish adjusting the month press Menu OK to move dot to the bottom right corner of the years section Now press the and buttons to adjust the year When you finish adjusting the year press Menu OK to confirm the action and return to the Settings Menu If you make a mistake in the previous date selection you can press the Exit Cancel button to move the dot backwards until you exit the setting ...

Страница 8: ...ght dot and using the and buttons When you finish adjusting the time press Menu OK to confirm the action and return to the Settings Menu 3 Press the button again to display 3 SET UNIT press the Menu OK button again to enter the unit settings as shown below ...

Страница 9: ...rrent pressure unit by default PSI press the and buttons to switch between PSI and BAR Press the Menu OK button to save the change or press the Exit Cancel button to cancel the action 4 Press the button again to display 4 SET LED ...

Страница 10: ...nt LED status Press the and buttons to switch between ON and OFF When the LED is selected ON the four pairs of LED lights on the front of the dashboard will light up as the RPM increases A When LED is selected ON press the Menu OK button to set the RPM value for each pair of lights See the figure below ...

Страница 11: ...ot B When finished press Menu OK to save and the Monitor will display the RPM value for the second pair of green lights as shown below Press the Menu OK button to move the bottom right dot to the next digit use the and buttons to change the value of the digit selected by the bottom right dot C When finished press Menu OK to save and the Monitor will display the RPM value for the pair of yellow lig...

Страница 12: ...for the pair of red lights as shown below Press the Menu OK button to move the bottom right dot to the next digit use the and buttons to change the value of the digit selected by the bottom right dot When finished press Menu OK to save and you will be brought back to the Settings Menu 5 Press the button again to display 3 SET ALARM press the Menu OK button again to enter the km h speed on which th...

Страница 13: ...nge the value of the digit selected by the bottom right dot press Menu OK to confirm IMPORTANT There are two types of alarms 1 Speed alarm 2 RPM alarm When alarm is selected ON when any of the following two factors is satisfied the alarm will be triggered a Exceeding the speed limit set in 5 SET ALARM b Exceeding the red LED light s RPM value set in 4 SET LED 6 Calibrating the speed Press the butt...

Страница 14: ...is km h When your car s unit is MPH the dashboard s unit is MPH 十 The Monitor and the DPU is paired the default pairing pin is 1234 If you need to connect to a replacement OBD Bluetooth unit that has a different pin you need to change the pairing pin on the Monitor otherwise the Bluetooth connection will not be established To change the pin please press and hold the Menu OK button then turn the Mo...

Страница 15: ...nge each digit of the pin like so and when all four digits are correct press the Menu OK button to confirm The Monitor will show Which means that the pin has been successfully changed The gauge will restart and then it will begin to use the new pairing pin to connect to the corresponding OBD Bluetooth Unit until the connection is established 十一 If the Monitor shows ...

Страница 16: ...and the OBD unit are functional Reset the pairing pin if necessary This error may occur if the Monitor is connected to the power before the DPU Please make sure to connect the DPU to power first or connect both the DPU and the Monitor to power at the same time ...

Отзывы: