background image


24 

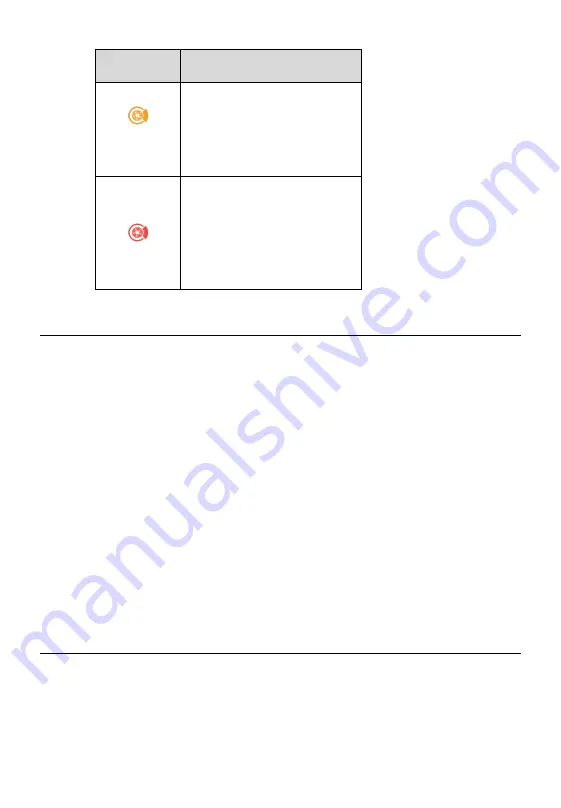
    Icon 

Results 


(Yellow) 

Replacement 

recommended 


(Red) 

Replace immediately 

5.1 Check mode 

Brake Disc Check   

The 

Brake  Disc

  function  checks  for  brake  disc  wear  and  provides  wear 

analysis. This check mode focuses on brake disc measurements only. 


To perform a Brake Disc Check 


1. 

Tap the 

Brake Disc

 application icon on the Main Job Menu. 

2. 

Place the tool on the disc surface and press the Power/Measure 
button to start measuring. 

3. 

Real-time measurement data will display on the screen with wear 
status represented by different colors. 

4. 

Select a disc location on the screen, swipe left to view details, and 
scroll down the screen to view wear analysis. 


5.2 Details 

The 

Details

  screen  shows  information  regarding  brake  disc  wear.  After 

measurements are shown on the screen, select a disc location, swipe left 
to view details of the chosen disc. Below are the main sections featured in 
the 

Details

 section: 

Содержание MaxiTPMS TBE200

Страница 1: ...on specifications and illustrations in this manual are based on the latest information available at the time of printing Autel reserves the right to make changes at any time without notice While information of this manual has been carefully checked for accuracy no guarantee is given for the completeness and correctness of the contents including but not limited to the product specifications functio...

Страница 2: ...ii 1 855 288 3587 1 855 AUTELUS North America supporttpms auteltech com For technical assistance in all other markets please contact your local distributor ...

Страница 3: ...hods and test procedures It is essential to perform tests in an appropriate and acceptable manner that does not endanger your safety the safety of others in the work area the device being used or the vehicle being tested Before using the device always refer to and follow the safety messages and applicable test procedures provided by the manufacturer of the vehicle or equipment being tested Use the...

Страница 4: ...way from all moving or hot engine parts Operate the vehicle in a well ventilated work area for exhaust gases are poisonous Put the transmission in PARK for automatic transmission or NEUTRAL for manual transmission and make sure the parking brake is engaged Put blocks in front of the drive wheels and never leave the vehicle unattended while testing Be extra cautious when working around the ignition...

Страница 5: ...to do so may result in personal injury or damage to the test equipment To avoid damaging the test equipment or generating false data make sure the vehicle battery is fully charged and the connection to the vehicle DLC is clean and secure Do not place the test equipment on the distributor of the vehicle Strong electro magnetic interference can damage the equipment ...

Страница 6: ... GETTING STARTED 16 3 1 POWER UP 16 4 TIRE TREAD CHECK 19 4 1 CHECK MODES 20 4 2 DETAILS 21 5 BRAKE DISC CHECK 23 5 1 CHECK MODE 24 5 2 DETAILS 24 6 QUICK CHECK 26 6 1 CHECK MODE 27 6 2 DETAILS 28 7 CHECK SETTINGS 29 NUMBER OF TIRES 29 UNIT 29 TIRE TYPE 29 TREAD CHECK MODE 30 BRAKE DISC WEAR LIMIT 30 8 DATA QUERY 31 9 SYSTEM CALIBRATION 32 10 SETTINGS 33 NETWORK CONNECTION 33 BRIGHTNESS 33 ...

Страница 7: ...AND REGION 34 ABOUT 34 UPDATE 34 RESTORE FACTORY SETTINGS 34 11 MAINTENANCE AND SERVICE 35 MAINTENANCE INSTRUCTIONS 35 TROUBLESHOOTING CHECKLIST 36 12 SERVICE PROCEDURES 37 13 COMPLIANCE INFORMATION 40 14 WARRANTY 43 LIMITED ONE YEAR WARRANTY 43 ...

Страница 8: ...ories Conventions The following conventions are used Bold Text Bold text is used to highlight selectable items such as buttons and menu options Tap OK Notes and Important Messages Notes A NOTE provides helpful information such as additional explanations tips and comments NOTE New batteries reach full capacity after approximately 3 to 5 charging and discharging cycles Important IMPORTANT indicates ...

Страница 9: ... and illustrations are active in electronic documents Blue italic text indicates a selectable hyperlink and blue underlined text indicates a website link or an email address link Illustrations Illustrations used in this manual are examples actual testing screens may vary for each vehicle being tested Carefully observe the menu titles and on screen instructions to make the right selections ...

Страница 10: ...es The tool s dual cameras enable users to document tire wear and damage as well as scan Tire Identification Numbers TINs You can use the tool on its own or with a compatible Autel diagnostics tablet such as an ITS600 ITS600 Pro to view and print detailed TPMS reports This manual describes the construction and operation of the tool and how it works to test tire brake disc wear MaxiTPMS TBE200 Exam...

Страница 11: ...miner Front View 3 Power Measure button Press and hold this button for 3 seconds to power the tool on and off once on press the button quickly to take measurements 4 1 65 inch AMOLED Screen Figure 2 3 Examiner Side View ...

Страница 12: ...era Power Sources The tool can receive power from any of the following sources Internal Battery Pack AC DC Power Supply Internal Battery Pack The tool can be powered by its internal rechargeable battery which when fully charged can provide sufficient power for about 8 hours of continuous operation AC DC Power Supply ...

Страница 13: ...AC DC power supply also charges the tool s internal battery Technical Specifications Table 0 1 Specifications Item Description Product Name Tire Brake Disc Examiner Laser Classification Class 3R Laser Product IEC 60825 1 2014 Optical Power 2 0 mW Wave Length At Peak Emission 520 nM ...

Страница 14: ...rtex A35 1 5 GHz Memory 1GB RAM LPDDR3 4GB On board Memory Display 1 65 inch AMOLED capacitive touchscreen with 348x442 pixel resolution Connectivity Wi Fi USB 2 0 Type C Micro cameras CMOS WXGA 1 megapixel 8 megapixel 30 fps Audio Output Output beep ...

Страница 15: ...A AMOLED on with default brightness 3 7 V Operating Temp 10 to 45 C 14 to 113 F Storage Temp 20 to 60 C 4 to 140 F Dimensions W x H x D 283 0 mm 11 14 x 39 0 mm 1 54 x 33 5 mm 1 32 Net Weight 188 g 0 41 lb Other Accessories Table 0 2 Accessories Power Adapter Used with USB cable to power and charge the tool via electrical outlet Type C USB Cable Connect between the power adapter and the tool for p...

Страница 16: ...ng the actual operation of tire tread check and brake disc check 3 1 Power Up Press and hold the power button on the tool to switch it on The system will boot up and display the TBE200 Job Menu Figure 3 1 TBE200 Job Menu System Status Icons Application Buttons Locator 3 1 1 System Status Icons As the MaxiTPMS TBE200 runs on the Android operating system you may refer to Android documents for additi...

Страница 17: ... Check on page 22 for details Quick Check Allows you to perform a quick check to measure tire tread depth brake disc wear measurements See Quick Check on page 25 for details Check Settings Adjusts settings for check sessions See Check Settings on page 28 for details Data Query Display data from previous measurements See Data Query on page 30 for details System Calibration Calibrates the measuremen...

Страница 18: ...18 3 1 3 Locator The Locator icon displays at the bottom of the TBE200 Jobs screen Swipe the screen left or right to view the previous or next screen ...

Страница 19: ... within 0 1mm Measurements are also displayed graphically The Tire Tread application provides two types of checks All Treads and Single When using this application a message will display prompting user to choose between the current mode the alternative one You can configure your default check mode under Check Settings Refer to Check Settings on page 28 for additional information Figure 4 1 Tire Tr...

Страница 20: ...oaching critical value Recommend replacing Red Danger Severe tire wear Replace immediately 4 1 Check modes There are two check modes available under the Tire Tread application Single Check The Single Tire check measures the wear of each tire on the vehicle by examining the tread depth in the center area of the tire only Unlike the All ...

Страница 21: ...rements ensure the tool is placed firmly on the tread and that the laser line is perpendicular to the groove being measured 4 2 Details The Details screen shows a wide variety of tire wear information After measurements are shown on the screen select a wheel location swipe left to view details of the chosen tire Below are the main sections featured in the Details section 1 Graphic measurements sho...

Страница 22: ...s including normal worn bulge etc 4 Tire DOT scan or manually enter the tire DOT serial number located on the sidewall to acquire basic tire characteristics such as tire age 5 Tire Specification view a series of options and manually enter tire information including brand tire model size construction type code Figure 4 2 Details Screen ...

Страница 23: ...a brake disc without the need to remove tires Measurements displayed graphically The Brake Disc function not only provides brake disc wear measurements but also offers analysis to ensure driving safety Figure 5 1 Brake Disc Check Screen Wear status is represented graphically in the colors displayed below Icon Results Gray Unchecked Green Normal ...

Страница 24: ...l on the disc surface and press the Power Measure button to start measuring 3 Real time measurement data will display on the screen with wear status represented by different colors 4 Select a disc location on the screen swipe left to view details and scroll down the screen to view wear analysis 5 2 Details The Details screen shows information regarding brake disc wear After measurements are shown ...

Страница 25: ...Graphic measurements displays the measurements data graphically with by color to indicate disc wear conditions 2 Wear analysis displays service recommendations for disc replacement Figure 5 2 Details Screen ...

Страница 26: ...s in one session This mode also provides a comprehensive analysis of tire and brake disc wear Figure 6 1 Quick Check Screen Degree of wear status is illustrated by the colors below below Tire Tread Icon Brake Disc Icon Results Recommendation Gray Unchecked Tire not checked Normal Please check regularly ...

Страница 27: ...face pressing the Power Measure button to take measurements for each 3 Real time measurement data will appear on the screen with wear status illustrated in different colors 4 Select a wheel or disc location on the screen swipe left to view details and scroll down to view additional information including wear analysis and maintenance suggestions Green Yellow Warning significant wear detected Replac...

Страница 28: ...rake discs 2 Braking Distance displays the stopping distance for the vehicle graphically based on the tire tread depth and tire type This section is also followed by tire wear analysis and maintenance suggestions 3 Tire Condition displays the tire status including normal worn and bulge presence 4 Tire DOT scan or manually enter the Tire Identification Number TIN sometimes referred to as the Tire s...

Страница 29: ...opriate measurement unit metric or imperial A check mark will display to the right of the active selection Tire Type The Tire Type setting is to choose the right type of tire for the vehicle Three tire types are available Summer Winter and All Season Select a tire type A check mark will display to the left of the active selection Right beneath each tire option is the tire wear limit with the defau...

Страница 30: ...before initiating a tread check measurement After choosing the check mode a check mark will display to the right of the active selection Brake Disc Wear Limit This option enables you to adjust the brake disc wear limit for brake disc checks Note that the disc wear limit is always in metric units ...

Страница 31: ...the latest measurement session After the tool is connected with the ITS600 tablet the measurements of the previous session will display on the tablet screen automatically Once a new measuring session starts the previous test results will be replaced by new results ...

Страница 32: ...e Calibration icon and place the magnetic head on the calibration table Press the Power Measure button to start Wait for 1 2 minutes until calibration is complete Calibration is recommended every two months Immediate calibration should be performed when deviations are detected or when the tool is dropped or mishandled in any manner Figure 9 1 System Calibration ...

Страница 33: ...spection reports Brightness This option allows you to adjust the screen brightness manually Tap on the brightness icon on the right to brighten the screen and tap the icon on the left to dim the screen Sleep This option allows you to set the amount of time before your tool goes into sleep low power mode to conserve battery life The maximum setting is 120 seconds Automatic Shutdown This option allo...

Страница 34: ...oftware ensure the tool s network connection is stable When a software update is available a red dot will display atop the Settings icon in the upper right corner of the Main Job screen Tap Update to install the software NOTE When updating the software ensure the tool is connected to the Internet and that its battery is charged to at least 50 percent or is connected to a power outlet Restore Facto...

Страница 35: ... your hands before using the tool The touch screen may not work if the touch screen is moist or if you tap the touch screen with wet hands Do not store the tool in humid dusty or dirty areas Check the housing wiring and connectors for dirt and damage before and after each use Do not attempt to disassemble the tool Do not drop or cause severe impact to the tool Use only authorized battery chargers ...

Страница 36: ... received B When you cannot turn on the tool Make sure the tool is connected to a power source or the battery is charged C When you are unable to charge the tool Your charger maybe out of order Contact your nearest dealer You may be attempting to use the tool in an overly hot cold environment Charge the tool in moderate temperatures Your tool may have not been connected to the charger properly Che...

Страница 37: ...les autel com ussupport autel com Address 175 Central Avenue Suite 200 Farmingdale New York USA 11735 AUTEL EUROPE Phone 0049 0 6103 2000520 Website www autel eu Email sales eu autel com support eu autel com Address Adalperostraße 82 85737 Ismaning Germany AUTEL CHINA HQ Phone 0086 755 2267 2493 Website www autel com Email sales auteltech net support autel com Address 7th 8th and 10th Floor Buildi...

Страница 38: ...06 1010 Cluster C Fortune Tower Jumeirah Lakes Tower JLT Dubai U A E Repair Service If it becomes necessary to return your device for repair please contact us first and then download a Repair Service Form from www autel com and www maxitpms com and fill it in The following information must be included Contact name Return address Telephone number Product name Complete description of the problem Pro...

Страница 39: ... Nanshan Shenzhen 518055 China Other Services You can purchase optional accessories directly from Autel authorized tool suppliers and or your local distributor or sales agent Your purchase order should include the following information Your contact information Product or part name Item description Purchase quantity ...

Страница 40: ...ifications not expressly approved by the party responsible for compliance could void the user s authority to operate the equipment NOTE This equipment has been tested and found to comply with the limits for a Class B digital device pursuant to Part 15 of the FCC Rules These limits are designed to provide reasonable protection against harmful interference in a residential installation This equipmen...

Страница 41: ...Specific Absorption Rate or SAR The SAR limit set by the FCC is 1 6 W Kg Tests for SAR are conducted using standard operating positions accepted by the FCC with the device transmitting at its highest certified power level in all tested frequency bands Although the SAR is determined at the highest certified power level the actual SAR level of the device while operating can be well below the maximum...

Страница 42: ...CE This product is declared to conform to the essential requirements of the following Directives and carries the CE mark accordingly EMC Directive 2014 30 EU R TTE Directive 1999 5 EC Low Voltage Directive 2014 35 EU ...

Страница 43: ...nting of the device Some states do not allow limitation on how long an implied warranty lasts so the above limitations may not apply to you This warranty does not apply to 1 Products subjected to abnormal use or conditions accident mishandling neglect unauthorized alteration misuse improper installation or repair or improper storage 2 Products whose mechanical serial number or electronic serial nu...

Страница 44: ...44 IMPORTANT All contents of the product may be deleted during the process of repair You should create a back up copy of any contents of your product before delivering the product for warranty service ...

Отзывы: