background image


24

Scan Tool doesn

t power up 

If the scan tool won

t power up or operates incorrectly in any other 

way, you need to do the following to check up: 

ü


Check if the scan tool

s diagnostic connector is securely connected 

to the vehicle

s DLC. 

ü


Check if the DLC pins are bent or broken. Clean the DLC pins if 
necessary. 

ü


Check vehicle battery to make sure it is still good with at least 8.0 
volts. 


4.


Diagnostics               


4.1


OBD II/EOBD Diagnostics 

When  more  than  one  vehicle  control  module  is  detected  by  the 
scan  tool,  you  will  be  prompted  to  select  the  module  where  the 
data  may  be  retrieved.  The  most  often  selected  modules  are 
Powertrain  Control  Module  [PCM]  and  Transmission  Control 
Module [TCM]. 

1)


Turn the ignition off. 

2)


Locate the vehicle

s 16-pin Data Link Connector (DLC). 

3)


Plug the OBD II connector to the vehicle

s DLC.   

4)


Turn the ignition on. Engine can be off or running. 

5)


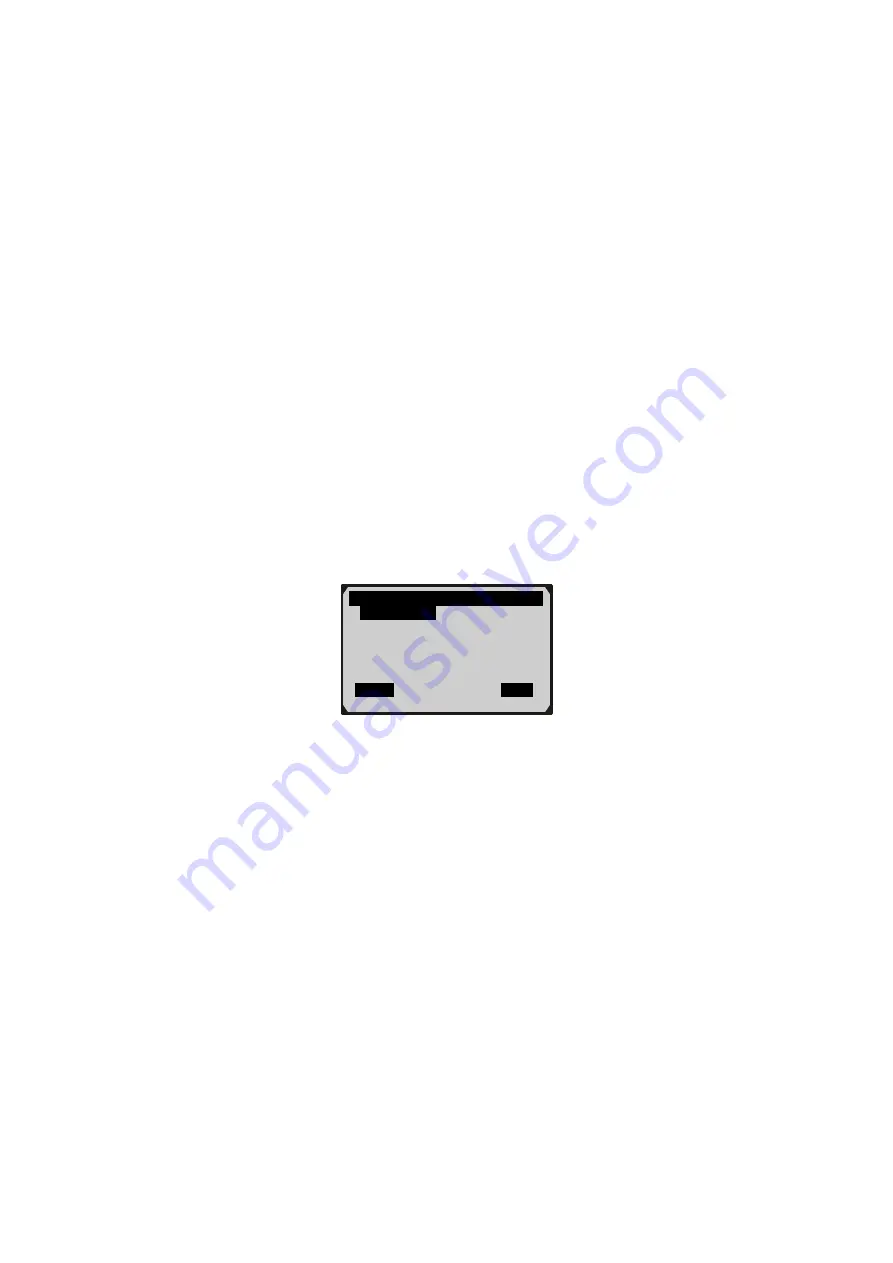
Use 

UP/DOWN

  button  to  select 

OBD  II/EOBD 

from 

Diagnostics


                      Diagnostics                       


OBD II/EOBD   


Asian   

    European   

USA   

Review Data   

    OK                                            Back                           


www.AllOBD2.com

Содержание MaxiDiag Pro MD801

Страница 1: ... Specifications 10 3 3 Accessories 10 3 4 Navigation Characters 10 3 5 Power 11 3 6 Obtaining Login Password 11 3 7 Product Setup 13 3 8 Tool Information 21 3 9 Battery Replacement 22 3 10 Vehicle Coverage 23 3 11 Product Troubleshooting 23 4 Diagnostics 24 4 1 OBD II EOBD Diagnostics 24 4 2 Pre OBD II Vehicle Diagnostics 50 4 3 Review Data 62 5 Updating and Printing 69 6 Appendix 70 6 1 PID List ...

Страница 2: ...caution when working around the ignition coil distributor cap ignition wires and spark plugs These components create hazardous voltages when the engine is running l Put the transmission in PARK for automatic transmission or NEUTRAL for manual transmission and make sure the parking brake is engaged l Keep a fire extinguisher suitable for gasoline chemical electrical fires nearby l Don t connect or ...

Страница 3: ...MIL on the vehicle instrument panel to alert the driver typically by the phrase of Check Engine or Service Engine Soon The system will also store important information about the detected malfunction so that a technician can accurately find and fix the problem Here below follow three pieces of such valuable information 1 Whether the Malfunction Indicator Light MIL is commanded on or off 2 Which if ...

Страница 4: ...tor is not located under dashboard a label should be there telling location For some Asian and European vehicles the DLC is located behind the ashtray and the ashtray must be removed to access the connector If the Identifying specific malfunctioning section of the systems Systems B Body C Chassis P Powertrain U Network Code Type Generic SAE P0 P2 P34 P39 B0 B3 C0 C3 U0 U3 Manufacturer Specific P1 ...

Страница 5: ...re supported by all vehicles and the exact number of monitors in any vehicle depends on the motor vehicle manufacturer s emissions control strategy Continuous Monitors Some of the vehicle components or systems are continuously tested by the vehicle s OBD II system while others are tested only under specific vehicle operating conditions The continuously monitored components listed below are always ...

Страница 6: ... or Complete after an appropriate drive cycle has been performed The drive cycle that enables a monitor and sets readiness codes to Ready varies for each individual monitor Once a monitor is set as Ready or Complete it will remain in this state A number of factors including erasing of diagnostic trouble codes DTCs with a scan tool or a disconnected battery can result in Readiness Monitors being se...

Страница 7: ...onger exists DTC Diagnostic Trouble Codes DTC that identify which section of the emission control system has malfunctioned Enabling Criteria Also termed Enabling Conditions They are the vehicle specific events or conditions that must occur within the engine before the various monitors will set or run Some monitors require the vehicle to follow a prescribed drive cycle routine as part of the enabli...

Страница 8: ...hicle operating parameters to help in identifying the problem This set of values is referred to as Freeze Frame Data and may include important engine parameters such as engine RPM vehicle speed air flow engine load fuel pressure fuel trim value engine coolant temperature ignition timing advance or closed loop status www AllOBD2 com ...

Страница 9: ... tool 3 1 Tool Description LCD DISPLAY Indicates test results Backlit 128 x 64 pixel display with contrast adjustment are three function keys that correspond with buttons on screens for executing commands www AllOBD2 com ...

Страница 10: ...lected character DOWN SCROLL BUTTON Moves down through menu and submenu items in menu mode When a DTC definition covers more than one screen moves up through the current screen to previous screens for additional data When looking up DTC it is used to change value of selected character LEFT SCROLL BUTTON Moves to previous screen or to previous character when looking up DTCs It is also used to view ...

Страница 11: ...plication and etc 3 Extension cable Connects the scan tool to diagnostic connector 4 Diagnostic Connector Provides power to the scan tool and communicates between the tool and vehicle 5 USB cable Used to upgrade the scan tool and to upload retrieved data 6 Carry case A nylon case to store the scan tool when not in use 7 Four 1 5V batteries Supplies power to the scan tool when disconnected from veh...

Страница 12: ... Connector DLC Just follow the steps below to turn on the scan tool 1 Connect the scan tool and diagnostic connector with the extension cable supplied 2 Find DLC on vehicle A plastic DLC cover may be found on some vehicles and you need to remove it before plugging the OBD II cable 3 Plug the diagnostic connector to vehicle s DLC 3 6 Obtaining Login Password CAUTION The login password is used to ge...

Страница 13: ...ress Back button to read password LOGIN PASSWORD Do you wish to read login password The password is used to get access to software updates and OK Back LOGIN PASSWORD Do you wish to give up reading login password OK Back Main Manu Diagnostics System Setup Tool Information Login Password OK www AllOBD2 com ...

Страница 14: ...display mode between with title and without title 6 Menu Style Changes selected menu style between highlighted and normal 7 Scroll Style Changes scroll style between scroll and normal 8 Button Style Changes button style between highlighted and normal 9 Default Resets the scan tool to factory default settings Settings of the unit will remain until change to the existing settings is made To enter sy...

Страница 15: ...Language and press OK button 2 Use UP DOWN button to select the desired language and press OK button to save your selection and return to previous menu Language English 中文 Español Deutsch Français Dutch OK Back System Setup Language Contrast Unit of Measure Auto Power off Title Style Menu Style OK Back Main Menu Diagnostics System Setup Tool Information OK www AllOBD2 com ...

Страница 16: ...ntrast 3 Press OK button to save your settings and return to previous menu Unit of Measure Metric is the default measurement unit 1 From System Setup menu use UP DOWN scroll button to select Unit of Measure and press OK button System Setup Language Contrast Unit of Measure Auto Power off Title Style Menu Style OK Back Contrast Press LEFT or RIGHT to adjust contrast OK Back www AllOBD2 com ...

Страница 17: ...utomatic power off time is 1 minute and the maximum is 30 minutes Auto power off setup can be performed only when the scanner is powered by AAA batteries 1 From System Setup menu use UP DOWN scroll button to select Auto Power off and press OK button Unit of Measure Metric English OK Back System Setup Language Contrast Unit of Measure Auto Power off Title Style Menu Style OK Back www AllOBD2 com ...

Страница 18: ...title style is With Title 1 From System Setup menu use UP DOWN button to select Title Style and press OK button Auto Power off 3 minute s Press UP or DOWN to adjust time OK Back System Setup Language Contrast Unit of Measure Auto Power off Title Style Menu Style OK Back System Setup Language Contrast Unit of Measure Auto Power off Title Style Menu Style OK Back www AllOBD2 com ...

Страница 19: ...tyle The default menu style is Normal 1 From System Setup menu use UP DOWN button to select Menu Style and press OK button 2 From Menu Style menu use UP DOWN button to select menu style between Highlighted and Normal Title Style Without Title With Title OK Back System Setup Language Contrast Unit of Measure Auto Power off Title Style Menu Style OK Back www AllOBD2 com ...

Страница 20: ... From System Setup menu use UP DOWN button to select Scroll Style and press OK button 2 From Scroll Style menu use UP DOWN button to select scroll style between Scroll and Normal Menu Style Highlighted Normal OK Back Scroll Style Scroll Normal OK Back System Setup Scroll Style Button Style Default OK Back www AllOBD2 com ...

Страница 21: ...le and press OK button 2 From Button Style menu use UP DOWN button to select button style between Highlighted and Normal 3 Press OK button to save your selection and return to previous menu Default 1 From System Setup menu use UP DOWN button to select Default and press OK button Button Style Highlighted Normal OK Back System Setup Scroll Style Button Style Default OK Back www AllOBD2 com ...

Страница 22: ...o previous screen 4 Press any key to return to previous screen 3 8 Tool Information The Tool Information function allows viewing of some important information of the scan tool such as serial number and login password 1 From Main Menu use UP DOWN button to select Tool Information and press OK button System Setup Scroll Style Button Style Default OK Back Default Do you wish to reset the tool to fact...

Страница 23: ... batteries as per instructed below 1 Locate the battery cover on the back of the scan tool 2 Remove the battery cover screw and slide the battery cover off 3 Remove discharged batteries and install 4 new AAA batteries 4 Reinstall battery cover by sliding battery cover on and installing screw Tool Information SERIAL NO xxxxxxxx LOGIN PW xxxxxxxx OS VERSION Vx xxxxx HW VERSION Vx xx Back Main Menu D...

Страница 24: ...occurs if the scan tool fails to communicate with the vehicle s ECU Electronic Control Unit You need to do the following to check up ü Verify that the ignition is ON ü Check if the scan tool s diagnostic connector is securely connected to the vehicle s DLC ü Turn the ignition off and wait for about 10 seconds Turn the ignition back to on and continue the testing ü Verify the control module is not ...

Страница 25: ...stics 4 1 OBD II EOBD Diagnostics When more than one vehicle control module is detected by the scan tool you will be prompted to select the module where the data may be retrieved The most often selected modules are Powertrain Control Module PCM and Transmission Control Module TCM 1 Turn the ignition off 2 Locate the vehicle s 16 pin Data Link Connector DLC 3 Plug the OBD II connector to the vehicl...

Страница 26: ... that the vehicle is OBD II compliant ü Turn the ignition off and wait for about 10 seconds Turn the ignition back to on and repeat the procedure from step 5 l If the LINKING ERROR message does not go away then there might be problems for the scan tool to communicate with the vehicle Contact your local distributor or the manufacturer s customer service department for assistance 2 View a summary of...

Страница 27: ...use the control module to illuminate the malfunction indicator lamp MIL when emission related fault occurs u Pending Codes are also referred to as maturing codes or continuous monitor codes They indicate problems that the control module has detected during the current or last driving cycle but are not considered serious yet Pending Codes will not turn on the malfunction indicator lamp MIL If the f...

Страница 28: ... to Read Codes menu 3 View DTCs and their definitions on screen l The control module ID sequence of the DTCs and total number of codes detected will be observed on the upper right hand corner of the display Diagnostic Menu Read Codes Erase Codes Live Data Freeze Frame I M Readiness O2 Mon Test OK Back Read Codes Stored Codes Pending Codes OK Back P0118 09 1 6 Engine Coolant Temperature Sensor 1 Ci...

Страница 29: ... 5 Press Save button to record retrieved DTCs and a Save done message shows on the screen l When there is not enough memory space a warning message prompting to delete previously stored data shows on the screen l If you wish to delete all previously stored data press Yes button to save currently retrieved data in the scanner l If you do not wish to delete the data press No button to return to prev...

Страница 30: ...is performed with key on engine off KOEO Do not start the engine 1 If you decide to erase the DTCs use UP DOWN button to select Erase Codes from Diagnostics Menu and press OK button 2 A warning message comes up to ask for your confirmation 3 Press Yes button to erase codes l If you do not want to proceed with erasing the codes press No button to exit 4 An Erase Done confirmation message shows on t...

Страница 31: ...cle s computer modules It is available only for OBD II EOBD compliant vehicles 1 To view live data use UP DOWN button to select Live Data from Diagnostic Menu and press OK button Erase Code Erase Done Press any key to con Erase Code Erase Failure Turn Key on with Engine Off Press any key to con Diagnostic Menu Read Codes Erase Codes Live Data Freeze Frame I M Readiness O2 Mon Test OK Back www AllO...

Страница 32: ...e screen Use LEFT RIGHT scroll button when necessary to move to previous or next screen to view additional data 5 When graphic viewing available press Graph to view graph of highlighted PID Live Data Reading PID 1 Please Wait Live Data Complete Data Set Custom Data Set OK Back Complete Data Set TP 100 0 STFT Bank1 100 RPM rpm 0 0 VSS km h 0 0 LTFT Bank1 0 7 SHRTFT1 0 0 Graph Save Back www AllOBD2 ...

Страница 33: ...ve data and PID graphs l If you record live data under graph mode following screen shows l If you record live data under text mode following screen shows RPM rpm 1035 1725 931 Text Save Back Recording 8 71 1725 931 Text Stop Back Recording 15 71 Engine Coolant Temp 40 STFT Bank1 100 Engine RPM RPM 0 0 Vehicle Speed MPH 0 0 LTFT Bank1 0 7 SHRTFT1 0 0 Graph Stop Back www AllOBD2 com ...

Страница 34: ...Yes button and save currently retrieved data in the scanner l If you do not wish to delete the data press No button to return to previous screen 8 Press Stop button to stop recording and a Save done message appears on the screen l If memory space gets full when recording following screen appears 9 To view customized data set use UP DPWN button to select Custom Data Set from Live Data menu and pres...

Страница 35: ...ayed 11 Press OK button to view marked PIDs Use LEFT RIGHT scroll button when necessary to move to previous or next screen to view additional data 12 Repeat procedures from Step 5 to Step 8 on Page 31 to view PID graphs and save selected items Custom Data Set DTC_CNT 1 FUELSYS1 FUELSYS2 2 LOAD_PCT ETC SHRTFT1 OK Select Back Complete Data Set DTC_CNT 5 FUELSYS2 N A ETC 40 SHRFT1 0 0 Graph Save Back...

Страница 36: ...ait a few seconds while the scan tool validates PID MAP 3 Use LEFT RIGHT button as necessary to view additional data on previous or next screens Freeze Frame DTCFRZF 1630 FUELSYS1 OL Drive FUELSYS2 N A LOAD_PCT 0 0 ECT 40 SHRTFT1 0 0 Save Back Freeze Frame Reading PID 1 Please Wait Diagnostic Menu Read Codes Erase Codes Live Data Freeze Frame I M Readiness O2 Mon Test OK Back www AllOBD2 com ...

Страница 37: ... Readiness tests A Since DTCs Cleared indicates status of the monitors since the DTCs are erased B This Drive Cycle indicates status of monitors since the beginning of the current drive cycle An I M Readiness Status result of NO does not necessarily indicate that the vehicle being tested will fail the state I M inspection For some states one or more such monitors may be allowed to be Not Ready to ...

Страница 38: ...tton as necessary to view the status of the MIL light ON or OFF and the following monitors l Misfire monitor Misfire monitor l Fuel System Mon Fuel System Monitor l Comp Component Comprehensive Components Monitor I M Readiness Since DTCs Cleared This Drive Cycle OK Back Communicating Please Wait Diagnostic Menu Read Codes Erase Codes Live Data Freeze Frame I M Readiness O2 Mon Test OK Back www All...

Страница 39: ...supports readiness test of This Drive Cycle following screen displays 4 Press Save button to record the results 5 Press Back button to return to Diagnostic Menu O2 Monitor Test OBD II regulations set by SAE require that relevant vehicles Since DTC Cleared MIL Status OFF Misfire Monitor OK Fuel System Mon OK Comp Component OK Catalyst Mon INC Htd Catalyst N A Save Back This Drive Cycle MIL Status O...

Страница 40: ...d tests from the vehicle s on board computer The O2 Monitor Test function is not supported by vehicles which communicate using a controller area network CAN For O2 Monitor Test results of CAN equipped vehicles see chapter On Board Mon Test 1 Use UP DOWN button to select O2 Mon Test from Diagnostic Menu and press OK button 2 Wait a few seconds while the scan tool communicates with vehicle control u...

Страница 41: ... results of selected item on screen O2 Monitor Test O2 Bank1 Sensor1 O2 Bank1 Sensor2 O2 Bank2 Sensor 1 O2 Bank2 Sensor 2 OK Back O2 Bank1 Sensor2 Rich Lean Threshd V Lean Rich Threshd V Low for Switch V High for Switch V Rich Lean Threshd S Lean Rich Threshd S OK Back O2 Monitor Test The selected mode is not supported Press any key to con www AllOBD2 com ...

Страница 42: ...oard Monitor Test for CAN equipped vehicles retrieves and displays test results for emission related powertrain components and systems that are and are not continuously monitored Test and components IDs are determined by the vehicle manufacturer 1 Use UP DOWN button to select On Board Mon Test from Diagnostic Menu and press OK button 2 Wait a few seconds while the scan tool communicates with vehic...

Страница 43: ...icle does not support On Board Monitor Test following screen shows l For CAN equipped vehicles the test selections can be as below On Board Mon Test Test 01 Data Test 05 Data Test 09 Data OK Back Communicating Please Wait On Board Mon Test The selected mode is not supported Press any key to con www AllOBD2 com ...

Страница 44: ...cord the data 7 Press Back button to return to the previous menus Component Test The Component Test function allows initiating a leak test for the On Board Mon Test O2 Mon B1S1 O2 Mon B1S2 Catalyst Mon B1 EGR Mon Bank1 OK Back Test 05 Data ID 01 Module 10 Test Value 0 Min Limit Max Limit FFFF Status OK Save Back O2 Mon B1S1 Rich Lean Threshd V Test Value 0 450 Min Limit 0 312 Max Limit 0 630 Statu...

Страница 45: ...ng the component test refer to the vehicle service manual for instructions to stop the test 1 Use UP DOWN button to select Component Test from Diagnostic Menu and press OK button 2 Wait a few seconds while the scan tool communicates with vehicle control unit 3 From Component Test Menu use UP DOWN button to select a test to be activated Diagnostic Menu On Board Mon Test Component Test Vehicle Info ...

Страница 46: ...tools to control vehicle systems or components If the vehicle under test does not support the EVAP Leak Test an advisory message is displayed on the screen Component Test EVAP Sys leak test OK Back Component Test Send command Press any key to con Component Test The selected mode is not supported Press any key to con www AllOBD2 com ...

Страница 47: ...hat support Mode 9 1 Use UP DOWN button to select Vehicle Info from Diagnostic Menu and press OK button 2 Wait a few seconds while the scan tool communicates with vehicle control unit 3 From Vehicle Info menu use UP DOWN button to select available items to view and press ENTER button Diagnostic Menu On Board Mon Test Component Test Vehicle Info Modules Present DTC Lookup OK Back Communicating Plea...

Страница 48: ...ta 6 Press Back button to return to previous screen Modules Present The Modules Present function allows viewing of module IDs and communication protocols for OBD II modules in the vehicle Vehicle Info Vehicle ID Number Calibration ID Cal Verif Number OK Back Calibration ID Cal ID1 30668343 Cal ID2 08644359 Save Back Vehicle Info The selected mode is not supported Press any key to con www AllOBD2 c...

Страница 49: ... Press Back button to return to previous screen DTC Lookup The DTC Lookup function is used to search for definitions of DTCs stored in built in library 1 Use UP DOWN button to select DTC Lookup from Diagnostic Menu and press OK button Modules Present Protocol ID SAE J1850 VPW 10 Save Back Diagnostic Menu On Board Mon Test Component Test Vehicle Info Modules Present DTC Lookup OK Back www AllOBD2 c...

Страница 50: ...ew next or previous DTC in built in DTC library use LEFT RIGHT button l For manufacturer specific codes you need to select a vehicle make on an additional screen to look for DTC definitions DTC Lookup P 0 0 0 0 left or right key to Change edit position up or down to Change value OK Back Diagnostic Menu On Board Mon Test Component Test Vehicle Info Modules Present DTC Lookup OK Back P0313 1 1 Misfi...

Страница 51: ...A vehicles For some vehicles it is able to retrieve VIN number and readiness status IMPORTANT All software screens shown in this manual are examples actual test screens vary for each vehicle being tested Operation steps for different vehicles are basically the same observe the menu titles and onscreen instructions to make correct option selections 1 Turn the ignition off 2 Locate the vehicle s Dat...

Страница 52: ...fy the vehicle but for some vehicle such as BMW and VW it is not necessary for you to do a lot of menu selections to identify the vehicle 8 When the vehicle is identified use UP DOWN button to select the system you wish to test and press OK button System Menu DEM EGS ABS Airbag OK Back Select vehicle Benz BMW Chrysler Citroen Ford OK Back Diagnostics OBD II EOBD Asian European USA Review data OK B...

Страница 53: ...L UNIT message comes up on the screen ü Verify that the ignition is ON ü Check if the scan tool is securely connected to the vehicle s DLC ü Turn the ignition off and wait for about 10 seconds Turn the ignition back to on and repeat the procedure from Step 5 to Step9 on Page 51 l If the message remains then there might be a problem with the scan tool communicating with the vehicle Contact your loc...

Страница 54: ...lect code type form Read Codes menu to view code definitions NOTE Different vehicle manufacturer may use different names for the same code type 2 View code definition on screen Mode Menu Read Codes Erase Codes ECU Information VIN OK Back Read Code Permanent Codes Temporary Codes OK Back 108 1 2 Continuous voltage Save Back www AllOBD2 com ...

Страница 55: ...age shows on the screen Erasing Code CAUTION Erasing the Diagnostic Trouble Codes may allow the scan tool to delete not only the codes from the vehicle s on board computer but also Freeze Frame data and manufacturer specific enhanced data Do not erase the codes before the system has been checked completely by a technician 1 Use UP DOWN button to select Erase Codes from Mode Menu and press OK butto...

Страница 56: ...rompting you to read codes before erasing 4 Press Yes button to send a command to erase codes l For some vehicles such as Honda a message prompting you to turn the key to KOEO position shows on the screen l Turn off the ignition and turn it back on 10 seconds later as instructed to erase codes or press Cancel button to return to Mode Menu if you decide not to erase the codes 5 When the codes are c...

Страница 57: ...ck button to return to Mode Menu 6 Press any key to continue Viewing Freeze Frame The Freeze Frame function allows viewing freeze frame of engine A T ABS and airbag systems The function may not be available for some vehicles 1 Use UP DOWN button to select Freeze Frame from Mode Menu and press OK button Communication TESTER NOT COMMUNICATING WITH CONTROL UNIT 1 Make sure the igni tion is switched O...

Страница 58: ...wing of ECU part No and etc The function may not be available for some vehicles 1 Use UP DOWN button to select ECU Information from Mode Menu and press OK button Mode Menu Read Codes Erase Codes Freeze Frame ECU Information VIN OK Back Freeze Frame DTCFRZF 1630 FUELSYS1 OL Drive FUELSYS2 N A LOAD_PCT 0 0 ECT 40 SHRTFT1 0 0 Save Back Mode Menu Read Codes Erase Codes ECU Information VIN OK Back www ...

Страница 59: ...e scan tool to delete both the codes and Freeze Frame data and manufacturer specific enhanced data from the vehicle s on board computer Do not reset the control module before the system has been checked completely by a technician 1 Use UP DOWN button to select ECM PCM Reset from Mode Menu and press OK button 2 A message prompting you to turn key on with engine off comes up on the screen Mode Menu ...

Страница 60: ...cide not to reset ECM PCM press NO button to exit A Command Cancelled message shows on the screen 5 A message prompting you to turn the key to KOEO position shows on the screen ECM PCM RESET DTCs and Freeze Data will be lost Do you wish to continue Yes NO ECM PCM RESET Ignition on and engine stopped Yes No Communication The engine should NOT be running but the ignition should be ON Turn the igniti...

Страница 61: ...utton to view additional troubleshooting tips and press Back button to return 8 Press any key to return to Mode Menu Readiness Test The Readiness Test function is available for engine system of VW AUDI vehicles ONLY 1 Use UP DOWN button to select Readiness Test from Mode Menu and press OK button Communication TESTER NOT COMMUNICATING WITH CONTROL UNIT 1 Make sure the igni tion is switched ON 2 Che...

Страница 62: ... This function is used to retrieve vehicle identification no VIN of vehicles It is available for GM vehicles ONLY 1 Use UP DOWN button to select VIN from Mode Menu and press OK button Mode Menu Read Codes Erase Codes ECU Information Readiness Test OK Back Readiness Test EGR Sys PASS Heated O2 PASS O2 Sensor s PASS A C PASS Sec Air Inject PASS EVAP Sys PASS Save Back www AllOBD2 com ...

Страница 63: ... button 4 3 Review Data The Review Data function allows viewing of previously recorded diagnostic data Only review of live data needs detailed instructions 1 Use UP DOWN button to select Diagnostics from Main Menu and press OK button Mode Menu Read Codes Erase Codes ECU Information VIN OK Back Vehicle Information Vehicle VIN 1GCEC14W5XZ214506 Save Back www AllOBD2 com ...

Страница 64: ...ton l If no data stored in the scan tool a No data available message shows on the screen 4 Use UP DOWN button to select diagnostic path and press OK button Main Menu Diagnostics System Setup Tool Information OK Select Vehicle gm eobd Delete all data OK Back Diagnostics OBD II EOBD Asian European USA Review data OK Back www AllOBD2 com ...

Страница 65: ...ata on screen Reviewing Live Data 1 To review live data use UP DOWN scroll button to select diagnostic path till Live Data is located and press OK button Select Menu Record 1 Record 2 OK Back P0118 09 1 6 Engine Coolant Temperature Sensor 1 Circuit High Back Record 1 Read Codes Live Data I M Readiness Vehicle Info Modules Present OK Back www AllOBD2 com ...

Страница 66: ...d live data on screen l The number x x indicates total number of recorded frames and the sequence of currently reviewed frame 5 Use UP DOWN button to view PID s of each frame Live Data Complete Data Set Custom Data Set OK Back Complete Data Set Test 1 Test 2 OK Back Complete Data Set TP 100 0 STFT Bank1 100 RPM rpm 0 0 VSS km h 0 0 LTFT Bank1 0 7 SHRTFT1 0 0 Graph P1 49 Back www AllOBD2 com ...

Страница 67: ... press Graph button and then use Px x button l Y axis of the coordinates indicates the maximum and minimum values of a PID and abscissa axis indicates time Currently played PID and its value are displayed on the upper part of the screen l The vertical line in the graph indicates the position of the frame in the graph l If recorded graph data covers less than one screen following screen appears SHI...

Страница 68: ...eview the recordings thoroughly before erasing 1 Use UP DOWN button to select Review Data from Main Menu and press OK button 2 Use UP DOWN button to select Delete All Data from Select Vehicle menu and press OK button Graph data less than one screen No playing Main Menu OBD II EOBD Asian European USA Review Data OK Select Vehicle OBD II EOBD Honda Delete All Data OK Back www AllOBD2 com ...

Страница 69: ...ation 4 Press OK button to erase recorded data and a Delete done message shows on the screen l If you decide not to delete the data press Back button to return to previous screen Are you sure you want to delete diagnostic data Yes No www AllOBD2 com ...

Страница 70: ... software and print data you need the following tools MaxiDiagPRO MD801 scan tool A computer with USB ports A USB cable 1 Download update application USB driver and update files from our website www auteltech com 2 Place included CD into CD ROM 3 Follow onscreen instructions on your computer to install applications 4 Launch PC Link when installations completed 5 Connect the scan tool to computer w...

Страница 71: ...el Trim Bank3 SHRTFT2 Short Term Fuel Trim Bank2 SHRTFT4 Short Term Fuel Trim Bank4 LONGFT2 Long Term Fuel Trim Bank2 LONGFT4 Long Term Fuel Trim Bank4 FRP kPa Fuel Rail Pressure gauge FRP psi Fuel Rail Pressure gauge MAP kPa Intake Manifold Absolute Pressure MAP inHg Intake Manifold Absolute Pressure RPM min Engine RPM VSS km h Vehicle Speed Sensor VSS mph Vehicle Speed Sensor SPARKADV x82 Igniti...

Страница 72: ...ltage B2S2 SHRTFTB2S2 Short Term Fuel Trim B2S2 O2B2S3 V O2 Sensor Output Voltage B2S3 SHRTFTB2S3 Short Term Fuel Trim B2S3 O2B2S4 V O2 Sensor Output Voltage B2S4 SHRTFTB2S4 Short Term Fuel Trim B2S4 O2B1S1 V O2 Sensor Output Voltage B2S1 SHRTFTB1S1 Short Term Fuel Trim B2S1 O2B1S2 V O2 Sensor Output Voltage B1S2 SHRTFTB1S2 Short Term Fuel Trim B1S2 O2B2S1 V O2 Sensor Output Voltage B2S1 SHRTFTB2S...

Страница 73: ...Equivalence Ratio wide range O2S B1S2 O2B1S2 V O2 Sensor Voltage wide range O2S B1S2 EQ_RATB1S3 Equivalence Ratio wide range O2S B1S3 O2B1S3 V O2 Sensor Voltage wide range O2S B1S3 EQ_RATB1S4 Equivalence Ratio wide range O2S B1S4 O2B1S4 V O2 Sensor Voltage wide range O2S B1S4 EQ_RATB2S1 Equivalence Ratio wide range O2S B2S1 O2B2S1 V O2 Sensor Voltage wide range O2S B2S1 EQ_RATB2S2 Equivalence Rati...

Страница 74: ... Ratio wide range O2S B4S2 O2B4S2 V O2 Sensor Voltage wide range O2S B4S2 EGR_PTC Commanded EGR EGR_ERR EGR Error EVAP_PCT Commanded Evaporative Purge FLI Fuel Level Input WARM_UPS Number of Warm ups Since DTC Cleared CLR_DIST km Distance Since DTC Cleared CLR_DIST mile Distance Since DTC Cleared EVAP_VP Pa Evap System Vapor Pressure EVAP_VP inH2O Evap System Vapor Pressure BARO kPa Barometric Pre...

Страница 75: ...RAT21 Equivalence Ratio wide range O2S B2S1 O2S21 mA O2 Sensor Current wide range O2S B2S1 EQ_RAT22 Equivalence Ratio wide range O2S B2S2 O2S22 mA O2 Sensor Current wide range O2S B2S2 EQ_RAT31 Equivalence Ratio wide range O2S B3S1 O2S31 mA O2 Sensor Current wide range O2S B3S1 EQ_RAT32 Equivalence Ratio wide range O2S B3S2 O2S32 mA O2 Sensor Current wide range O2S B3S2 EQ_RAT41 Equivalence Ratio ...

Страница 76: ... Relative Throttle Position AAT F Ambient Air Temperature AAT C Ambient Air Temperature TP_B Absolute Throttle Position B TP_C Absolute Throttle Position C APP_D Accelerator Pedal Position D APP_E Accelerator Pedal Position E APP_F Accelerator Pedal Position F TAC_PCT Commanded Throttle Actuator Control MIL_TIME Minute run by Engine While MIL activated CLR_TIME Time since Diagnostic Trouble Code C...

Страница 77: ...alyst system bank 1 malfunction have been encountered numerator CATCOND1 Catalyst Monitor Conditions Encountered Counts Bank 1 Catalyst Monitor Conditions Encountered Counts Bank 1 displays number of times that the vehicle has been operated in the specified catalyst monitoring conditions denominator CATCOMP2 Catalyst Monitor Completion Counts Bank 2 Catalyst Monitor Completion Counts Bank 2 displa...

Страница 78: ...e that all conditions necessary to detect an oxygen sensor bank 2 malfunction have been encountered numerator O2SCOND2 O2 Sensor Monitor Conditions Encountered Counts Bank 2 O2 Sensor Monitor Conditions Encountered Counts Bank 2 displays number of times that the vehicle has been operated in the specified oxygen sensor monitoring conditions denominator EGRCOMP EGR Monitor Completion Condition Count...

Страница 79: ...f times that the vehicle has been operated in the specified AIR system monitoring conditions denominator EVAPCOMP EVAP Monitor Completion Condition Counts EVAP Monitor Completion Condition Counts displays number of time that all conditions necessary to detect a 0 020 EVAP system leak malfunction have been encountered numerator EVAPCOND EVAP Monitor Conditions Encountered Counts EVAP Monitor Condit...

Страница 80: ...proper use accident flood lightning or if the product was altered or repaired by anyone other than the Manufacturer s Service Center 3 Autel shall not be liable for any incidental or consequential damages arising from the use misuse or mounting of the code reader 4 All information in this manual is based on the latest information available at the time of publication and no warranty can be made for...

Отзывы: