background image

UM-CV-751-RP-X117-Q322V1 www.austin-hughes.com

   It is very important to mount the equipment in a suitable cabinet or on a stable surface.

   Make sure the place has a good ventilation, is out of direct sunlight, away from sources of excessive    

      dust, dirt, heat, water, moisture and vibration.

The equipment comes with the standard parts shown in package content. Check and make sure they are 
included and in good condition. If anything is missing, or damaged, contact the supplier immediately. 

Unpacking

Before Installation 


How To Clean Your LCD Monitor  


Caution : 

   To avoid the risk of electric shock, make sure your hands are dry before unplugging your monitor from or

       plugging your monitor into an electrical outlet.

   When you clean your monitor, do not press down on the LCD screen. Pressing down on the screen can 

      scratch or damage your display. Pressure damage is not covered under warranty. 

   Use only cleansers made speci

fi

 cally for cleaning monitors and monitor screens. Cleansers not made to 

      clean monitors and monitor screens can scratch the LCD display or strip o

  the 

fi

 nish.

   Do not spray any kind of liquid directly onto the screen or case of your monitor. Spraying liquids directly 

      onto the screen or case can cause damage which is not covered under warranty.    


   Do not use paper towels or abrasive pads to clean your monitor. Using an abrasive pad or any wood based

      paper product such as paper towels can scratch your LCD screen.

Cleaning Your Monitor 


To clean your LCD safely, please follow these steps :


  Disconnect the power cord.

       Gently wipe the surface using a clean, dry micro

fi

 ber cloth. Use as little pressure as possible.

1

2

Cleaning Tough Marks and Smudges                     

To remove tough marks and smudges, please follow these steps :


     Disconnect the power cord.

        Spray a small amount of non-abrasive cleanser on a micro

fi

 ber cloth.

        Gently wipe the surface. Use as little pressure as possible.

        Wait until your monitor is completely dry before plugging it in and powering it up.

1

2

Caution : Do not spray or apply any liquids directly onto the monitor. Always apply the solution to your 
micro

fi

 ber cloth 

fi

 rst, not directly on the parts you are cleaning.

3

4

Содержание CyberView RP-X117

Страница 1: ...w austin hughes com 751 1U LCD Drawer RP X117 Options SDI Touchscreen DC power User Manual Designed and manufactured by Austin Hughes 16 2 Ultra High Resolution LCD 1920 x 1200 dedicated KVM switch and rackmount screen technology ...

Страница 2: ...rvice personnel should open the chassis Opening it yourself could damage the equipment and invalidate its warranty If any part of the equipment becomes damaged or stops functioning have it checked by qualified service personnel What the warranty does not cover Any product on which the serial number has been defaced modified or removed Damage deterioration or malfunction resulting from Accident mis...

Страница 3: ...n P 1 1 3 Installation P 3 Part 2 Specifications OSD 2 1 Product Specifications P 4 2 2 On screen Display Operation OSD P 7 2 3 Picture In Picture PIP Picture By Picture PBP P 10 Part 3 Options 3 1 3G HD SD SDI Broadcast grade input P 12 3 2 X17 Touchscreen Resistive 1 point touch P 13 3 3 DC Power 12V 24V 48V 125V 250V P 14 ...

Страница 4: ...sers not made to clean monitors and monitor screens can scratch the LCD display or strip off the finish Do not spray any kind of liquid directly onto the screen or case of your monitor Spraying liquids directly onto the screen or case can cause damage which is not covered under warranty Do not use paper towels or abrasive pads to clean your monitor Using an abrasive pad or any wood based paper prod...

Страница 5: ... OSD membrane Carry handle to release the 2 pt lock 2 point lock 6 3 6 Part 1 RP X117 1 1 Package Content RP X117 unit X 1 6ft VGA cable X 1 Power cord X 1 M6 screw cage nut cup washer X 8 1 2 Structure Diagram The above package content is only for the pure model VGA and DVI D only It varies with options such as SDI HDMI audio touchscreen DC power ...

Страница 6: ...117 441 6 x 480 x 44 mm 17 4 x 18 1 x 1 73 inch 588 x 758 x 120 mm 23 1 x 29 8 x 4 7 inch 11 kg 24 2 lb 15 kg 33 lb The weight is only for the pure models It varies with accessories options such as SDI HDMI audio touchscreen DC power Front View Top View Side View 1 2 Dimension UNIT mm 1mm 0 03937 inch Power VGA DVI D Rear View Audio out HDMI ...

Страница 7: ...n Slides Step 2 Measure the depth of the front and rear mounting rails Align each rear mounting bracket to a suitable length M6 screw cage nut cup washer x 8 are provided After use the drawer Basically user can push in the drawer back to park position by releasing the left right slide lock arrow as long as the drawer starts moving he she can release their finger right away holding the arrow is not...

Страница 8: ...9 89 89 Response Time ms 30 Dot pitch mm 0 191 Display Area mm 343 80H x 214 90V Surface treatment Anti glare Hard coating Surface hardness 3H Backlight Type LED MTBF hrs 20 000 Video Connectivity Digital HDMI HDMI 1 4 CEA 861 E DVI DVI D TMDS single link Analog VGA Analog 0 7Vp p Plug Play DVI VGA VESA EDID structure 1 3 Synchronization VGA Separate Composite SOG Power Power Supply Range Auto sen...

Страница 9: ... 50Hz Audio Signal 2ch Linear PCM 32 44 1 48 KHz Environmental Conditions Operating Temperature 0 to 55 C degree Humidity 20 90 non condensing Altitude 16 000 ft Storage Non operating Temperature 20 to 60 C degree Humidity 5 90 non condensing Altitude 40 000 ft Shock 10G acceleration 11ms duration Vibration 10 300Hz 0 5G RMS random vibration Physical Specification Product W x D x H 441 6 x 480 x 4...

Страница 10: ...UM CV 751 RP X117 Q322V1 www austin hughes com Intentionally Left Blank ...

Страница 11: ... All LED touch buttons in WHITE light The LED of Power touch button will flash continuously when there is no signal input All the LED touch buttons will automatically turn off after 10 minutes of idle status except the Power Light up all membrane buttons please press any button for 1 2 seconds except the Power Select another video input only available for models with multiple video input a Press th...

Страница 12: ...rsion 2 Color Color temperature User Warm Cool 5400k mode and Red Green Blue color balance Sharpness Adjust the image from weak to sharp Hue Adjust the screen hue value Saturation Adjust the saturation of the image color Dynamic luminous control Control the dynamic brightness 3 OSD Set Language Select the language in which the OSD menu is displayed English OSD H Position Align the screen image lef...

Страница 13: ...the size of the Sub screen Small Medium Large Huge PIP position Adjust the position of the Sub screen Top Left Top Right Bottom Left Bottom Right Swap Swap the input signal of PIP PBP sub screen 6 MISC Signal source Select the signal source DP HDMI1 HDMI2 Mute Turn off the surrounding sound Audio in Auto Line in DP Volume Adjust the volume of sound Sleep mode Set the off time 10 min 20 min 30 min 50...

Страница 14: ...om left top right bottom right OSD Menu MISC PIP Position top left top right bottom left bottom right top left top right bottom left bottom right Size Adjust the size of the Sub screen Large Small OSD Menu MISC PIP Mode Large Small LCD Monitor Large Sub screen Small Sub screen 1920 x 1200 552 x 414 480 x 360 1920 x 1080 552 x 414 480 x 360 1440 x 900 414 x 310 360 x 270 1366 x 768 392 x 294 340 x ...

Страница 15: ...678 x 508 1280 x 1024 635 x 476 2 3 2 Picture By Picture PBP 2 3 3 PIP PBP Source To select an input signal for PIP PBP Sub screen OSD Menu MISC PIP Source VGA S Video Composite DVI HDMI SDI YPbPr TV Sub Main VGA S Video Composite DVI D HDMI SDI YPbPr TV VGA x o o o o o o o S Video o x x o o o o x Composite o x x o o o o x DVI o o o x x o o o HDMI o o o x x o o o SDI o o o o o x x o YPbPr o o o o ...

Страница 16: ...0mm 20 9 Audio out INPUT 3G SDI IN BNC x 1 0 8Vp p 75 ohm 3G SDI OUT BNC x 1 Active through equalized relocked Standard Compliance Video SMPTE 425M 274M 296M 125M ITU R BT 656 Audio SMPTE 299M 272M C Compatible Audio Format 3G SDI 48kHz 16 20 24 bit 2 CH Synchronized Video HD SDI 48kHz 16 20 24 bit 2 CH Synchronized Video SD SDI 48kHz 16 20 24 bit 2 CH Synchronized Asyn chronized Video Compatible ...

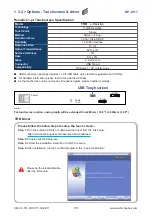
Страница 17: ...ideline and CD disc For detailed information please refer to the attached CD disc As the touchscreen unit is not made of toughened glass please handle it carefully For touchscreen option casing depth will be extended from 480mm 18 9 to 530mm 20 9 Power VGA DVI D USB Touchscreen Audio out TRB Driver Step 1 Run the bundled CD disc or download the driver from the link below http www austin hughes com...

Страница 18: ...n DC power 3 3 Options DC Power VGA DVI D Audio out Model 12V 24V 48V 125V 250V Input rating Input voltage 12 Volt 24 Volt 48 Volt 110 Volt 300 Volt Input range 9 18V 18 36V 36 75V 66 160V 180 425V Input current No load 50 mA 50 mA 50 mA 35 mA 10 mA Full load 4950 mA 2450 mA 1220 mA 749 mA 600 mA Output rating Output voltage 12 Volt 12 Volt 12 Volt 12 Volt 12 Volt Output current 4 16A 4 16A 4 16A ...

Страница 19: ...UM CV 751 RP X117 Q322V1 www austin hughes com Intentionally Left Blank ...

Страница 20: ... modify product specifications without prior notice and assumes no responsibility for any error which may appear in this publication All brand names logo and registered trademarks are properties of their respective owners Copyright 2022 Austin Hughes Electronics Ltd All rights reserved ...

Отзывы: