


18
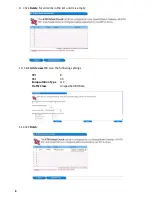
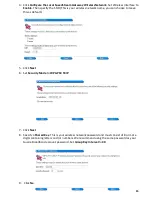
5. The progress will be shown as the computer connects to the network. If the
Wireless
Network Connection
window continues to show acquiring Network Address, the pre-shared
key or encryption key may have been mistyped. Click
Cancel
and return to Step 3.
Once you are connected, close the
Wireless Network Connection
window. You should now be
connected to your network and have internet access.
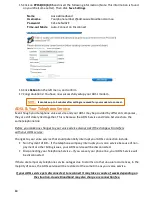
On a Windows Vista Machine
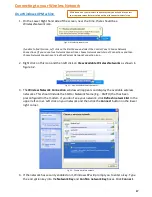
1. Go to
Start
and click on
Connect to
.
2. A
Connect to a network
window will appear. This window
will show all available connections. Focus on the wireless
connections and scroll down the list and select the
wireless network that you wish to connect to.
Click on the
Connect
button.
3. Type in the Pre-Shared Key/Encryption Key.
4. Once the wireless connection has been established, the connection will display
connected
.
5. Right click the connected wireless network and click
properties
. The connection settings of
this network will be displayed and you can make further configuration changes, such as set it
as the preferred network to connect to automatically.
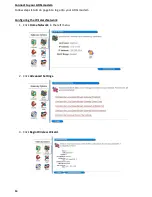
On a Mac – OS X
Connecting Via the Wireless Menu
(This menu item can be hidden)
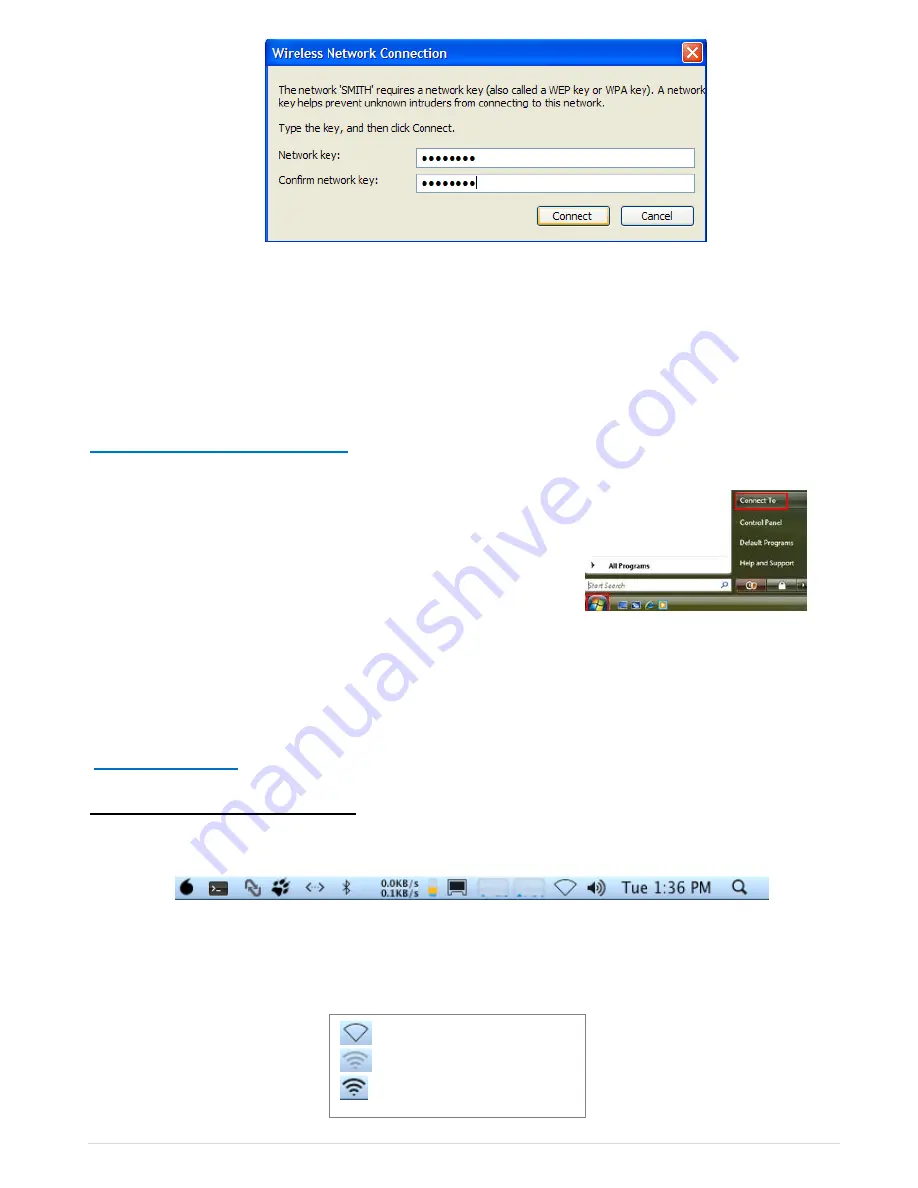
The wireless menu is located in the top right hand corner of the screen in the menu bar.
This menu bar is highly customizable so may not display all these icons.
The Wireless Menu icon has three states, as show below in figure 3.7.
Fig 3.4 – Type in Network Key & Confirm
Fig 3.5 – Windows Vista
- Off
- On,
not
connected to a network
- On, connected to a network
Fig 3.7 – Wireless States
Fig 3.6 – Menu Bar


