Aussie MONARO 7652K1 Скачать руководство пользователя страница 13

To reduce the risk of serious bodily injury or death:

· Locate your charcoal in an open area away from

buildings, dry leaves, or brush.and at least 10 feet 
away from your house or building.

· Always make sure the grill is on a level, stable surface 

and not tilted toward the front or back. 

· Do not use the grill in a garage, breezeway, carport, 

porch, high traffic area, on or under any surface that 
can catch fire.

· Do not use a charcoal grill indoors, on recreational 

vehicles, or boats.

· Do not use a charcoal grill as a space heater.

SELECTING A LOCATION

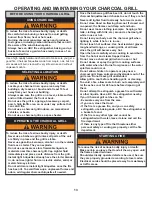
OPERATING AND MAINTAINING YOUR CHARCOAL GRILL

BEFORE USING YOUR CHARCOAL GRILL

To reduce the risk of serious bodily injury or death:

· Be careful when burning charcoal to avoid getting 

burned from flame, heat or hot coals.

· Burning charcoal consumes oxygen and produces 

toxic gases, including carbon monoxide that can kill.

· Be aware of the wind blown sparks.
· Always have an ABC fire extinguisher, baking soda, a 

bucket of sand or a garden hose ready in case of an 
uncontrolled fire. 

USING CHARCOAL

To reduce the risk of serious bodily injury or death:

· Never use a barbecue grill unless all parts of the unit 

are firmly in place and the grill is stable.

· Never use gasoline, kerosene, alcohol  or other volatile  

fluids as a starter. They can explode.

· Do not use aerosols or store flammable liquids or 

materials near this charcoal grill. Cap Lighter fluid
immediately and place a safe distance from the grill.

· Instant light briquettes already have the starter blended 

in, do not use lighter fluid, an electric starter, solid, or 
metal chimney starters.  

· Do not add more instant light briquettes once the fire 

has been lit. To avoid flame-ups, unpleasant fumes and 
odors, add regular charcoal briquettes if needed.

Use a high quality hardwood charcoal to make sure you get a
good fire. Charcoal briquettes made from maple, oak, birch or
elm woods will burn clean with very little smoke and without
unpleasant odors.

· Once the barbecue grill has been lit, do not touch the 

charcoal briquettes/wood chunks to see if they are hot. 

· Never add lighter fluid to already hot or warm coals

.

· Do not close Hood on flaming charcoal. If closed and 

re-opened, the flames could leap out and burn. 

· Do not wear loose clothing (example:  hanging shirt 

tails, clothing with frills, etc.) around a charcoal grill 
while in use or hot. 

· Do not lean your body over the charcoal grill when  

lighting it, while it hot or is in use.

· Do not touch hot surfaces. Use heat resistant gloves, 

long-handled tongs, or cooking mitts at all times 
since the grill will become very hot. 

· Open the hood carefully when cooking to avoid burn 

from the hot air and steam trapped inside.

· Do not move a charcoal grill when in use or hot.
· Do not douse or spray the grill or cooking surfaces 

with water when hot. Burns from grease or the water 
splatters could occur.

· Do not allow children to operate or play near a

charcoal grill. Keep animals and bystanders out of the 
grill area. Do not leave grill unattended.

· Allow grill to cool before handling parts or cleaning.  
· To avoid a fire, allow coals to burn out completely and 

let the ashes cool for 48 hours before disposing of 
them.

· Do not attempt to extinguish a grease fire with water 

or other liquids. Have a BC fire extinguisher nearby.

· If your Charcoal grill catches on fire:

- Evacuate everyone from the area.
- If you can, close the Hood.
- If the fire is a grease fire, and you can safely

extinguish, use baking soda, a BC fire extinguisher or 
a bucket of sand. 

- If the fire is any other type and cannot be

extinguished with water, leave it alone and call the 
fire department.

- If there is any type of fire that threatens either 

personal safety or endangers property, call the fire 
department.

OPERATING THE CHARCOAL GRILL

13

STARTING A FIRE 

To reduce the risk of serious bodily injury or death:

· Make certain you leave the Hood all the way open until 

the flames have died down.

· Should electrically operated starters be used, be sure 

they are properly grounded according to local codes. 
Electrical cords should be placed away from walkways 
or traffic areas.

Содержание MONARO 7652K1

Страница 1: ...esult in fire or explosion which could cause property damage personal injury or death Read and follow instructions carefully before assembly or use Do not use this product for any other purpose than which it is intended These instructions must be kept with the user SAVE THESE INSTRUCTIONS Assembly and Use Manual M Mo od de el l 7 76 65 52 2K K1 1 Aussie M Mo od de el l 7 76 65 52 2K K5 5 7 76 65 5...

Страница 2: ...o not throw away any packaging until you have located all the parts Follow instructions of each step in the order they are written as you look at the diagrams This will allow little confusion and easier assembly If you have any questions which require help contact Customer Service and be sure to mention the model number of your grill I Assembly Instructions 2 Parts Illustrations 3 Parts List 4 Ste...

Страница 3: ...3 PARTS ILLUSTRATIONS 1 7 with Item 10 installed 9 6 or 6A 5 4 3 2 or 2A 10 See Item 7 23 22 20 21 19 17 16 15 14 13 12 11 2B 3A 4A 5A 11A 17A 18 or 18A 6B 8 ...

Страница 4: ...Axle Nut Assembled on Item 7 Axle 03 4073 00 2 2 2 11 Body Assembly See 25 25A 26 for Replacement 1 1 1 12 Slide Vent 03 6072 00 2 2 2 13 Bolt 6mm x 16mm 03 6070 00 8 8 8 14 Washer 6mm 03 6501 00 18 18 18 15 Spacer Sleeve 03 6071 00 8 8 8 16 Locknut 6mm 03 4070 00 10 10 10 17 Bolt 6mm x 90mm 03 6020 00 2 10 10 17A Bolt 6mm x 110mm 03 4066 00 8 18 Handle Hood Models 7652K1 7652K5 03 6036 00 1 1 18A...

Страница 5: ...aded holes in the Side Table Do not tighten bolts completely NOTE For easier alignment and further assembly final tightening of all bolts will be completed in Step 6 Attach the two Wheel Legs to the second Side Table the same way Wheel Leg is the short leg with a large axle hole at one end ITEM 5 1 4 20 x 1 3 8 Bolt STEP 1 Leg Side Table Assembly TOOLS ITEM 3 or 3A Fixed Leg ITEM 2 or 2A Side Tabl...

Страница 6: ...tom Shelf holes with holes of Wheel Legs and attach with four 1 4 20 Bolts Item 5 or 5A Do not tighten Bolts completely Secure Fixed Legs to Bottom Shelf with 1 4 20 Bolts Go ahead and tighten Wheel Leg bolts securely This will not be possible after the Wheel is assembled Fixed Legs Wheel Legs ITEM 5A 1 4 20 x 1 Bolt Fixed Legs Wheel Legs All Wood Bottom Shelf Leg Assembly ITEM 6B Bottom Shelf ...

Страница 7: ...xle through both sides of Wheel Legs Place Axle Washers onto each end of Axle Position Wheel hub recess to the outside and slide a Wheel onto each end of Axle Attach Axle Nut onto each end of Axle Tighten each side with wrench or pliers Wheel hub recess this side Axle Washer Axle Nut 7 with Item 10 installed ...

Страница 8: ...the Sleeve Spacer inside the Slide Vent slotted hole Attach 6mm Steel Washer and Locknut to Bolt from inside of Grill Body to secure the Slide Vent Repeat for each slotted hole on both Slide Vents Make sure the Vents slide back and forth freely over the Sleeve Spacers If not loosen the bolts slightly and reset the Spacers inside the Slide Vent slotted holes and retighten ITEM 14 Washer 6mm ITEM 12...

Страница 9: ... it on on its backside Insert 6 mm x 90 mm Bolt through recessed hole of Hood Handle through Handle Spacer through a hole in Hood Note Wide end of Handle Spacer goes against the Hood Attach a 6mm Washer and Locknut to the Bolt from inside Hood Do not over tighten it may crack the Hood finish Repeat for other end of Handle Assembly of Grill Body will require two people ITEM 14 Washer 6 mm ITEM 11 o...

Страница 10: ... away from the body since all the bolts are loose Insert two 6mm x 90mm Body Bolts through Leg Spacers and slotted holes in Grill Body Attach a 6mm Wing Nut to the Bolts but do not tighten Repeat this assembly for remaining three Cart Legs With help from a second person turn full Grill and Cart Assembly upright The Grill Body should slide down to seat itself within the slotted holes If not loosen ...

Страница 11: ...FIG A FIG B View from inside Body Leg Assembly Bolt Body Spacer Wingnut View from back side of Body Leg Assembly after standing up STEP 6 Grill Body Wood Cart Assembly 11 ...

Страница 12: ... Pan is pushed all the way in Hang Charcoal Grate inside Grill Body by hooking the handles inside the two 2 elongated slots on each side of the Grill Body Lay the Cooking Grids on the front and rear Body shoulders above the Charcoal Holder ITEM 22 Drip Pan Install Grids on Front and Rear Shoulder of Body Slide Drip Pan under Body Hook Handles into slots ...

Страница 13: ...easant odors Once the barbecue grill has been lit do not touch the charcoal briquettes wood chunks to see if they are hot Never add lighter fluid to already hot or warm coals Do not close Hood on flaming charcoal If closed and re opened the flames could leap out and burn Do not wear loose clothing example hanging shirt tails clothing with frills etc around a charcoal grill while in use or hot Do n...

Страница 14: ...ated by the burning charcoal underneath The natural food juices from the juices fall onto the hot Charcoal and vaporize Rising smoke bastes the food giving it that unique barbecued flavor Leave the Slide Vents open for the most heat Close the vents partially to lower the heat It takes a few minutes for the charcoal to react to the vent adjustment Leave the hood open for Texas Style open air barbec...

Страница 15: ...utdoors out of the reach of children To avoid an fire or explosion do not store charcoal or lighter fluid near a heat source Do not store additional charcoal and lighter fluid under or near the charcoal grill while it is hot Always cap the lighter fluid when not in use STORAGE 1 Clean your grill before storing 2 Remove the Cooking Grid Rub with a coat of light cooking oil and wrap with aluminum fo...

Страница 16: ...P N 03 6077 01 REV C 12 06 16 Aussie ...

Отзывы: