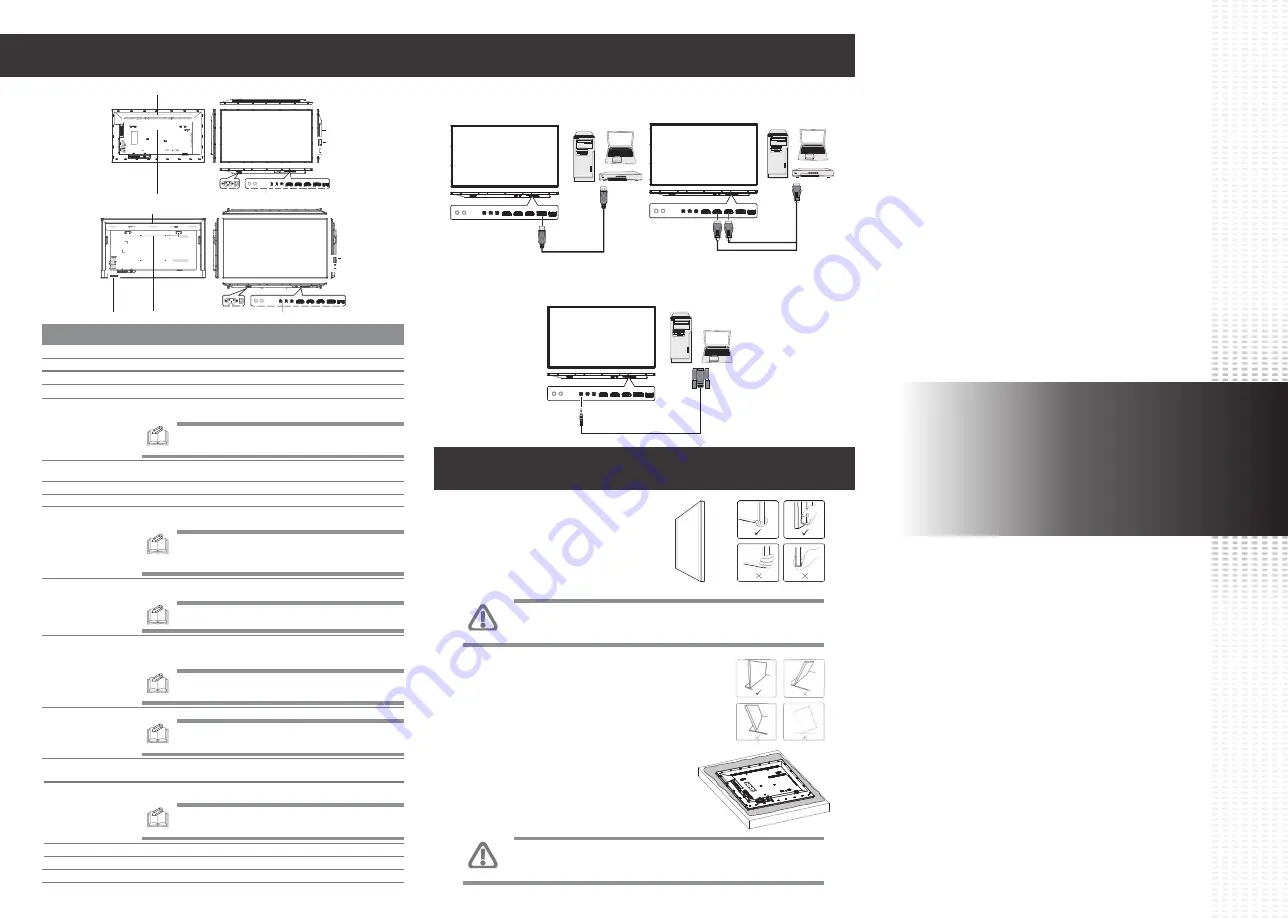
Connecting To The Display
Inputs/Outputs
Quick Start Guide
PUSDM55A (P550QVF07.0)
PUSDM65A (P650QVF09.0)
PUSDM75A (SN75UNM01.0)
CAUTION:
Avoid applying force or using sharp objects on
the screen or the frame around the screen at all times.
CAUTION:
Never press or place anything on the back cover.
This may damage the internal parts of the display.
DP
55"/65"
75"
Safety Information
Carrying the Display
When carrying the display, always carry it
using both hands and with the LCD panel
facing forward. DO NOT carry the
display while putting pressure on the
screen at the front of the chassis.
Placing the Display
When placing the display, always keep the screen face
down as illustrated in the Setting Down the Display
section. Never tilt the display towards the left, right or
balanced on a single corner of the frame.
Setting Down the Display
When setting the display down, place the
screen face down on a flat and stable surface
covered by a protective sheet and a table
cushion as shown in the illustration provided.
HDMI
RS232
Item
Description
17
Speakers
Emit audio from the display.
3
SDM-L
Slot used to install a large Intel
®
Smart Display Module (SDM Large).
15
Switches the main power on/off.
AC SWITCH
16
Connects with the supplied power cord.
AC IN
2
See “Control Buttons” for detailed information.
Control Buttons
7
HDMI IN1
Connects with devices transmitting audio/video using the HDMI interface.
8
HDMI IN2
Connects with devices transmitting audio/video using the HDMI interface.
4
SDM-S
Slot used to install a small Intel
®
Smart Display Module (SDM Small).
11
IR IN
•
Connects with an external IR sensor module.
•
Connects with the IR OUT connector of another display to daisy chain the
IR signal.
NOTE:
From the tip to the terminal the plug sections are defined
as IR / VCC / Ground.
12
RS232 IN
Connects with the serial IO connector of a host device.
NOTE:
From the tip to the terminal the plug sections are defined
as TX / RX / Ground.
14
RS232 OUT
Connects with the RS232 IN connector of another display to daisy chain
direct commands.
NOTE:
The RS232 OUT port does not support connecting with
an SDM module's internal UART port.
13
IR OUT
Connects with the IR IN connector of another display to daisy chain the IR
signal with a pin-to-pin straight cable.
10
AUDIO OUT
Connects with external speakers with an amplifier or audio amplifier to
output the audio that is supplied by the video source.
NOTE:
Headphones and earphones are not supported.
6
DP IN
Connects with devices transmitting audio/video using the DP (DisplayPort)
interface.
1
Air Vents
Disperses heat from the display.
5
USB
Connects with a flash drive to display digital media or update the display’s
firmware.
NOTE:
Use a flash drive with a maximum storage capacity of 512
GB for FAT32 /NTFS formats.
Connects with the HDMI IN connector of another display to daisy chain the
audio/video broadcast on the displays.
9
HDMI OUT
NOTE:
When interconnecting displays to create a daisy-chain
configuration, use only the HDMI IN2 port as the input source on
all the displays in the daisy chain.
2
7
8
13
11
6
16
3
14
4
9
10
12
15
17
5
1
3
6
7
10
5
14
4
12
17
8
9
11
13
15
2
1
16


