background image

23

EN

repeatedly. The station frequency will show on the display.

•  Press and hold the  

/TUN+ or 

/TUN- button to quick scan the 

stations that with strong signal.

Auto preset memory / scan

To scan for stations within reception range and save them to preset 

memory automatically, press and hold the PLAY/PAUSE/PAIR/SCAN button. 

After the unit is finished scanning, the unit will automatically tune to preset 

number 1 (P01). 

Manual preset memory operation

Choose which stations to save in preset memory instead of scanning 

automatically.

1.  Use the  

/TUN+ or 

/TUN- button to tune to the station that you want 

to save as a preset (e.g., 93.1).

2. 

Press the P-MODE/M./ECHO button. “P01” will flash on the display to 

indicate that you are saving the station as Preset Memory 01. (To change 

the preset memory number, press the 10/M./FOLD.+ or 10/M./FOLD.- 

buttons.)

3. 

Press the P-MODE/M./ECHO button to finish saving the station (e.g., P01 

is now set to 93.1).

4.  To save another station, repeat steps 1 to 3. You may save up to 30 FM 

stations.

To tune to a preset station

•  To tune to the next preset station, press the 10/M./FOLD.+ button.

•  To tune to the previous preset, press the 10/M./FOLD.- button.

USB operation

1.  Press the FUNCTION/  button on unit to select USB mode.

2.  Plug the USB memory stick to the USB port on top of the unit. Playback 

will start automatically.

3.  To pause playback, press the PLAY/PAUSE/PAIR/SCAN button on unit. 

The playing time will flash on the display.

4.  To resume playback, press the PLAY/PAUSE/PAIR/SCAN button again.

5.  To select a desired track, press the 

/TUN+ or 

/TUN-, button 

respectively during playing until the desired track appears on the display. 

The unit will start play automatically.

6.  To search for a particular passage during playback, press and hold the  

/TUN+ or 

/TUN-, button to scan the current playing track at high 

speed until desired point (passage) appears, then release the button for 

normal playback mode.

7.  To select a song which track number exceeds 10, press the 10/M./FOLD.+ 

or 10/M./FOLD.- button each time to skip forward/backward 10 tracks, 

then press the  

/TUN+ or 

/TUN- button to select desired track.

8.  To select a desired folder (if the USB contains more than one folder), 

Содержание Ultrasonic BT

Страница 1: ...w w w a u n a m u l t i m e d i a c o m Ultrasonic BT Boom box 10032633 ...

Страница 2: ......

Страница 3: ...r Entsorgung 14 INHALT Sehr geehrter Kunde wir gratulieren Ihnen zum Erwerb Ihres Gerätes Lesen Sie die folgenden Hinweise sorgfältig durch und befolgen Sie diese um möglichen Schäden vorzubeugen Für Schäden die durch Missachtung der Hinweise und unsachgemäßen Gebrauch entstehen übernehmen wir keine Haftung ...

Страница 4: ... V 50 60 Hz Leistung 33 W Ausgangsleistung max 20 W x 2 UKW Frequenzbereich 87 5 108 MHz Anschlüsse AUX IN Eingang Mikrofoneingang 3 5 mm 6 3 mm Betriebstemperaturbereich 5 C bis 40 C BT BT Übertragungsstandard Version 2 1 EDR Reichweite bis zu 10 Meter Kompatible BT Profil A2DP ...

Страница 5: ...nicht mit nassen Händen ein oder aus Wenn der Netzstecker nicht mit Ihrer Steckdose kompatibel ist versuchen Sie keinesfalls diesen mit Gewalt hinein zu stecken Verwenden Sie nur vom Hersteller ausgewiesene Ersatzteile Stellen Sie das Gerät an einen Ort mit guter Luftzirkulation Stellen Sie das Gerät auf eine ebene harte und stabile Oberfläche Setzen Sie das Gerät keinesfalls Temperaturen über 40 ...

Страница 6: ... Rückseite des Geräts Dieses Gerät muss geerdet werden Das Gerät enthält keine Teile die vom Kunden gewartet werden könnten Bitte wenden Sie sich zur Wartung und Reparatur an den Kundendienst oder an in ähnlicher Weise qualifiziertes Personal Der Blitz mit Pfeilspitze in einem gleichseitigen Dreieck bedeutet dass im Inneren des Geräts eine hohe Stromspannung herrscht welche eine Stromschlaggefahr ...

Страница 7: ...7 DE GERÄTEÜBERSICHT ...

Страница 8: ...n 9 PAIR SCAN Taste 10 10 M FOLD Taste 11 EQ Lichttaste 12 Anzeigeleuchte PAIR 13 Ladeanzeige 14 LCD Bildschirm 15 Lautsprecher 2x 16 Griff 17 MIC VOL Lautstärkeregler Mikrofon 18 MIC Anschluss 1 6 3 mm 19 MIC Anschluss 2 6 3 mm 20 Lichtbalken 21 AUX IN Anschluss 3 5 mm 22 USB Anschluss 23 Gerät ein ausschalten 24 Belüftungsöffnungen 25 AC Anschluss 26 Antenne ...

Страница 9: ...geführt werden Gerät ein ausschalten Drücken Sie die Taste ON OFF auf der Rückseite des Geräts um das Gerät ein oder auszuschalten HINWEISE Wenn sich das Gerät im USB BT AUX Modus befindet und für circa 15 Minuten keine Aktion durchgeführt wird wechselt das Gerät automatisch in den Standby Modus Drücken Sie die Funktions Standby Taste um das Gerät wieder einzuschalten Beachten Sie dass eine sehr n...

Страница 10: ...halten Sie die Taste EQ LIGHT um den gewünschten Lichtmodus auszuwählen Drücken und halten Sie die Taste EQ LIGHT zum Ausschalten des Discolichts so lange bis auf dem Bildschirm OFF angezeigt wird L 1 Blaues LED Licht leuchtet nach der Auswahl permanent L 2 Blaues LED Licht ist nach der Auswahl im Blinkmodus L 3 Rotes LED Licht leuchtet nach der Auswahl permanent L 4 Rotes LED Licht ist nach der A...

Страница 11: ...ndersuchlauf zu verwenden 1 Drücken Sie die Tasten TUN oder TUN um den Sender welchen Sie speichern möchten einzustellen z B 93 1 2 Drücken Sie die Taste P MODE M ECHO Die Anzeige P01 wird auf dem Bildschirm aufblinken um anzuzeigen dass Sie diesen Sender auf Speicherplatz 1 einspeichern Drücken Sue zum Ändern der Speicherplatznummer die Tasten 10 M FOLD oder 10 M FOLD 3 Drücken Sie zum endgültige...

Страница 12: ...asten 10 M FOLD oder 10 M FOLD wenn Sie einen Ordner überspringen möchten Drücken Sie anschließend zur Auswahl des gewünschten Titels im entsprechenden Ordner die Tasten TUN oder TUN HINWEIS Der USB Anschluss dient lediglich dem Datentransfer Andere Geräte können über die USB Verbindung nicht verwendet werden Die Verwendung von USB Verlängerungskabeln wird nicht empfohlen Wiederholungsmodus Im USB...

Страница 13: ...chstgeschwindigkeit 2 Aktivieren Sie die BT Funktion des externen Geräts welches Sie mit Ihrem Gerät verbinden möchten suchen Sie in der Liste nach KP683 und stellen Sie die Verbindung her Geben Sie falls notwendig zum Verbinden das Passwort 0000 ein Die Anzeigeleuchte leuchtet nun permanent um anzuzeigen dass die Verbindung erfolgreich hergestellt wurde und der Bildschirm des Geräts zeigt bt an D...

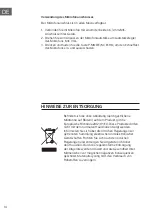
Страница 14: ...inke Abbildung durchgestrichene Mülltonne auf Rädern auf dem Produkt gilt die Europäische Richtlinie 2012 19 EU Diese Produkte dürfen nicht mit dem normalen Hausmüll entsorgt werden Informieren Sie sich über die örtlichen Regelungen zur getrennten Sammlung elektrischer und elektronischer Gerätschaften Richten Sie sich nach den örtlichen Regelungen und entsorgen Sie Altgeräte nicht über den Hausmül...

Страница 15: ...ear Customer Congratulations on purchasing this equipment Please read this manual carefully and take care of the following hints on installation and use to avoid technical damages Any failure caused by ignoring the items and cautions mentioned in the operation and installation instructions are not covered by our warranty and any liability ...

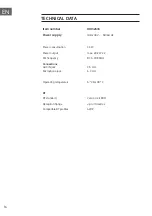
Страница 16: ...V 50 60 Hz Power consumption 33 W Power output max 20 W x 2 FM frequency 87 5 108 MHz Connections AUX IN jack Microphone jack 3 5 mm 6 3 mm Operating temperature 5 C bis 40 C BT BT standard Version 2 1 EDR Reception Range up to 10 metres Compatible BT profiles A2DP ...

Страница 17: ...se replacement parts which are specified by the manufacturer Install the unit in accordance with the manufacturer s instructions Place the unit where there is good ventilation Place the system on a flat hard and stable surface Do not expose to temperatures above 40 C Allow at least 30 cm clearance from the rear and the top of the unit and 5 cm from each side Press the buttons of the unit gently Pr...

Страница 18: ...th arrowhead symbol within the equilateral triangle is intended to alert the user to the presence of uninsulated dangerous voltage within the product s enclosure that may be of sufficient magnitude to constitute a risk of electric shock to persons Triangle with exclamation point plus explanation as follows ATTENTION The exclamation point within the equilateral triangle is intended to alert the use...

Страница 19: ...19 EN GUIDE TO THE APPLIANCE ...

Страница 20: ...N 8 VOL BUTTON 9 PAIR SCAN Taste 10 10 M FOLD BUTTON 11 EQ LIGHT BUTTON 12 PARI INDICATOR 13 CHARGE INDICATOR 14 LCD DISPLAY 15 SPEAKER X 2 16 HANDLE 17 MIC VOL KNOB 18 6 3mm MIC JACK 1 19 6 3mm MIC JACK 2 20 LIGHT BAR 21 3 5mm AUX IN JACK 22 USB PORT 23 POWER ON OFF BUTTON 24 VENTILATION HOLES 25 AC SOCKET 26 Antenna ...

Страница 21: ... unit on off Press the power ON OFF button on the rear cabinet to switch the unit on or off Note In USB BT AUX mode when the unit is not providing the main function for around 15 minutes the unit will automatically switch into standby mode Press the FUNCTION button to turn on the unit again Please note that low volume setting in the audio source may be recognized as no audio signal this will affec...

Страница 22: ...tton until OFF shows on the display L 1 Blue LED will be on constantly when it is selected L 2 Blue LED will be on flashing mode L 3 Red LED will be on constantly L 4 Red LED will be on flashing mode L 5 7 colors LED will be on flashing mode There s a light bar above the handle the white light on when the Blue Red LED on constantly the bar will keep flashing when LED in flashing mode Press and hol...

Страница 23: ...up to 30 FM stations To tune to a preset station To tune to the next preset station press the 10 M FOLD button To tune to the previous preset press the 10 M FOLD button USB operation 1 Press the FUNCTION button on unit to select USB mode 2 Plug the USB memory stick to the USB port on top of the unit Playback will start automatically 3 To pause playback press the PLAY PAUSE PAIR SCAN button on unit...

Страница 24: ...ver again 2 To cancel repeat play press the P MODE M ECHO button on unit until disappears from the display To repeat the folder only for USB which contains more than one folder 1 Press the P MODE M ECHO button on unit until FOLDER shows steadily on the display the current folder will be repeated over and over again 2 To cancel repeat play press the P MODE M ECHO button on unit until FOLDER disappe...

Страница 25: ... ECHO button to turn on or turn off the microphone echo effect DISPOSAL CONSIDERATIONS According to the European waste regulation 2012 19 EU this symbol on the product or on its packaging indicates that this product may not be treated as household waste Instead it should be taken to the appropriate collection point for the recycling of electrical and electronic equipment By ensuring this product i...

Страница 26: ......

Страница 27: ......

Страница 28: ......

Отзывы: