background image

33

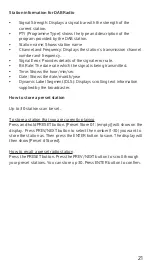
Informations sur la station en mode radio DAB

• 

Force du signal : Affiche une barre de signal avec l’intensité de la 

station actuelle.

• 

PTY (type de programme) : affiche le type et la description du pro

-

gramme fourni par la station DAB.

• 

 Nom de la station : Affichage du nom de la station

• 

 Canal et fréquence : affiche le numéro du canal de transmission et la 

fréquence de l’émetteur.

• 

 Erreur de signal : fournit des informations sur le taux d’erreur du 

signal.

• 

 Débit binaire : débit de transmission du signal.

• 

 Heure : Affiche l’heure / minute / seconde.

• 

 Date: affiche la date / mois / année.

• 

 Dynamic Label Segment (DLS): affiche les informations de texte 

défilant fournies par l’expéditeur.

Mémorisation d’une station

Vous pouvez mémoriser jusqu’à 30 stations.

Voici comment mémoriser une station en cours de lecture

Maintenez la touche PRESET. L’écran affiche les informations [Preset 

Store 01: (emty]). Appuyez sur la touche PRECEDENT ou SUIVANT pour 

sélectionner le numéro (1-30) où vous voulez stocker la station. Appuyez 

ensuite sur la touche ENTER pour enregistrer la station. L’écran affiche 

[Preset # Stored].

Comment écouter une station mémorisée

Appuyez sur la touche PRESET. Appuyez sur la touche PRECEDENT ou 

SUIVANT pour faire défiler les stations mémorisées. Lorsque vous avez 

trouvé la station souhaitée, appuyez sur la touche ENTER.

Содержание DigiPlug DAB

Страница 1: ...1 w w w a u n a m u l t i m e d i a c o m D igiPlug D AB D AB Radio 10032857 10032858 ...

Страница 2: ......

Страница 3: ...n wir keine Haftung Scannen Sie den folgenden QR Code um Zugriff auf die aktuellste Be dienungsanleitung und weitere Informa tionen rund um das Produkt zu erhalten KONFORMITÄTSERKLÄRUNG Hersteller Chal Tec GmbH Wallstraße 16 10179 Berlin Deutschland Dieses Produkt entspricht den folgenden Europäischen Richtlinien 2014 35 EU LVD 2011 65 EU RoHS 2014 53 EU RED Die vollständige Konformitätserklärung ...

Страница 4: ...erät keiner direkten Sonneneinstrahlung aus Stecken Sie den Netzstecker des Geräts auf die dafür vorgesehene Art und Weise in die Steckdose Das Gerät ist mit einem Überlastungsschutz ausgestattet Sollte dieser ersetzt werden müssen wenden Sie sich an den Kundendienst oder einen in ähnlicher Weise qualifizierte Person Ziehen Sie den Netzstecker des Geräts aus der Steckdose wenn Sie dieses für einen...

Страница 5: ...halten wird Stellen Sie keine Zündquellen mit offener Flamme wie beispielswei se angezündete Kerzen auf das Gerät Entsorgen Sie Altbatterien umweltgerecht Verwenden Sie das Gerät nur bei gemäßigtem Klima nicht bei tropischem Klima WARNUNG Verletzungsgefahr Öffnen Sie zum Reduzieren der Stromschlaggefahr weder die Geräteabdeckung noch die Rückseite des Geräts Das Gerät enthält keine Teile die vom K...

Страница 6: ...6 GERÄTEÜBERSICHT 1 Display 8 Modus Taste 2 Lautstärke 9 Suche Taste 3 Lautstärke 10 Info Menü Taste 4 Enter Taste 11 Senderspeicher ...

Страница 7: ...gespielte Sender gestartet Drücken wiederholt die MODE Taste um zwischen DAB FM und BT umzuschalten Hinweis Das Gerät und die Steckdose müssen stets leicht zugänglich sein Das Gerät hat keinen Netzschalter nur Standby und wird nur durch Herausziehen des Steckers komplett umgeschaltet Power Taste und Standby Modus Drücken Sie im ausgeschalteten Zustand die POWER Taste um in den Standby Modus zu wec...

Страница 8: ...ie ENTER Taste um die Suche zu starten Das Radio speichert automatisch alle Sender mit einem starken Sig nal bis zu 240 MHz Nach Beendigung der Suche wird automatisch der erste gespeicherte Sender abgespielt Um alle gespeicherten Sender anzuhören blättern Sie mit den Pfeil tasten ZURÜCK und VOR durch die Sender Wenn der gewünschte Sender angezeigt wird bestätigen Sie mit ENTER Das Radio zeigt Send...

Страница 9: ...c Label Segment DLS Zeigt die vom Sender gelieferten Lauftextinformationen an Speichern eines Senders Es können bis zu 30 Sender gespeichert werden So speichern Sie einen Sender den Sie gerade abspielen Halten Sie die Taste PRESET gedrückt Das Display zeigt die Information Preset Store 01 emty an Drücken Sie die Taste ZURÜCK oder VOR um die Nummer 1 30 auszuwählen unter der Sie den Sender speicher...

Страница 10: ...frufen wird die FM Frequenz 87 5 MHz auf dem Bildschirm angezeigt Fahren Sie die Antenne vollständig aus Drücken Sie zum automatischen Scannen Sendersuche die Taste SCAN und lassen Sie sie los Dadurch wird das Frequenzband ges cannt und der erste gefundene Sender mit gutem Signal abgespielt Drücken und halten Sie die Taste VOR ZURÜCK um vorwärts oder rückwärts nach Sendern zu suchen Wenn Sie die T...

Страница 11: ...ören Entweder Stereo oder Mono Zeit Zeigt die Stunde Minute Sekunde an Datum Zeigt das Datum Monat Jahr an Radiotext Zeigt die vom Sender gelieferten Zeigt die vom Sender gelieferten Lauftextinformationen an Speichern eines Senders Es können bis zu 30 Sender gespeichert werden So speichern Sie einen Sender den Sie gerade abspielen Halten Sie die Taste PRESET gedrückt Das Display zeigt die Informat...

Страница 12: ...format einstellen Drücken Sie die nächste Taste um TT MM JJJJ oder MM TT JJJJ auszu wählen Bestätigen Sie die Auswahl mit der ENTER Taste Alarm 1 2 Drücken Sie die VOR Taste um Alarm 1 oder Alarm 2 auszuwählen Bestätigen Sie die Auswahl mit der ENTER Taste Wählen Sie Stunde Minute durch Drücken der VOR Taste Bestäti gen Sie die Auswahl mit der ENTER Taste Drücken Sie die VOR Taste um die Alarmquel...

Страница 13: ...ke Drücken Sie die VOR Taste um High hoch Medium mittel oder Low niedrig zu wählen Bestätigen Sie die Auswahl mit der ENTER Taste Sprache Language Drücken Sie die VOR Taste um Englisch Französisch Deutsch oder Italienisch auszuwählen Bestätigen Sie die Auswahl mit der ENTER Taste Auf Werkseinstellung zurücksetzen Drücken Sie die VOR Taste um NO nein oder YES ja zu wählen Bestäti gen Sie die Auswah...

Страница 14: ...u trennen HINWEISE ZUR ENTSORGUNG Befindet sich die linke Abbildung durchge strichene Mülltonne auf Rädern auf dem Produkt gilt die Europäische Richtlinie 2012 19 EU Diese Produkte dürfen nicht mit dem normalen Hausmüll entsorgt werden Informieren Sie sich über die örtlichen Regelungen zur getrennten Sammlung elektrischer und elektronischer Gerätschaften Richten Sie sich nach den örtlichen Regelun...

Страница 15: ...covered by our warranty and any liability Scan the QR code to get access to the latest user mannual and other information about the product DECLARATION OF CONFORMITY Producer Chal Tec GmbH Wallstraße 16 10179 Berlin Germany This product is conform to the following European Directives 2014 35 EU LVD 2011 65 EU RoHS 2014 53 EU RED The complete declaration of conformity of the manufacturer can be fou...

Страница 16: ...ing Do not expose the device to direct sunlight Plug the power plug of the unit into the power outlet in the manner intended The device is equipped with overload protection Should this need to be replaced contact customer service or a similarly qualified person Unplug the unit from the wall outlet if it will not be used for a long period of time Do not attempt to service or repair the unit yoursel...

Страница 17: ...d Do not place sources of open flame ignition such as lit candles on the unit Dispose of used batteries in an environmentally friendly manner Use the device only in temperate climate not in tropical climate WARNING Risk of injury To reduce the risk of electric shock do not open either the cover or the back of the unit The device does not contain any parts that could be serviced by the customer Ple...

Страница 18: ...18 PRODUCT OVERVIEW 1 LCD screen 8 Mode button 2 Vol button 9 Scan button 3 Vol button 10 Info Menu button 4 Enter button 11 Preset button ...

Страница 19: ...commence or will play the last station before the unit was turned off Press MODE button repeatedly to switch between DAB FM and BT Note The device and the socket must always be easily accessible The device has no mains switch only standby and is only completely switched over by pulling out the plug Power In turn off mode press POWER button to turn on the unit to standby In working mode press POWER...

Страница 20: ...automatically save all the stations with a strong sig nal up to 240 MHz After searching has finished it will automatically play the first station stored To listen to all stations that have been stored use the Prev and Next button to scroll through them Press the ENTER button when on the required station The radio will display station information when you press the INFO MENU button Press multiple t...

Страница 21: ...he hour min sec Date Shows the date month year Dynamic Label Segment DLS Displays scrolling text information supplied by the broadcaster How to store a preset station Up to 30 stations can be set To store a station that you are currently playing Press and hold PRESET button Preset Store 01 empty will show on the display Press PREV NEXT button to select the number 1 30 you want to store the station...

Страница 22: ...ch to FM mode The first time you do this the FM frequency 87 5 MHz will be displayed on the screen Fully extend the antenna To auto scan press and release the SCAN button This will then start scanning up the frequency band and play the first station it finds with good signal Furthermore press and hold the PREV NEXT button can scan back or forward as well The radio will display station information ...

Страница 23: ...ion you are listening to It will either be stereo or mono Time Shows the hour min sec Date Shows the date month year Radio Text Displays scrolling test information supplied by the broadcaster How to store a preset station Up to 30 stations can be set To store a station that you are currently playing Press and hold PRESET button Preset Store 01 empty will show on the display Press PREV NEXT button ...

Страница 24: ...format Press next button to select DD MM YYYY or MM DD YYYY then press ENTER button to confirm Alarm 1 2 Press next button to select Alarm 1 or Alarm 2 then press ENTER button to confirm Select hour min by pressing next button then press Enter button to confirm Press next button to select Alarm source DAB FM Buzzer then press ENTER button to confirm Press next button to select Alarm mode Once Week...

Страница 25: ...lume then press ENTER button to confirm Then press next button to select alarm on or off then press enter button to confirm Backlight Timeout Press next button to select on 10 sec 20 sec 30 sec 45 sec 60 sec 90 sec 120 sec 180 sec then press ENTER button to confirm On level Press next button to select High Medium Low then press ENTER to confirm Language Press next button to select English Français...

Страница 26: ...e regulation 2012 19 EU this symbol on the product or on its packaging indicates that this product may not be treated as household waste Instead it should be taken to the appropriate collection point for the recycling of electrical and electronic equipment By ensuring this product is disposed of correctly you will help prevent potential negative consequences for the environment and human health wh...

Страница 27: ...ct des consignes et à la mau vaise utilisation de l appareil Scannez le QR Code pour obtenir la dernière version du mode d emploi et à d autres informati ons concernant le produit DÉCLARATION DE CONFORMITÉ Fabricant Chal Tec GmbH Wallstraße 16 10179 Berlin Allemagne Ce produit est conforme aux directives européennes suivantes 2014 35 UE LVD 2011 65 UE RoHS 2014 53 UE RED La déclaration complète de...

Страница 28: ...té de sources de chaleur telles qu un radiateur N exposez pas l appareil à l ensoleillement direct Branchez la fiche secteur de l appareil de la manière appropriée dans la prise L appareil est équipé d une protection contre les surcharges Si celle ci doit être remplacée contactez le service clientèle ou une personne de qualification similaire Débranchez l appareil si vous ne l utilisez pas pendant...

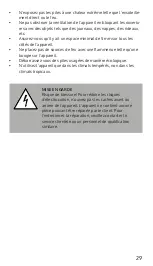
Страница 29: ... de sources de feu avec une flamme nue telle qu une bougie sur l appareil Débarrassez vous des piles usagées de manière écologique N utilisez l appareil que dans les climats tempérés non dans les climats tropicaux MISE EN GARDE Risque de blessure Pour réduire les risques d électrocution n ouvrez pas les caches avant ou arrière de l appareil L appareil ne contient aucune pièce pouvant être réparée ...

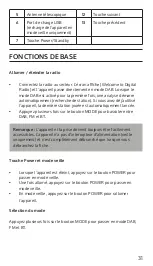
Страница 30: ...30 APERÇU DE L APPAREIL 1 Écran 8 Touche mode 2 Volume 9 Touche recherche 3 Volume 10 Touche Info Menu 4 Touche Enter 11 Mémorisation des stations ...

Страница 31: ...e station jouée est automatiquement lancée Appuyez plusieurs fois sur le bouton MODE pour basculer entre DAB FM et BT Remarque L appareil et la prise doivent toujours être facilement accessibles L appareil n a pas d interrupteur d alimentation veille uniquement et n est complètement débranché que lorsque vous débranchez la fiche Touche Power et mode veille Lorsque l appareil est éteint appuyez sur...

Страница 32: ...e ENTER pour lancer la recherche La radio enregistre automatiquement toutes les stations avec un signal fort jusqu à 240 MHz Lorsque la recherche est terminée la première station mémorisée est lue automatiquement Pour écouter toutes les stations mémorisées faites défiler les stati ons à l aide des touches fléchées PRECEDENT et SUIVANT Lorsque la station désirée est affichée confirmez avec ENTER La...

Страница 33: ...te mois année Dynamic Label Segment DLS affiche les informations de texte défilant fournies par l expéditeur Mémorisation d une station Vous pouvez mémoriser jusqu à 30 stations Voici comment mémoriser une station en cours de lecture Maintenez la touche PRESET L écran affiche les informations Preset Store 01 emty Appuyez sur la touche PRECEDENT ou SUIVANT pour sélectionner le numéro 1 30 où vous v...

Страница 34: ...nce FM 87 5 MHz s affiche à l écran Déployez complètement l antenne Appuyez sur la touche SCAN pour numériser automatiquement recherche de station et relâchez Vous allez balayer la bande de fréquence et lire la première station trouvée avec un bon signal Appuyez sur la touche PRECEDENT SUIVANT et maintenez la pour rechercher des stations en avant ou en arrière Lorsque vous appuyez sur la touche IN...

Страница 35: ...ion que vous écoutez Soit Stéréo soit Mono Heure Affiche l heure minute seconde Date affiche la date mois année Texte radio Affiche les informations texte défilant fournies par la station Comment mémoriser une station Vous pouvez mémoriser jusqu à 30 stations Voici comment mémoriser une station en cours de lecture Maintenez la touche PRESET L écran affiche les informations Preset Store 01 emty App...

Страница 36: ...at de l heure Appuyez sur le bouton suivant pour sélectionner JJ MM AAAA ou MM JJ AAAA Confirmez la sélection avec la touche ENTER Alarme 1 2 Appuyez sur la touche SUIVANT pour sélectionner l alarme 1 ou l alarme 2 Confirmez la sélection avec la touche ENTER Sélectionnez heure minute en appuyant sur la touche SUIVANT Confirmez la sélection avec la touche ENTER Appuyez sur la touche SUIVANT pour sé...

Страница 37: ...ité Appuyez sur la touche SUIVANT pour sélectionner Haut Moyen ou Bas Confirmez la sélection avec la touche ENTER Langue Language Appuyez sur la touche SUIVANT pour sélectionner anglais français alle mand ou italien Confirmez la sélection avec la touche ENTER Réinitialisation aux paramètres d usine Appuyez sur la touche SUIVANT pour choisir NO non ou YES oui Con firmez la sélection avec la touche ...

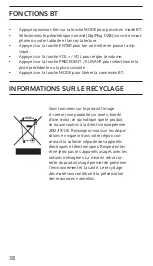
Страница 38: ...e MODE pour libérer la connexion BT INFORMATIONS SUR LE RECYCLAGE Vous trouverez sur le produit l image ci contre une poubelle sur roues barrée d une croix ce qui indique que le produit se trouve soumis à la directive européenne 2012 19 UE Renseignez vous sur les dispo sitions en vigueur dans votre région con cernant la collecte séparée des appareils électriques et électroniques Respectez les et n...

Страница 39: ...nes y del uso inadecuado Escanee el siguien te código QR para acceder al manual de usuario más reciente y a otra información sobre el producto DECLARACIÓN DE CONFORMIDAD Fabricante Chal Tec GmbH Wallstraße 16 10179 Berlín Alemania Este producto cumple con las siguientes directivas europeas 2014 35 UE LVD 2011 65 UE RoHS 2014 53 EU RED La declaración de conformidad completa del fabricante se encuen...

Страница 40: ...parato a la luz solar directa Enchufe el clavija de alimentación de la unidad en la toma de corriente de la manera prevista El dispositivo está equipado con una protección contra sobrecargas En caso de que sea necesario sustituirlo póngase en contacto con el servicio de atención al cliente o con una persona cualificada similar Desenchufe la unidad de la toma de corriente si no desea utilizarla dur...

Страница 41: ...nición de llama abierta como velas encen didas sobre la unidad Deseche las pilas usadas de forma respetuosa con el medio ambien te Utilice el dispositivo sólo en climas templados no en climas tropica les ATENCIÓN Riesgo de lesiones Para reducir el riesgo de descargas eléctricas no abra la tapa ni la parte posterior de la unidad El aparato no contiene piezas que puedan ser reparadas por el cliente ...

Страница 42: ...42 DESCRIPCIÓN DEL APARATO 1 Pantalla 8 Botón MODO 2 Volumen 9 Botón BÚSQUEDA 3 Volumen 10 Botón INFO MENÚ 4 Botón ENTER 11 Memoria de emisoras ...

Страница 43: ...producida iniciará automáticamente Pulse el botón MODE repetidamente para cambiar entre DAB FM y BT Aviso El aparato y la toma de corriente deben ser siempre fácilmente accesibles El aparato no dispone de un interruptor de red sólo en modo de espera y sólo estará completamente apagado desconectando el enchufe Botón de encendido y modo de espera Cuando esté apagado el aparato pulse el botón POWER p...

Страница 44: ...búsqueda La radio memoriza automáticamente todas las emisoras con una se ñal fuerte hasta 240 MHz Una vez que haya finalizado la búsqueda se reproducirá automáticamente la primera emisora almacenada Para escuchar todas las emisoras almacenadas utilice las teclas de flecha HACIA ATRÁS y HACIA ADELANTE para ver las emisoras Cuando aparezca la emisora deseada pulse ENTER La radio muestra la informaci...

Страница 45: ...o Fecha Muestra la fecha mes año Dynamic Label Segment DLS Muestra la información suministrada por el transmisor en forma de un texto animado Almacenamiento de una emisora Es posible almacenar hasta 30 emisoras Para guardar una emisora que esté reproduciendo actualmente Pulse y mantenga pulsado el botón PRESET La pantalla muestra la información Preset Store 01 empty Pulse el botón ADELANTE o ATRÁS...

Страница 46: ... aparecerá en la pantalla la frecuencia de FM 87 5 MHz Extienda la antena completamente Para la búsqueda automática búsqueda de emisoras pulse y suelte el botón SCAN Esto escanea la banda de frecuencia y reproduce la primera emisora encontrada con una buena señal Mantenga pulsado el botón Adelante Atrás para buscar emisoras hacia adelante o hacia atrás Cuando pulse el botón INFO MENU la radio most...

Страница 47: ... de audio de la emisora que está escuchando Puede ser Estéreo o Mono Hora Muestra la hora minuto segundo Fecha Muestra la fecha mes año Texto de radio Muestra la información suministrada por la emisora en forma de un texto animado Almacenamiento de una emisora Es posible almacenar hasta 30 emisoras Para guardar una emisora que esté reproduciendo actualmente Pulse y mantenga pulsado el botón PRESET...

Страница 48: ...la tecla ENTER Ajuste del formato de hora Pulse el botón ADELANTE para seleccionar DD MM AAAA o MM DD AAAA Confirme la selección con el botón ENTER Alarma 1 2 Pulse el botón ADELANTE para seleccionar Alarma 1 o Alarma 2 Confirme la selección con la tecla ENTER Seleccione hora minuto pulsando el botón ADELANTE Confirme la selección con la tecla ENTER Pulse el botón ADELANTE para seleccionar la fuen...

Страница 49: ...TER En Nivel encendido intensidad luminosa Pulse el botón ADELANTE para seleccionar Alto Medio o Bajo Confirme la selección con la tecla ENTER Idioma Language Pulse el botón ADELANTE para seleccionar Inglés Francés Alemán o Italiano Confirme la selección con el botón ENTER Restablecer la configuración de fábrica Pulse el botón ADELANTE para seleccionar NO no o YES sí Confirme la selección con la t...

Страница 50: ...to lleva adherida la ilustración de la izquierda el contenedor de basura tachado entonces rige la normativa euro pea directiva 2012 19 UE Este producto no debe arrojarse a un contenedor de basura común Infórmese sobre las leyes territori ales que regulan la recogida separada de aparatos eléctricos y electrónicos Respete las leyes territoriales y no arroje aparatos viejos al cubo de la basura domés...

Страница 51: ...ilità per danni derivati da una mancata osservazione delle avvertenze per la sicurezza e da un uso improprio del dispositivo DICHIARAZIONE DI CONFORMITÁ Produttore Chal Tec GmbH Wallstrasse 16 10179 Berlino Germania Questo prodotto é conforme alle seguen ti linee guida europee 2014 35 UE LVD 2011 65 UE RoHS 2014 53 EU RED La dichiarazione completa di conformità del produttore si trova al seguente ...

Страница 52: ... vicino a fonti di calore ad esempio termosifoni Non posizionare il dispositivo direttamente alla luce del sole Inserire correttamente la spina nella presa Il dispositivo è dotato di protezione da sovraccarico In caso sia necessaria sostituirla contattare il servizio clienti o un tecnico qualificato Scollegare il dispositivo dalla presa di corrente in caso di inutilizzo prolungato Non tentare in n...

Страница 53: ...are fonti di ignizione con fiamme libere sul dispositivo come ad esempio candele accese Smaltire le batterie usate in modo ecocompatibile Utilizzare il dispositivo solo in climi temperati non in climi tropicali ATTENZIONE Pericolo di lesioni Non aprire il coperchio e il retro del dispositivo per evitare il pericolo di scosse elettriche Il dispositivo non contiene parti riparabili dall utente Si pr...

Страница 54: ...54 PANORAMICA DEL DISPOSITIVO 1 Display 8 Tasto MODALITÀ 2 Volume 9 Tasto RICERCA 3 Volume 10 Tasto INFO MENU 4 Tasto ENTER 11 Memoria stazioni ...

Страница 55: ...amente l ultima delle stazioni riprodotte Premere ripetutamente il tasto MODE per alternare tra DAB FM e BT Nota il dispositivo e la presa devono essere sempre facilmente accessibili Il dispositivo non ha alcun interruttore solo standby e si spegne completamente estraendo la spina Tasto di accensione e modalità standby Quando il dispositivo è spento premere il tasto POWER per ac cedere alla modali...

Страница 56: ...iare la ricerca La radio memorizza automaticamente tutte le stazioni con un seg nale forte fino a 240 MHz Al termine della ricerca verrà riprodotta automaticamente la prima stazione preselezionata Per ascoltare tutte le stazioni memorizzate scorrere le stazioni usando i tasti freccia PREVIUOS e NEXT Quando viene visualizzata la stazione desiderata premere ENTER per confermare La radio mostra infor...

Страница 57: ...e anno Dynamic Label Segment DLS visualizza le informazioni di testo fornite dal mittente Memorizzare una stazione È possibile memorizzare fino a 30 stazioni Salvare una stazione che si sta ascoltando Per salvare una stazione che si sta ascoltando tenere premuto il tasto PRESET Il display mostrerà l informazione Preset Store 01 emty Premere il tasto PREVIUOS O NEXT per selezionare il numero 1 30 i...

Страница 58: ...a la frequenza FM 87 5 MHz sullo schermo Estendere completamente l antenna Premere il pulsante SCAN per eseguire automaticamente la scansio ne ricerca delle stazioni e rilasciare Questo esegue la scansione della banda di frequenza e riproduce la prima stazione trovata con buon segnale Premere e tenere premuto il pulsante PREVIOUS NEXT per cercare avanti o indietro le stazioni Quando si preme il ta...

Страница 59: ... stazione che si sta ascoltando O Stereo o Mono Ora visualizza l ora minuto secondo Data visualizza data mese anno Testo radio visualizza le informazioni sul canale fornite dal tras mettitore Memorizzare una stazione È possibile memorizzare fino a 30 stazioni Memorizzare una stazione che si sta ascoltando Per salvare una stazione che si sta riproducendo tenere premuto il tasto PRESET Il display mo...

Страница 60: ...l formato dell ora Premere il pulsante accanto per scegliere GG MM AAAA o MM GG AAAA Confermare la selezione con il tasto ENTER Alarm 1 2 Premere il pulsante PREVIUOS per selezionare Alarm 1 o Alarm 2 Confermare la selezione con il pulsante ENTER Selezionare ora minuto premendo il pulsante PREVIUOS Confer mare la selezione con il tasto ENTER Premere il tasto PREVIUOS per selezionare la sorgente de...

Страница 61: ...lla luce Premere il pulsante PREVIUOS per selezionare High alto Medium me dio o Low basso Confermare la selezione con il tasto ENTER Lingua Language Premere il tasto PREVIUOS per selezionare inglese francese tedesco o italiano Confermare la selezione con il tasto ENTER Ripristinare le impostazioni di fabbrica Premere il tasto PREVIUOS per selezionare NO no o YES Sí Confer mate la selezione con il ...

Страница 62: ...sattivare la connessione BT SMALTIMENTO Se sul prodotto è presente la figura a sinis tra il cassonetto mobile sbarrato si appli ca la direttiva europea 2012 19 UE Questi prodotti non possono essere smaltiti con i rifiuti normali Informarsi sulle disposizioni vigenti sulla raccolta separata di dispositivi elettrici ed elettronici Non smaltire i vecchi dispositivi con i rifiuti domestici Grazie al c...

Страница 63: ......

Страница 64: ......

Отзывы: