background image

3

DE

English 13

Español 23

Français 33

Italiano 43

Sehr geehrter Kunde, 

wir gratulieren Ihnen zum Erwerb Ihres Gerätes. 

Lesen Sie die folgenden Hinweise sorgfältig durch 

und befolgen Sie diese, um möglichen Schäden 

vorzubeugen. Für Schäden, die durch Missachtung der 

Hinweise und unsachgemäßen Gebrauch entstehen, 

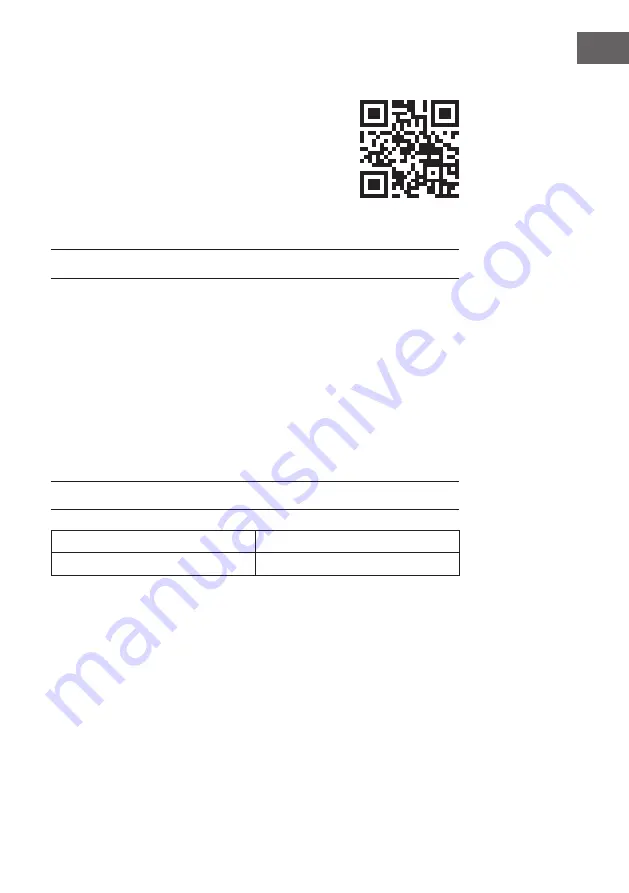
übernehmen wir keine Haftung. Scannen Sie den 

folgenden  QR-Code,  um  Zugriff  auf  die  aktuellste 

Bedienungsanleitung und weitere Informationen rund 

um das Produkt zu erhalten:

INHALTSVERZEICHNIS

Sicherheitshinweise 4

Geräteübersicht 4

MW/UKW Radio-Modus 7

Kassetten-Modus 7

CD-Modus 7

Schallplatten-Modus 9

AUX-Modus  9

BT-Modus 10

USB-Modus  10

Hinweise zur Entsorgung 11

Konformitätserklärung 11

TECHNISCHE DATEN

Artikelnummer

10033179

Stromversorgung 

230 V ~ 50 Hz

Содержание Belle Epoque 1910

Страница 1: ... w a u n a m u l t i m e d i a c o m Belle Epoque 1910 Retro Stereoanlage m it BT Retro H i Fi System w ith BT Equipo estéreo retro con BT Chaîne stéréo rétro avec BT Im pianto stereo rétro con BT 10033179 ...

Страница 2: ......

Страница 3: ...emäßen Gebrauch entstehen übernehmen wir keine Haftung Scannen Sie den folgenden QR Code um Zugriff auf die aktuellste Bedienungsanleitung und weitere Informationen rund um das Produkt zu erhalten INHALTSVERZEICHNIS Sicherheitshinweise 4 Geräteübersicht 4 MW UKW Radio Modus 7 Kassetten Modus 7 CD Modus 7 Schallplatten Modus 9 AUX Modus 9 BT Modus 10 USB Modus 10 Hinweise zur Entsorgung 11 Konformi...

Страница 4: ...as Gehäuse nicht geöffnet werden Sollte ein Fremdkörper versehentlich in das Innere des Gerätes gelangen wenden Sie sich bitte an einen Fachhändler 4 Reinigen Sie das Gerät nicht mit chemischen Lösemitteln da diese die Oberfläche beschädigen könnte Benutzen Sie zur Reinigung ein sauberes trockenes Tuch 5 Bewahren Sie dieses Handbuch zur späteren Verwendung auf GERÄTEÜBERSICHT Vorderseite 1 USB Ste...

Страница 5: ... CD Fach öffnen 13 Tuner 11 Lautstärkeregler 14 Tuning Regler Rückseite 15 FM Antenneneingang 17 Ein Aus Schalter 16 Lautsprecheranschluss 18 Netzanschluss 19 Taste TUNER 22 Taste PHONO 20 Taste CD USB 23 Taste EQ 21 Taste TAPE AUX ...

Страница 6: ...6 DE Oberseite 21 Achsadapter 23 33 45 78 RPM Drehzahlwähler 22 Plattenteller 24 Tonarm Seitenansicht 26 Kassettendeck 27 Kassette vorspulen auswerfen ...

Страница 7: ...ssettendeck zur Hälfte ein Die Kassette wird dann vorgespult Tippen Sie die Taste denn leicht an um die Wiedergabe fortzusetzen 4 Drücken Sie die Taste neben dem Kassettendeck vollständig ein um die Kassette auszuwerfen CD MODUS 1 Drücken Sie die CD USB Taste um in den CD Modus zu wechseln CD wird auf dem Display angezeigt 2 Drücken Taste zum Öffnen Schließen des CD Fachs um das CD Fach zu öffnen ...

Страница 8: ...ieren die in der eingegebenen Reihenfolge abgespielt werden 1 Legen Sie eine Disc ein und drücken Sie STOP sobald Sie abgespielt wird 2 Drücken Sie PROG P01 wird auf dem Display angezeigt 3 Drücken Sie VORSPULEN ZURÜCKSPULEN um Ihre Lieblingstitel auszuwählen 4 Drücken Sie PROG um den Titel zu speichern P02 wird auf dem Display angezeigt 5 Wiederholen Sie die Schritte 3 4 um alle gewünschten Titel...

Страница 9: ...l zu stoppen heben Sie den Tonarm von der Platte und legen Sie ihn wie der in seine Halterung Hinweis Wenn Sie den Plattenteller verschieben oder erschüttern ohne dass der Tonarm gesichert ist kann das Schäden am Tonarm zur Folge haben Setzen Sie die Schutzkappe auf die Nadel wenn Sie den Plattenspieler nicht benutzen AUX MODUS Dieses Gerät bietet einen zusätzlichen Eingang zum Anschluss externer ...

Страница 10: ...abspielen und über Ihr externes BT Gerät steuern USB MODUS 1 Stecken Sie den USB Gerät in den USB Anschluss 2 Drücken Sie die CD USB Taste um in den USB Modus zu wechseln USB wird auf dem Display angezeigt 3 Das Gerät beginnt automatisch das USB Gerät auszulesen nachdem es verbunden ist 4 Gehen Sie wie bei CDs vor um Musik von Ihrem USB Gerät zu hören EQ Titel Drücken Sie im PHONO TAPE BT AUX oder...

Страница 11: ...rtlichen Regelungen und entsorgen Sie Altgeräte nicht über den Hausmüll Durch die regelkonforme Entsorgung der Altgeräte werden Umwelt und die Gesundheit ihrer Mitmenschen vor möglichen negativen Konsequenzen geschützt Materialrecycling hilft den Verbrauch von Rohstoffen zu verringern KONFORMITÄTSERKLÄRUNG Hersteller Chal Tec GmbH Wallstraße 16 10179 Berlin Deutschland Dieses Produkt entspricht de...

Страница 12: ......

Страница 13: ...tioned in the instruction manual is not covered by our warranty and any liability Scan the QR code to get access to the latest user mannual and other information about the product CONTENT Safety Instructions 14 Product Overview 14 FM MW Radio Mode 17 Tape Mode 17 CD Mode 17 Phono Mode 19 AUX Mode 19 BT Mode 20 USB Mode 20 Hints on Disposal 21 TECHNICAL DATA Item number 10033179 Power supply 220 24...

Страница 14: ...shock do not open the cabinet Should a foreign object accidentally find its way into the interior of the unit contact your local dealer 4 Do not attempt to clean the unit with chemical solvents as this might damage the finishing A clean dry cloth is recommended for cleaning 5 Keep this manual for future reference PRODUCT OVERVIEW Front 1 USB port 5 Play Pause 2 AUX IN 6 Stop 3 Headphone jack 7 Bac...

Страница 15: ...ROG 12 Display 10 Open CD slot 13 Tuner 11 Volume control 14 Tuning knob Rear 15 FM Antenna 17 On Off switch 16 Speaker terminal 18 Mains connection 19 TUNER key 22 PHONO key 20 CD USB key 23 EQ key 21 TAPE AUX key ...

Страница 16: ...16 EN Upside 21 Spindle adaptor 24 33 45 78 RPM speed selector 22 Turntable 25 Tone arm Side 26 Kassettendeck 27 Kassette vorspulen auswerfen ...

Страница 17: ...e button next to the cassette deck halfway The cassette is then prewound Touch the button lightly to resume playback 4 Press the button next to the cassette deck fully in to eject the cassette CD MODE 5 Press the CD USB button to switch to the CD Mode CD is shown on the display 6 Press the Open Close CD Compartment button to open the CD Compartment Place a CD in the tray with the printed side faci...

Страница 18: ...in the display Programming CD tracks You can program a playlist of up to 99 songs to play in the order you entered 1 Insert a disc and press STOP when it plays 2 Press PROG P01 is shown on the display 3 Press Forward Rewind to select your favorite tracks 4 Press PROG to save the title P02 appears on the display 5 Repeat steps 3 4 to select and save all desired songs 6 Press PLAY PAUSE to play the ...

Страница 19: ...der 5 To stop playback manually lift the tonearm from the disc and place it in its holder like the one Note Moving or shaking the platter without securing the tonearm may damage the tonearm Place the protective cap on the needle when not using the turntable AUX MODE This unit provides an auxiliary audio input jack for connecting external audio device like MP3 pla yers CD players and allow playback...

Страница 20: ...e stereo and control it from your external BT device USB MODE 1 Plug the USB device into the USB port 2 Press the CD USB button to switch to USB mode USB is shown on the display 3 The device automatically starts to read out the USB device after it is connected 4 Proceed as for CDs to listen to music from your USB device EQ Title In PHONO TAPE BT AUX or CD mode press the EQ key to select available ...

Страница 21: ... potential negative consequences for the environment and human health which could otherwise be caused by inappropriate waste handling of this product For more detailled information about recycling of this product please contact your local council or your household waste disposal service DECLARATION OF CONFORMITY Producer Chal Tec GmbH Wallstraße 16 10179 Berlin Germany This product is conform to t...

Страница 22: ......

Страница 23: ...so indebido del producto o por haber desatendido las indicaciones de seguridad Escanee el código QR para obtener acceso al manual de usuario más reciente y otra información sobre el producto ÍNDICE DE CONTENIDOS Indicaciones de seguridad 24 Visión general del aparato 24 Modo radio AM FM 27 Modo CD 27 Modo vinilo 29 Modo AUX 29 Modo BT 30 Modo USB 30 Retirada del aparato 31 DATOS TÉCNICOS Número de...

Страница 24: ...ctrica la carcasa no debe abrirse Si un cuerpo extraño termina por accidente en el interior del aparato contacte con un técnico especializado 4 No limpie el aparato con disolventes químicos pues la superficie podría dañarse Para limpiar el aparato utilice un paño seco 5 Conserve este manual para usos posteriores VISIÓN GENERAL DEL APARATO Parte delantera 1 Ranura para USB 5 Play Pause 2 Entrada AU...

Страница 25: ...D 13 Sintonizador 11 Regulador de volumen 14 Regulador Parte trasera 15 Acceso de servicio 17 Interruptor on off 16 Conexión de altavoces 18 Conexión para la fuente de alimentación 19 Botón TUNER 22 Botón PHONO 20 Botón CD USB 23 Botón EQ 21 Botón TAPE AUX ...

Страница 26: ...26 ES Parte superior 21 Adaptador de eje 23 Selección de giro de revoluciones 33 45 78 RPM 22 Tocadiscos 24 Brazo del tocadiscos Vista lateral 26 Compartimento para casete 27 Avanzar expulsar casete ...

Страница 27: ...l compartimento de casete hasta la mitad El casete avanza Pulse de nuevo ligeramente para continuar con la reproducción 4 Pulse completamente el botón junto al compartimento de casete para expulsar el casete MODO CD 1 Pulse el botón CD USB para cambiar al modo CD CD aparece en el display 2 Pulse el botón abrir cerrar del compartimento del CD para abrirlo Introduzca un CD con la cara impresa hacia ...

Страница 28: ...na lista de reproducción con hasta 99 pistas que se reproducen en el orden indicado 1 Introduzca un disco y pulse STOP en cuanto se reproduzca 2 Pulse PROG P01 aparece en el display 3 Pulse el botón AVANZAR RETROCEDER para elegir su pista favorita 4 Pulse PROG para guardar la pista P02 aparece en el display 5 Repita los pasos 3 4 para elegir todas las pistas deseadas y guardarlas 6 Pulse PLAY PAUS...

Страница 29: ...er la reproducción manualmente levante el brazo del vinilo y colóquelo en su soporte Nota Si mueve o agita el tocadiscos sin que el brazo esté asegurado podrían provocarse daños en el brazo Coloque la tapa de protección en la aguja si no utiliza el tocadiscos MODO AUX Este aparato ofrece una entrada adicional para conectar dispositivos externos de audio como reproductores MP3 o CD La entrada permi...

Страница 30: ... a través de su dispositivo BT externo MODO USB 1 Conecte el dispositivo USB a la conexión USB 2 Pulse el botón CD USB para cambiar al modo USB USB aparece en el display 3 El aparato comienza automáticamente a leer el aparato USB después de que esté conectado 4 Proceda igual que con los CD para escuchar música desde su dispositivo USB Título de la Inteligencia Emocional En el modo PHONO TAPE BT AU...

Страница 31: ... aparatos viejos al cubo de la basura doméstica Una retirada de aparatos conforme a las leyes contribuye a proteger el medio ambiente y a las personas a su alrededor frente a posibles consecuencias perjudiciales para la salud El reciclaje ayuda a reducir el consumo de materias primas DECLARACIÓN DE CONFORMIDAD Fabricante Chal Tec GmbH Wallstraße 16 10179 Berlín Alemania Este producto cumple con la...

Страница 32: ......

Страница 33: ...dus au non respect des consignes de sécurité et à la mauvaise utilisation de l appareil Scannez le QR Code pour accéder à la dernière version du mode d emploi et à d autres informations concernant le produit SOMMAIRE Indicaciones de seguridad 34 Aperçu de l appareil 34 Mode radio MW FM 37 Mode cassette 37 Mode CD 37 Mode vinyle 39 Mode AUX 39 Mode BT 40 Mode USB 40 Conseils pour le recyclage 41 FI...

Страница 34: ...escargas eléctrica la carcasa no debe abrirse Si un cuerpo extraño termina por accidente en el interior del aparato contacte con un técnico especializado 4 No limpie el aparato con disolventes químicos pues la superficie podría dañarse Para limpiar el aparato utilice un paño seco 5 Conserve este manual para usos posteriores APERÇU DE L APPAREIL Face avant 1 Port USB 5 Play Pause 2 Entrée AUX 6 Sto...

Страница 35: ...eur CD 13 Tuner 11 Réglage du volume 14 Réglage du tuner Dos de l appareil 15 Prise d antenne FM 17 Bouton de marche arrêt 16 Prise d enceinte 18 Prise d alimentation 19 Bouton TUNER 22 Bouton PHONO 20 Bouton CD USB 23 Bouton EQ 21 Bouton TAPE AUX ...

Страница 36: ...36 FR Haut de l appareil 21 Centreur 23 Sélecteur de vitesse de rotation 33 45 78 RPM 22 Plateau tournant 24 Bras de lecture Vue latérale 26 Lecteur de cassettes 27 Commande de cassette avance éjection ...

Страница 37: ...platine cassette La cassette est alors rembobinée Appuyez légèrement sur le bouton pour reprendre la lecture 4 Appuyez à fond sur le bouton situé à côté de la platine cassette pour éjecter la cassette MODE CD 1 Appuyez sur le bouton CD USB pour passer en mode CD CD est affiché à l écran 2 Appuyez sur le bouton d ouverture fermeture du tiroir CD pour ouvrir le compartiment CD Insérez un CD dans le ...

Страница 38: ...z programmer une liste de lecture de 99 pistes à lire dans l ordre indiqué 1 Insérez un disque et appuyez sur STOP dès qu il est lu 2 Appuyez sur PROG P01 s affiche à l écran 3 Appuyez sur AVANCE RETOUR pour sélectionner vos pistes préférées 4 Appuyez sur PROG pour mémoriser la piste P02 est affiché à l écran 5 Répétez les étapes 3 à 4 pour sélectionner toutes les pistes souhaitées et les mémorise...

Страница 39: ...ment la lecture soulevez le bras de lecture du disque et replacez le sur son support Remarque Si vous déplacez ou secouez la platine sans avoir sécurisé le bras de lecture cela pourrait l endommager Placez le capuchon de protection sur l aiguille lorsque vous n utilisez pas la platine vinyle MODE AUX Cet appareil dispose d une entrée supplémentaire pour connecter des périphériques audio externes t...

Страница 40: ...r via votre appareil BT externe MODE USB 1 Branchez le périphérique USB sur le port USB 2 Appuyez sur le bouton CD USB pour accéder au mode USB USB s affiche à l écran 3 L appareil commence automatiquement à lire le périphérique USB dès sa connexion 4 Suivez la même procédure que pour les CD pour lire de la musique depuis votre périphérique USB Titre de l égaliseur En mode PHONO TAPE BT AUX ou CD ...

Страница 41: ...t ne jetez pas vos anciens produits avec les ordures ménagères Le respect des règles de recyclage des vieux produits aide à la protection de l environnement et de la santé de votre entourage contre les conséquences négatives possibles Le recyclage des matériaux aide à réduire l utilisation des matières premières DÉCLARATION DE CONFORMITÉ Fabricant Chal Tec GmbH Wallstraße 16 10179 Berlin Allemagne...

Страница 42: ......

Страница 43: ...vazione delle avvertenze di sicurezza e da un uso improprio del dispositivo Scansionare il codice QR seguente per accedere al manuale d uso più attuale e per ricevere informazioni sul prodotto INDICE Avvertenze di sicurezza 44 Descrizione del dispositivo 44 Modalità radio AM FM 47 Modalità cassetta 47 Modalità CD 47 Modalità giradischi 49 Modalità AUX 49 Modalità BT 50 Modalità USB 50 Smaltimento ...

Страница 44: ...re l alloggiamento Se inavvertitamente un corpo estraneo dovesse finire all interno del dispositivo rivolgersi a un tecnico specializzato 4 Non pulire il dispositivo con solventi chimici in quanto potrebbero danneggiare la superficie Utilizzare un panno pulito e asciutto per la pulizia 5 Conservare il presente manuale per future consultazioni DESCRIZIONE DEL DISPOSITIVO Lato frontale 1 Ingresso US...

Страница 45: ...3 Tuner 11 Regolazione volume 14 Regolazione tuning Rückseite 15 Ingresso antenna FM 17 On Off 16 Connessione altoparlante 18 Connessione per l alimentazione 19 Pulsante TUNER 22 Pulsante PHONO 20 Pulsante CD USB 23 Pulsante EQ 21 Pulsante TAPE AUX ...

Страница 46: ...46 IT Lato superiore 21 Adattatore asse 23 Selezionare 33 45 78 RPM 22 Piatto 24 Braccio del pick up Vista dal lato 26 Mangiacassette 27 Mandare avanti cassetta Espellere cassetta ...

Страница 47: ...assette La cassetta viene mandata avanti Premere leggermente per riprendere la riproduzione 4 Premere completamente il tasto accanto al mangiacassette per espellere la cassetta MODALITÀ CD 1 Premere CD USB per selezionare CD Sul display compare CD 2 Premere il tasto per aprire chiudere il vano CD Inserire un CD con il lato stampato verso l alto e chiudere il vano Inizia la riproduzione del primo t...

Страница 48: ...are i titoli su CD Può essere creata una playlist con fino a 99 titoli che vengono riprodotti in sequenza 1 Inserire un CD e premere STOP non appena viene riprodotto 2 Premere PROG Sul display compare P01 3 Premere ANDARE AVANTI TORNARE INDIETRO per selezionare il titolo desiderato 4 Premere PROG per salvare il titolo Sul display compare P02 5 Ripetere i passaggi 3 4 per selezionare e salvare tutt...

Страница 49: ...almente la riproduzione sollevare il braccio del pick up dal disco e posizionarlo sul suo appoggio Avvertenza se si sposta o si smuove il piatto senza che l braccio del pick up sia bloccato possono risultare danni al braccio del pick up Mettere la protezione sulla puntina quando non si utilizza il giradischi MODALITÀ AUX Questo dispositivo mette a disposizione una connessione per dispositivi ester...

Страница 50: ...tereo e gestirla dal dispositivo esterno MODALITÀ USB 1 Inserire il dispositivo USB nell apposito ingresso 2 Premere CD USB per selezionare USB Sul display compare USB 3 Il dispositivo comincia in automatico la lettura del dispositivo USB dopo il collegamento 4 Procedere come per i CD per ascoltare musica dal dispositivo USB Titolo EQ In modalità PHONO TAPE BT AUX o CD premere il tasto EQ per sele...

Страница 51: ...ecchi dispositivi con i rifiuti domestici Grazie al corretto smaltimento dei vecchi dispositivi si proteggono il pianeta e la salute delle persone da possibili conseguenze negative Il riciclo di materiali aiuta a ridurre il consumo di materie prime DICHIARAZIONE DI CONFORMITÀ Produttore Chal Tec GmbH Wallstraße 16 10179 Berlino Germania Questo prodotto è conforme alle seguenti direttive europee 20...

Страница 52: ......

Страница 53: ......

Страница 54: ......

Страница 55: ......

Страница 56: ......

Отзывы: