

Start Making Calls
You may make calls directly after switching the device on.
To make an external call, all you need is a
telephone number
.
For internal calls, dial
**
and an
internal number
(the factory settings for the connected telephones
include the telephone numbers 21 to 24; on the module, the telephone numbers 25 and 26).
Note:
On an ISDN telephone, the internal number must first be entered in the telephone
as an MSN (see the telephone instructions).
Configure the PBX Using a PC
Configuring the PBX using a PC is done using the configuration manager integrated in the PBX. This
can be accessed via the IP address of the PBX. Depending on your connection and network
environment, proceed as follows.
•
If the PBX is connected directly to a PC which can automatically receive its IP address (default
setting on Windows and Mac OS X), you can access the PBX via the permanent IP address
169.254.1.240. Proceed as described in the section
Open the Configuration Manager
.
•
If the PBX is connected to a router that works as a DHCP server and allocates IP addresses to
the devices connected (default setting on most routers), you can access the PBX via two IP
addresses:
1. Via the permanent IP address 169.254.1.240.
2. Via the IP address allocated by the DHCP server.
Proceed as described in the section
Open the Configuration Manager
. If the permanent IP
address is not working, you need to first query the IP address allocated by the DHCP server.
Proceed as described in the section
Query the IP Address on the PBX
.
Note:
If the UPnP service is installed and enabled on the PC you are using (see
Windows Help), you do not need to know the IP address to open the configuration
manager. The IP address does not need to be queried.
•
If the PBX is connected to a network in which IP addresses are allocated permanently, the IP
configuration on the PBX must be adapted for use on the network. For more information, contact
your system administrator. Proceed as described in the section
Configure a Permanent IP
Address in the PBX
and then, as described in the section
Open the Configuration Manager
.
Query the IP Address on the PBX
1. Pick up the receiver of an internal, CLIP-enabled telephone.
2. Dial
##8
*
941#
.
You will hear the confirmation tone (pulsating tone).
3. Hang up the receiver.
You will get a call. The IP address of the PBX is displayed on the telephone as a 12-digit number,
e.g., for 192.168.2.10: 192168002010.
Configure a Permanent IP Address in the PBX
1. Pick up the receiver of an internal telephone.
2. In sequence, dial
##8
, the 6-digit admin PIN (
111111
in the factory settings) and
*
930
*
0#
.
You will hear the confirmation tone (pulsating tone).
The DHCP client function is disabled in the PBX.
3. Hang up the receiver and then pick it up again.
4. In sequence, dial
##8
, the 6-digit admin PIN (
111111
in the factory settings),
*
931
*
, the 12-digit
IP address
(e. g., for 192.168.2.10: 192168002010) and
#
.
You will hear the confirmation tone (pulsating tone).
The entered IP address has been configured in the PBX (for subnet mask 255.255.255.0).
5. Hang up the receiver.
Note:
For more information, refer to the operation guide in the internet (see
Open the Configuration Manager
Note:
If the
UPnP service
is installed and enabled on the PC being used, the PBX can
be identified and selected as "Auerswald PBX" device in the network environment. The
configuration manager is then opened in the browser. Steps 1 and 2 are omitted.
Proceed with Step 3.
1. Start a browser (e.g., Mozilla Firefox in current version).
2. In the address field of the browser, enter the IP address of the PBX.
An example for entering a permanent IP address is
http://169.254.1.240
.
The login window opens.
3. Enter the user name (
admin
in the factory settings) and the 6-digit admin PIN (
111111
in the
factory settings).
4. Click
Login
.
The configuration wizard for the configuration manager opens.
Note:
If the PBX is no longer set to the factory settings, the configuration wizard does
not start automatically. It can be started by clicking
Configuration Wizard
in the
navigation.
5. Use the configuration wizard to carry out a quick setup of the PBX. During the course of the quick
setup, all the basic settings are configured.
6. If necessary, carry out a firmware update in order to extend the PBX with the newly available
Configure the PBX without a PC
If no PC is available for configuring the PBX, you have two options for setting up the PBX without a
PC.
•
If your dealer gave you a USB memory stick or an SD memory card containing a pre-set config-
uration file on it (auconfig.cfg), you can automatically load this into the PBX. Proceed as
described in the section
Upload Configuration Automatically
.
•
Or you can use a connected telephone to configure which internal telephones should ring when
calls are made to your external connection. Proceed as described in the section
Configure Call
Distribution by Phone
.
Upload Configuration Automatically
1. Remove the power plug from the power socket.
2. Insert the USB memory stick into the USB port or insert the SD
memory card into the SD card slot on the side of the PBX casing.
3. Reinsert the power plug into the power socket.
The configuration is automatically uploaded into the PBX.
The "Power" LED lights up/flashes in red and orange for up to
two minutes.
If the LED is green, the PBX is ready for operation.
Note:
If the PBX is no longer set to its factory settings, no
automatic configuration takes place. To ensure that the
configuration is saved in the PBX anyway, proceed as
described below.
a) Pick up the receiver of an internal telephone.
b) In sequence, dial
##8
, the 6-digit admin PIN (
111111
in the factory settings) and
*
902#
.
You will hear the confirmation tone (pulsating tone).
c) Hang up the receiver.
Configure Call Distribution by Phone
Note:
These settings can only be configured on a Point-to-Multipoint connection. If you are
using a Point-to-Point connection, you need to configure the settings using your PC.
If devices that automatically accept calls are connected (e.g., answering machine, fax,
analogue door module), you need to remove them before carrying out the configuration.
Exception: Devices connected to the fourth telephone jack.
Perform the following four steps for each MSN available on the connection (telephone numbers on
the Point-to-Multipoint connection).
1. Pick up the receiver of the internal telephone on which external calls should ring.
2. In sequence, dial
##8
, the 6-digit admin PIN (
111111
in the factory settings),
*
901
*
, the
MSN without prefix
and
#
. Do not hang up the receiver.
All other telephones connected will also ring. The fourth telephone jack is meant for the fax. The
device connected does not ring.
3. Pick up the receivers of the telephones that are also supposed to ring for external calls on this
MSN.
You will hear the confirmation tone on each receiver you pick up (pulsating tone).
Note:
If a telephone is connected to the fourth telephone jack, instead of the pre-
configured fax machine, you must also pick up that receiver in order to cancel the default
setting.
4. Hang up the receivers of all telephones in order to complete the learning process for this MSN.
Note:
To delete the settings configured for all of the MSNs, in sequence dial
##8
, the 6-
digit admin PIN (
111111
in the factory settings) and
*
900 #
.
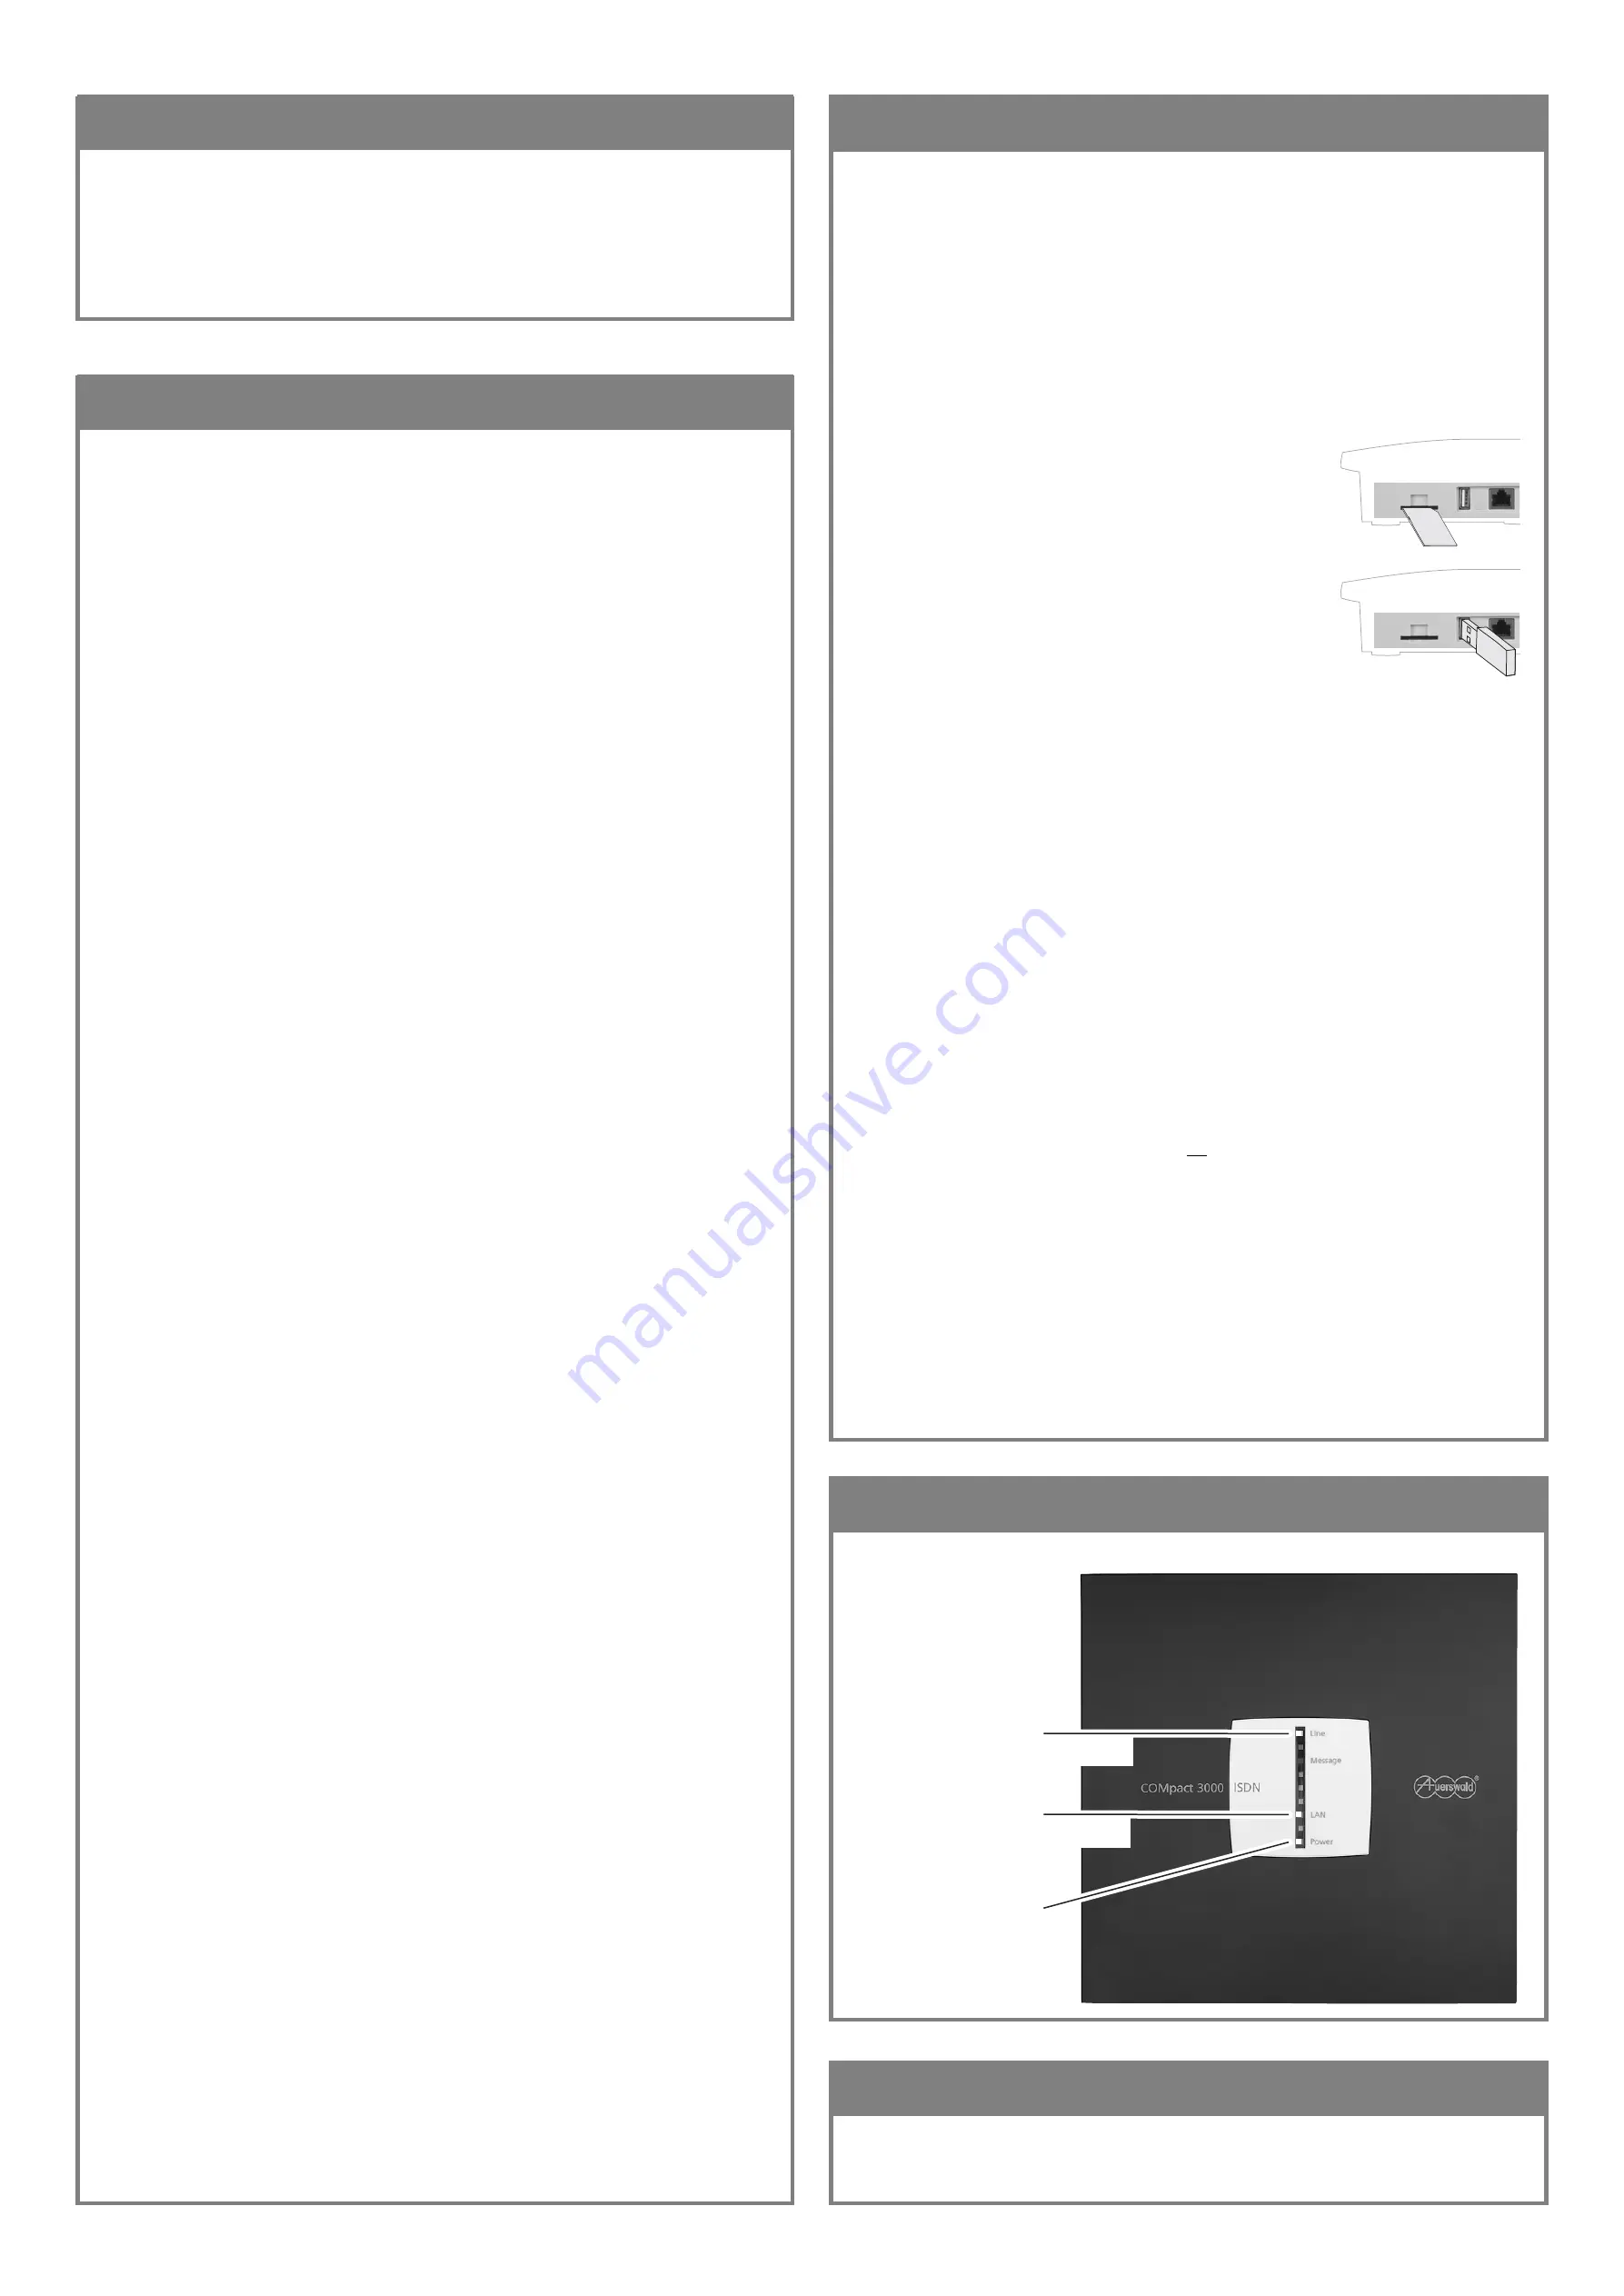
Check the Installation
Check the installation using the LEDs:
How to contact us ...
If there are any questions about your Auerswald system, please contact our representatives or
distributor in the country of sale. The contact information can be found on the Auerswald web site
(Internet address: www.auerswald.com).
"Line" LED is green
"Power" LED is green
(PBX is ready for operation)
"LAN" LED is green
(PC/network connection established)
(Exchange line is ready and available)


