background image

30

When complete “Parental” Setting, press Enter or LEFT return
the root Menu

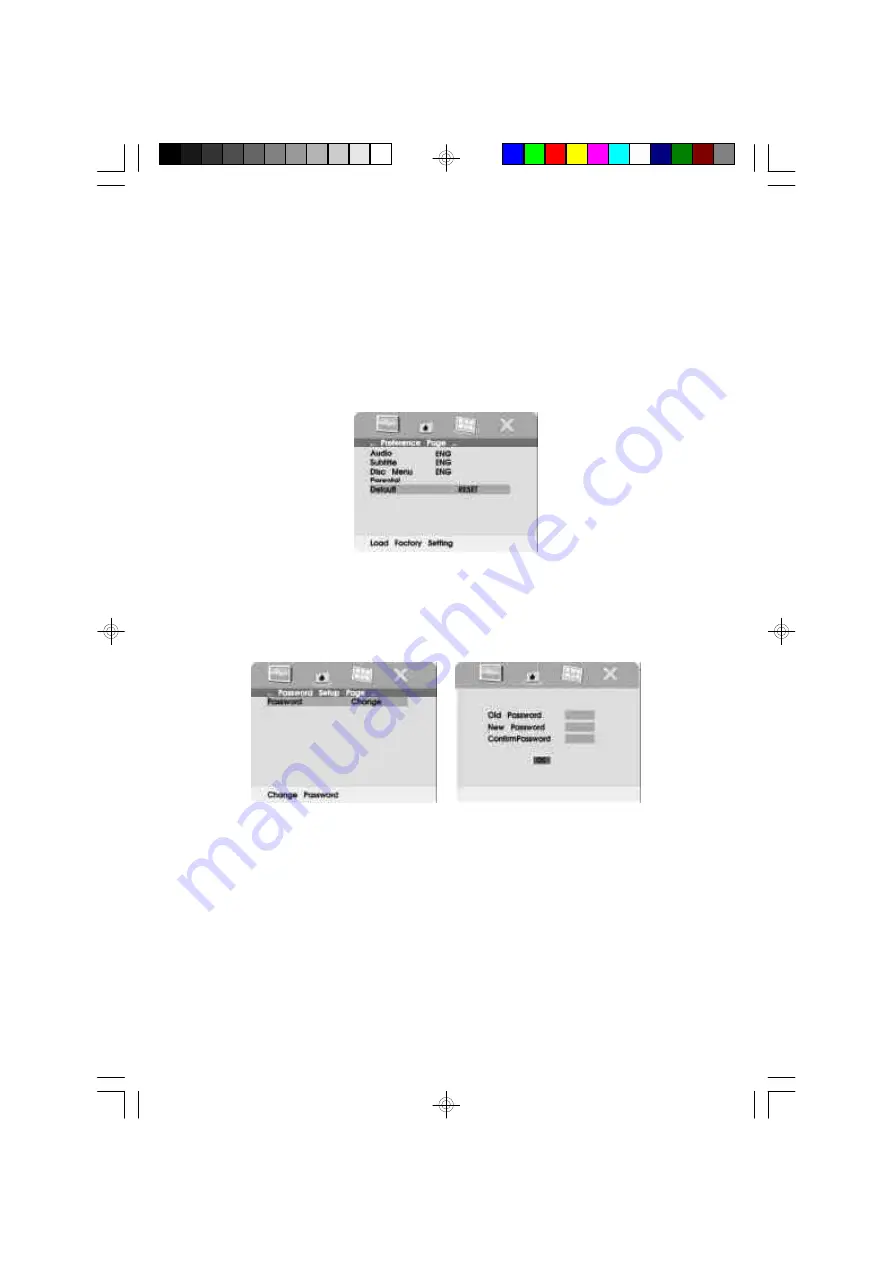
e. Select ‘

DEFAULTS’


using UP/DOWN, then press RIGHT to enter

the submenu. Press ENTER to make the setting return to the
factory-set mode.

NOTE: 

The parental setting is not affected by the default

function.

 Figure 38. Loading Factory Setting

3) When no disc inside the player, select “password” using  LEFT/

RIGHT, then press RIGHT to enter the submenu .

       Figure 39. PASSWORD CHANGE Menu

Press ‘

ENTER’


to enter the Password Change Page. Input the Old

Password or the Default Password, the New Password, and the
Confirmed New Password. Press ‘

ENTER’


to confirm the change.

Содержание VBP3900

Страница 1: ...VBP3900 VIDEO IN A BAG SYSTEM WITH 5 LCD MONITOR DVD PLAYER ...

Страница 2: ...other intellectual propertyrightsownedbyMacrovisionCorporationandotherrightsowners Use of this copyright protection technology must be authorized by MacrovisionCorporation andisintendedforhomeandotherlimitedview ing uses only unless otherwise authorized by Macrovision Corporation Reverse engineering or disassembly is prohibited ...

Страница 3: ...ctly or indirectly by the operator of the motor vehicle A Introduction Thank you for selecting the VBP3900 Video in a Bag System The system s main features include a 5 Liquid Crystal Display LCD monitor and a DVD player The system utilizes the latest state of the art electronics and is designed for use in vehicles hotels offices or your home The VBP3900 Video in a Bag is constructed to provide yea...

Страница 4: ...n wait for about one hour before operating the unit or remove the disc and leave the unit turned on until the mois ture evaporates 2 Installation Ensure that the LCD Monitor DVD Player Bag are installed in accordance with the instructions and illustrations provided in this manual When the main unit is in the bag ensure the latch of the bag are fastened to prevent the unit from falling The S hooks ...

Страница 5: ... kind on or in the system this may result in a fire or electric shock Do not place anything heavy on the unit To ensure proper ventilation and proper operation never cover or block the slots and openings with a cloth or other material 5 Disassemble Do not attempt to disassemble the cabinet There is a risk of elec tric shock and or exposure to Laser Radiation Contact qualified service personnel if ...

Страница 6: ... the disc contents the soft ware producers designed some playback features may not be available Also refer to the instructions supplied with the discs C Contents 1 1 x Monitor DVD Player Combo 2 1 x AC to DC Adapter 3 1 x Cigarette Lighter Adapter 4 1 x Remote Control 5 1 x Mounting Bag with 4 Straps 6 1x Storage bag 7 1 x Instruction Manual D Power Source 1 Powering the system indoors Refer to Fi...

Страница 7: ...icle Refer to Figure 2 Figure 2 Unzip the lower compartment of the bag and take the cigarette lighter adapter Plug one end into the DC 12V jack on the left side of the main unit then plug the other end into the cigarette lighter socket ...

Страница 8: ...the other upper metal ring and place the loop over the headrest Adjust the strap until the bag is firmly secured 3 Take one of the supplied straps from the lower compartment of the bag and connect the latch to the lower metal ring on the left side of the bag Attach the S hook to the same ring after looping the strap around the seat rail Repeat this process for the right side In some vehicles it ma...

Страница 9: ...d the headrest of the driver s seat Repeat this process for the right side Passenger Seat 2 Take another strap and connect the latch to lower metal ring on the left side of the bag Attach the S hook to the same ring after looping the strap around the driver s seat rail Repeat this pro cess for the right side In some vehicles it may be necessary to attach the S connector to the rail directly as it ...

Страница 10: ...rom the bag as they are not used in this installation Figure 5 Ensure the rear strap of the bag is attached to the upper Velcro strip on the back of the bag Carefully place the system front fac ing up on the back seat Guide the vehicle s safety belt through the rear piece of the bag Then secure and adjust the safety belt so that the system is not free to move around Swing the monitor upward and ad...

Страница 11: ... 4 DC 12V power Jack 5 S Video Output Jack 6 Video Jack 7 Audio L Jack 8 Audio R Jack 9 Input Ouput Switch 10 Monitor Port 11 Remote Control Sensor 12 Power Button 13 Power Indicator 14 Menu Button 15 Previous Button 16 Play Button 17 Next Button 18 Up Down Left Right Enter Buttons 19 Stop Button 20 Eject Button 21 Brightness Up Down Thumbwheel ...

Страница 12: ... Stop Button 15 Eject Button 16 Number Button 17 Setup Button 18 Repeat Button 19 Skip Button 20 Skip Button 21 Play Button 22 Pause Button G Playing A DVD After connecting power to the unit press the power button on the main unit momentarily Insert the disc into the slot on the right side of the main unit the unit will load the disc and start playing automatically if there s a disc inside unit pr...

Страница 13: ...an forward at 2 4 8 16 or 32 times speed Scanbackwardat2 4 8 16or 32timesspeed Used for Menu Navigation Execute item or setting Select item or setting Selectingpasswordorothernumericfunctions Return to the previous selection Display the root menu of the disc Repeat playing title chapter or track Repeat a specific portion from pointAto point B of the disc Display information title chapter or track ...

Страница 14: ...isplay contents vary from disc to disc 1 PLAYINGTIMEANDREMAININGTIME a During playback press DISPLAY first time to display the cur rent Title Number 1 the total Number of Titles 2 the current Chapter Number 3 the total Number of Chapters 4 and the Playing elapsed Time for the title 5 The heading will disappear automatically after 3 seconds if no buttons are pressed b Press DISPLAY again to display...

Страница 15: ...tomatically after 3 seconds 2 ANGLE During playback of a disc press ANGLE to display the avail able angles for discs containing multi angles with the current angle number 1 and the total number of angles 2 displaying Press ANGLE to select another angle then press again to exit and return to the normal viewing angle The angle display will disappear automatically if the ANGLE button is not pressed a...

Страница 16: ...here are mul tiple languages press SUBTITLE again to select another subtitle lan guage To turn subtitles OFF press the SUBTITLE button until SUBTITLE OFF is displayed The Subtitle display will disappear au tomatically if the SUBTITLE button is not pressed again within 3 seconds Figure 13 Subtitle Screen Display SomeDVDsonlyallowaccesstothisfunctionthroughtheDVDmenu Figure 12 Angle Screen Display ...

Страница 17: ...not pressed within for 3 seconds Figure 14 Audi Language Screen Display Some DVDs only allow access to this function through the DVD menu 5 ZOOM During playback press ZOOM to enlarge the picture by 2x 3x or 4X with the current zoom multiple 1 Press zoom first time the picture will be enlarged 2X 2 Press zoom second time the pic ture will be enlarged 3X 3 Press zoom 3rd time the picture will be enl...

Страница 18: ...oint Screen Display b Press A B second time to set the Ending Point B and the player will repeatedly play the part between Point A and Point B Figure 18 A B Repeat Cancelled Screen Display Figure 17 A B Repeat Ending Point Screen Display c Press A B a third time to cancel A B repeat and resume playback from point A ...

Страница 19: ...hapter Figure 19 Chapter Repeat ON Screen Display b During playback press REPEAT again to repeatedly play the current title Figure 20 Title Repeat ON Screen Display c During playback press REPEAT a 3rd time to repeat all Chapters and Titles Figure 21 Title Repeat ON Screen Display ...

Страница 20: ... remote to display the DISPLAY Banner The options below show you what happens when you press the DISPLAY button a The current track and playing time of that track will dispay on the screen Figure 23 SINGLE ELAPSED Screen Display b Press DISPLAY first time and SINGLE ELAPSED appears along with the current track playing the amount of time left Figure 26 SINGLE Elapsed Screen Display ...

Страница 21: ...play c Press DISPLAY third times and TOTAL ELAPSED appears along with the current track playing and the total time that the CD has been playing Figure 25 TOTAL ELAPSED Screen Display d Press DISPLAY fourth times and TOTAL REMAIN appears along with the current track playing and the amount of time remaining on the CD Figure 26 TOTAL REMAIN Screen Display ...

Страница 22: ...cted repeat option loops repeatedly until you turn it off 5 PLAYING MP3 DISCS MP3 is a format for storing digital audio An audio CD quality song is compressed into the MP3 format with very little loss of audio quality while taking up much less disc space CD R RW discs that have been encoded in MP3 format are compatible with this system Playbackmodes FOLDER normal playback SINGLE REPEAT ONE repeat ...

Страница 23: ...t and begin playback of the highlighted song SKIPPING SONGS Use the NEXT button to move to the next song Press the PREVIOUS button to move to the beginning of the previous song USING THE REPEAT FEATURE The default mode for the Repeat feature is OFF Pressing REPEAT consecutively changestherepeatoptions SINGLE REPEAT ONE REPEAT FOLDER FOLDER Pressing REPEAT the 5TH time resume normal playback As you...

Страница 24: ...M will display on the screen the picture will refresh from left bottom to right top h Press display 8th time DIAGONAL WIPE RIGHT BOTTOM will display on the screen the picture will refresh from right bot tom to left top i Press display 9th time EXTEND FROM CENTER H will dis play on the screen the picture will refresh from horizontal center to both sides j Press display 10th time EXTEND FROM CENTER ...

Страница 25: ...ay 11th time COMPRESS TO CENTER H will dis play on the screen the picture will refresh from top and bottom still to center l Press display 12th time COMPRESS TO CENTER V will display on the screen the picture will refresh from right and left to center m Press display 13th time WINDOW H will display on the screen the picture will refresh from four window s top side to bottom side n Press display 14...

Страница 26: ... to enter the submenu Select the TV display mode on the screen using UP DOWN and press ENTER to confirm the setting Press LEFT to return Figure 29 TV DISPLAY Screen Display NORMAL PS When the player is connected to a normal TV and a wide picture is shown on the full screen NORMAL LB When the player is connected to a normal TV and a wide picture is shown on the screen with a black strip at both the...

Страница 27: ...the submenu Choose Angle Mark on or off displayed on the screen using the UP DOWN and then press ENTER to confirm the setting Press the LEFT button to return Figure 31 ANGLE MARK Screen Display ON The screen will show angle mark If angle option is available OFF The screen will not display the Angle Mark d Select SCREEN SAVER using UP DOWN key and then press the RIGHT button to enter the submenu Ch...

Страница 28: ... no disc inside the player select Preference Page by using LEFT RIGHT press ENTER to enter the Preference page Figure 33 Preference Page Menu Screen a Select Audio by UP DOWN Key then press Enter you can change the Audio Language by pressing LEFT RIGHT key After chosing the propered Audio Language press ENTER or LEFT back to the root menu Figure 34 Preference Audio Language ...

Страница 29: ...er or LEFT return the root Menu c Select Disc Menu by UP DOWN Key then press Enter you can change the Disc Menu by UP DOWN key Figure 36 Preference Disc Menu Language When complete Disc Menu Setting press Enter or LEFT return the root Menu d Select Parental by UP DOWN Key then press Enter you can change the Parental by UP DOWN key Figure 37 Parental Preference Screen Display ...

Страница 30: ...NOTE The parental setting is not affected by the default function Figure 38 Loading Factory Setting 3 When no disc inside the player select password using LEFT RIGHT then press RIGHT to enter the submenu Figure 39 PASSWORD CHANGE Menu Press ENTER to enter the Password Change Page Input the Old Password or the Default Password the New Password and the Confirmed New Password Press ENTER to confirm t...

Страница 31: ...lways effective even after you have selected your own password and changed it To avoid the possibility of others using the default password to set the parental level and change the password you can record this default password in another area and delete it from this manual Some discs can be limited depending on the age of users while some discs can not ...

Страница 32: ...put Output switch to the IN Position Adjust the volume control and the brightness control on the monitor for individual preference I Wired Headphone Refer to Figure 41 Optional wired headphones may be used with the Video In a Bag System Simply plug in the headset to either HEADPHONE 1 jack or HEADPHONE 2 jack on the left side of the monitor Note Using HEADPHONE 1 jack will disconnect the internal ...

Страница 33: ...vehicle Please contact an Audiovox dealer for the additional monitors Note The AC to DC adapter can power only the main unit Connect the DIN cable on the additional monitor to the MONITOR port on the left side of the main unit After plugging in the main unit DC 12V power Audio Video and IR signals will all be supplied through DIN cable to the additional monitor Figure 42 ...

Страница 34: ... of the main unit to the S VIDEO connector on your TV for a high quality DVD picture K Specification Disc format DVD CD MP3 Color system NTSC Screen size 5 Resolution 960 X234 pixels Video output 1 0 Vp p 75 Ohm unbalanced Video S N Better than 35 dB Audio output 2 x 1 W Audio S N Better than 35 dB Power source DC 11 V to 16 V Power consumption 22 W Operating temperature 5 40 C 41 104 F Storage te...

Страница 35: ... EXTENT OF THE COMPANY S LIABILITY UNDER THIS WARRANTY IS LIMITED TO THE REPAIR OR REPLACEMENT PROVIDED ABOVE AND IN NO EVENT SHALL THE COMPANY S LIABILITY EXCEED THE PURCHASE PRICE PAID BY PURCHASER FOR THE PRODUCT This Warranty is in lieu of all other express warranties or liabilities ANY IMPLIED WARRANTIES INCLUDINGANYIMPLIEDWARRANTY OFMERCHANTABILITY SHALLBE LIMITEDTO THE DURATIONOFTHISWRITTEN...

Страница 36: ...128 6666A 2003 Audiovox Electronics Corp 150 Marcus Blvd Hauppauge N Y 11788 ...

Отзывы: