

WARNING:
TO REDUCE THE RISK OF FIRE OR ELECTRIC SHOCK, DO NOT
EXPOSE THIS APPLIANCE TO RAIN OR MOISTURE.
The exclamation point within the triangle is a warning sign
alerting you of important instructions accompanying the product.
The lightning flash and arrowhead within the triangle is a warning
sign alerting you of "dangerous voltage" inside the product.
WARNING: TO REDUCE THE RISK OF ELECTRIC SHOCK, DO NOT REMOVE
COVER (OR BACK) NO USER-SERVICEABLE PARTS INSIDE. REFER
SERVICING TO QUALIFIED SERVICE PERSONNEL.
WARNING
RISK OF ELECTRIC SHOCK
DO NOT OPEN
LOCATION OF CONTROLS
HOW TO SET THE CLOCK
Connect the AC power cord to a wall outlet. Figures will appear and
begin to flicker on the time display.
Be sure to install an optional 9V battery (6F22) for the power back-up
function. If the AC power supply is interrupted, the battery supplies
power to keep the clock operating and holding the alarm time setting.
During power interruption, the backup battery will keep track of
the time and store the alarm setting until the power returns. The
battery will not operate the LED clock display, radio, CD player, or
alarm function.
After a power interruption, the displayed time may not be always
correct (it may gain or lose less than ten minutes per hour).
When to replace the battery
To check the battery condition, unplug the AC power cord from the
wall outlet and plug it in again after a few minutes. If the displayed
time is incorrect, replace the battery with a new one.
Caution
Clock display will be flash as the indication of the system has lost AC
power some moment (even backup battery inserted), please double
check the clock and update.
Be sure to install the battery before disconnecting the AC power
cord.
When the unit is left unplugged for a long time, remove the battery
to avoid undue battery discharge and unit damage from battery
leakage.
INSTRUCTION
MANUAL
LISTENING TO THE RADIO
1.
Slide the ALARM/POWER switch to ON.
2.
Select the FUNCTION switch to FM or AM.
3.
Tune in to a station.
4.
Adjust the volume.
5.
After listening. Set the ALARM/POWER switch to STANDBY.
To improve the radio reception
FM:
Extend the external FM
antenna wire.
Caution:
DO NOT CONNECT
TO OUTSIDE ANTENNA.
For private listening
Connect headphones (Ø3.5mm stereo mini plug) to the PHONES jack.
When the headphones are connected, speakers are automatically
disconnected.
PRECAUTIONS
POWER SUPPLY
USING HOUSE CURRENT
Before use, check that the rated voltage of your unit matches your
local voltage.
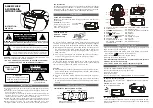
CAUTION:
To prevent
electrical shock, match
wide blade of plug to
wide slot, fully insert.
POWER BACK UP
DURING POWER
INTERRUPTION
Insert one "6F22" battery
* DO NOT CONNECT FM ANTENNA TO EXTERNAL ANTENNA *
* SEE BOTTOM OF UNIT FOR GRAPHIC SYMBOLS *
CAUTION
INVISIBLE LASER RADIATION WHEN
OPEN AND INTERLOCKS DEFEATED.
AVOID EXPOSURE TO BEAM
WARNING:
DO NOT PLACE THE UNIT ON BEDDING
OR OTHER SURFACES THAT PREVENTS
AIR FLOW THROUGH THE UNIT.
This product contains a low
power laser device
TIME DISPLAY INDICATOR/CD DISPLAY
FCC Information
This device complies with Part 15 of FCC Rules. Operations are subject
to the following two conditions: (1) this device may not cause harmful
interference, and (2) this device must accept any interference received,
including interference that may cause undesirable operation.
To disconnect the cord, pull it out by the grasping plug. Never pull it by
the cord.
Avoid exposure to temperature extremes, direct sunlight, moisture, sand,
dust or mechanical shock.
Allow adequate air circulation to prevent internal heat build-up. Do
not place the unit on surfaces (rugs, blankets, etc.) or near materials
(curtains, draperies) that may block the ventilation holes.
Should any solid object or liquid fall into the unit, unplug the unit and
have it checked by qualified personnel before operating it any further.
When cleaning the casing, use a soft cloth dampened with a mild
detergent solution. Never use abrasive cleaners or chemical solvents.
AM:
Rotate the unit horizontally.
AC cord to
AC outlet
CLASS 1 LASER
PRODUCT
ALARM CLOCK
AM/FM RADIO
WITH CD PLAYER
HOUR digits
PM
indicator
ALARM 1
indicator
ALARM 2
indicator
MINUTE digits
TRACK No./PLAY indicator
REPEAT ONE indicator (r 1)/
REPEAT ALL indicator (r A)
1.
ALARM 1 / ALARM 2 buttons
2.
SLEEP button
3.
SKIP / HOUR button
4.
REPEAT button
5.
SKIP / MIN button
6.
STOP / CLOCK SET button
7.
PLAY / PAUSE button
8.
VOLUME control
9.
ALARM / POWER switch
(CD / RADIO / BUZZER) /
STANDBY/ON
10.
FUNCTION switch (AM/FM/CD)
11.
PHONES jack
12.
9V Back-up battery compartment
13.
Display
14.
Speaker
15.
Dial Scale
16.
TUNING control
17.
AC cord
18.
CD door
19.
SNOOZE button
1.
Pressing the CLOCK SET button when clock display will be flash,
press the HOUR button to the desired hour.
2.
Press the MIN button to the desired minute.
3.
Pressing the CLOCK SET button
Note: When the POWER switch to ON and the FUNCTION switch to
CD mode, the clock will not setting.
PM 12:00 = NOON time, and PM indicator will light up.
8
1
9
2
10
4
3
11
12
5
6
7
17
18
19
13
14
15
16