background image

30

INStAlACIÓN de lA BAteRÍA

Inserte unas baterías de tamaño "Cell" en el compartimiento de la batería. Asegúrese 
de que las baterías se insertan correctamente para evitar daños al mando a distancia. 
quite siempre las baterías cuando el mando a distancia no se utilice durante un 
periodo de tiempo largo, ya que esto provocará filtraciones de las baterías y en 
consecuencia se dañará su equipo.

Deslice la tapa e instale una sola batería "Cell" con las polaridades según se muestra.

Notas:

  •   Si disminuye la distancia necesaria entre el mando a distancia y el aparato, 


las baterías están agotadas. En este caso sustituya las baterías por unas nuevas.

  •   El botón de encendido en la unidad principal debe estar "ON" para que el Mando 

a Distancia funcione.

VeNtANA del SeNSOR del ReCePtOR

  •   Incluso si el mando a distancia se acciona dentro del alcance efectivo, su 

funcionamiento puede ser imposible si hay obstáculos entre el aparato y el mando 
a distancia.

  •   Si el mando a distancia se hace funcionar cerca de otros aparatos que generan rayos 

infrarrojos, o si otros dispositivos de mando a distancia que utilizan rayos infrarrojos 
se utilizan cerca del aparato, el mando puede funcionar incorrectamente.

fUNCIONAMIeNtO de RAdIO

funcionamiento general

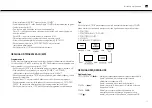
  •   Ponga el selector de "fUNCIÓN" en el modo "RADIO".
  •   Seleccione la banda deseada utilizando el selector de "BANDA".
  •   Ajuste la frecuencia de radio a su emisora deseada utilizando el control 


de "SINTONIZACIÓN".

  •   Ajuste el control de "VOLUMEN" al nivel deseado.

Recepción de fm / fm-estéreo

  •   Ponga el selector de "BANDA" en el modo fM para una recepción MONO.
  •   Ponga el selector de "BANDA" en el modo fM ST. para una recepción ESTÉREO. 


La luz indicadora Estéreo se ilumina para mostrar el modo fM ST.

Para una mejor recepción

  •   fM - Este aparato tiene una antena de fM situada en el recinto trasero. 


Este cable se desenreda y extiende completamente para una mejor recepción.

  •   AM - Este aparato está equipado con una antena AM dirección de ferrita 

incorporada. Gire el aparato para mejorar la recepción.

fUNCIONAMIeNtO de Cd / MP3

funcionamiento general

REPRODUCCIÓN / PAUSA ( 

 )    Apriete para empezar a reproducir un disco CD / MP3.


 Apriete otra vez para parar temporalmente la 
reproducción de CD / MP3.


Apriete otra vez para reanudar la reproducción.

SALTO + & ( 

 ) 

 Apriete para ir a la siguiente pista o retroceder a 


la pista anterior.

SALTO - ( 

 ) 

 Apriete y mantenga durante la reproducción hasta 
que encuentre el punto deseado.

PARAR (   ) 

Apriete para detener el funcionamiento de CD / MP3.

Manual de instrucciones

Содержание HF-1254

Страница 1: ...anwijzing GB Instruction Manual du Bedienungsanleitung fr Mode d emploi es Manual de instrucciones pt Manual de Instru es pl Instrukcje u ytkowania i Istruzioni per l uso Stereo powerpack C D M P 3 U...

Страница 2: ...2...

Страница 3: ...van batterijen Gebruik het apparaat niet in een extreem hoog of laag klimaat Het ratinglabel bevindt zich aan de onderzijde van het apparaat Overmatige geluidsdruk van oortelefoon of hoofdtelefoon ka...

Страница 4: ...buurt van hoogspanningslijnen worden gericht OBJECTen en vloeistoffen Zorg er voor dat er geen voorwerpen op kunnen vallen of vloeistoffen worden gemorst op het apparaat ESD WAARSCHUWING Als het disp...

Страница 5: ...AUSE 13 STOP 14 Functieschakelaar 15 AUX in 16 FM antenne 17 Power ON OFF 18 Luidsprekeraansluitingen L R 19 Tijd instellen 20 Uur 21 Minuten 22 Netsnoer 23 Afstandbediening sensor Electriciteits aans...

Страница 6: ...ralen genereren of andere afstandsbedienings gestuurde apparaten is het mogelijk dat deze niet goed functioneert Radio bediening Algemene werking Stel de functieschakelaar in op de radio modus Selecte...

Страница 7: ...zen door op de ALBUM knop te drukken Druk op de MODE toets om het gewenste nummer te bevestigen in het programma geheugen Herhaal stap 2 en 3 om extra nummers in het programmageheugen te plaatsen Als...

Страница 8: ...naar CD MP3 OPERATIE voor deze actie Overige eigenschappen Klokinstelfunctie Druk op de tijdsinstelling knop laat deze knop niet los tijdens tijdinstelling Druk op de UUR knop om uren in te stellen D...

Страница 9: ...apparatus Attention should be drawn to environmental aspects of battery disposal Use of the apparatus in moderate climates The rating and marking information are located at the bottom of the unit Exce...

Страница 10: ...tems placed upon or against them POWER LINES An outdoor antenna should be located away from power lines OBJECT and LIQUID ENTRY Care should be taken so that objects do not fall and liquids are not spi...

Страница 11: ...Album 12 Play Pause 13 Stop 14 Function selector 15 aux in 16 fm antenna 17 Power on off 18 Speaker jacks l r 19 Time set 20 Hour 21 Minute 22 ac power cord 23 Remote sensor POWER SOURCE You can powe...

Страница 12: ...ther remote control devices using infrared rays are used near the appliance it may operate incorrectly RADIO OPERATION General operation et the FUNCTION selector to RADIO mode Select desired band by u...

Страница 13: ...ALBUM button Press the MODE button again to confirm desired track into the program memory Repeat step 2 and 3 to enter additional tracks into the program memory When all the desired tracks have progra...

Страница 14: ...THER FEATURES Clock setting Press the TIME SET button Do not release TIME SET button during time setting Press the HOUR button to set hour Press the MINUTE button to set minute Release all button to c...

Страница 15: ...kt f r umweltgerechtes Recycling zur cknehmen Keine offenen Flammen wie z B brennende Kerzen auf das Ger t stellen Bei der Batterieentsorgung auf Umweltaspekte achten Das Ger t in gem igtem Klima benu...

Страница 16: ...n STROMLEITUNGEN Eine Au enantenne darf nicht in der N he von Stromleitungen angebracht werden GEGENST NDE und FL SSIGKEITSEINTRITT Achten Sie darauf dass keine Gegenst nde auf das Geh use fallen und...

Страница 17: ...ABE PAUSE 13 STOPP 14 FUNKTIONSAUSWAHLSCHALTER 15 AUX EIN 16 FM ANTENNE 17 EIN AUSSCHALTEN 18 LAUTSPRECHERBUCHSEN L R 19 ZEITEINSTELLUNG 20 STUNDE 21 MINUTE 22 AC NETZKABEL 23 FERNBEDIEUNUNGSSENSOR ST...

Страница 18: ...des Ger ts benutzt werden kann die Funktion beeintr chtigt werden RADIOBETRIEB Allgemeine bedienung Den FUNKTIONS Wahlschalter auf RADIO Modus stellen Das gew nschte Band mit dem BAND Wahlschalter au...

Страница 19: ...GEN oder BERSPRINGEN Taste den gew nschten Titel w hlen Ein gew nschtes Album kann durch Dr cken der ALBUM Taste gew hlt werden Die MODUS Taste erneut dr cken um den gew nschten Titel im Programmspeic...

Страница 20: ...einstellen Die ZEIT EINSTELLEN Taste dr cken W hrend der Zeiteinstellung die ZEIT EINSTELLEN Taste nicht l sen Zum Einstellen der Stunde die STUNDE Taste dr cken Zum Einstellen der Minute die MINUTE T...

Страница 21: ...d un traitement inappropri de ce produit en tant que d chet Pour rapporter votre appareil usag veuillez utiliser les services de reprise et de collecte ou bien contactez le d taillant o le produit a t...

Страница 22: ...eli qu au type de source d alimentation d crit dans les instructions d utilisation ou mentionn sur l appareil PROTECTION DU CORDON D ALIMENTATION Les cordons d alimentation doivent tre agenc s de mani...

Страница 23: ...ION 15 ENTREE AUX 16 ANTENNE FM 17 MARCHE ARRET 18 PRISES HAUT PARLEUR G D 19 REGLAGE DE L HEURE 20 HEURE 21 MINUTE 22 CORDON D ALIMENTATION CA 23 CAPTEUR DE TELECOMMANDE SOURCE D ALIMENTATION Vous po...

Страница 24: ...ppareil elle peut mal fonctionner FONCTIONNEMENT DE LA RADIO Fonctionnement g n ral Placez le s lecteur de FONCTION en mode RADIO S lectionnez la bande de votre choix en utilisant le s lecteur de BAND...

Страница 25: ...SKIP Vous pouvez s lectionner l album de votre choix en cliquant sur la touche ALBUM Appuyez nouveau sur la touche MODE pour m moriser votre choix de plage R p tez les tapes 2 et 3 afin de m moriser...

Страница 26: ...puyez sur la touche REGLAGE DE L HEURE Ne rel chez pas la touche REGLAGE DE L HEURE pendant le r glage de l heure Appuyez sur la touche HEURE pour r gler les heures Appuyez sur la touche MINUTE pour r...

Страница 27: ...vendedor donde se compr el producto Ellos pueden coger este producto para un reciclaje ambiental seguro No debe colocarse sobre el aparato ninguna fuente de llama desnuda como velas de iluminaci n Deb...

Страница 28: ...E DE ALIMENTACI N Los cables de alimentaci n deben colocarse de modo que no sea probable que se pisen o pellizquen por art culos colocados sobre o contra ellos L NEAS DE TENSI N Una antena al aire lib...

Страница 29: ...UNCI N 15 ENTRADA AUXILIAR 16 ANTENA FM 17 ON OFF Encender apagar 18 CONECTORES DE ALTAVOZ I D 19 AJUSTE DE HORA 20 HORA 21 MINUTO 22 CABLE DE ALIMENTACI N DE C A 23 SENSOR REMOTO FUENTE DE ALIMENTACI...

Страница 30: ...l aparato el mando puede funcionar incorrectamente FUNCIONAMIENTO DE RADIO Funcionamiento general Ponga el selector de FUNCI N en el modo RADIO Seleccione la banda deseada utilizando el selector de BA...

Страница 31: ...cionar un lbum deseado apretando el bot n LBUM Apriete de nuevo el bot n MODO para confirmar la pista deseada en la memoria de programa Repita los pasos 2 y 3 para introducir pistas adicionales en la...

Страница 32: ...o suelte el bot n AJUSTE DE HORA durante el ajuste de la hora Apriete el bot n HORA para establecer la hora Apriete el bot n MINUTO para establecer los minutos Sueltelosbotonesparaconfirmarlosajustes...

Страница 33: ...m amiga do ambiente N o devem ser colocados no aparelho fontes de chamas como velas acesas Deve ter em aten o os aspectos ambientais da elimina o de pilhas Utilize o aparelho em climas moderados Ainfo...

Страница 34: ...ma a n o serem pisados nem ficarem presos em objectos CABOS EL CTRICOS Deve colocar uma antena exterior longe de cabos el ctricos ENTRADE DE OBJECTOS e L QUIDOS Deve ter cuidado para que n o entrem ob...

Страница 35: ...4 SELECTOR DE FUN O 15 ENTRADA AUX 16 ANTENA FM 17 LIGAR DESLIGAR 18 ENTRADAS DE AUSCULTADORES E D 19 DEFINIR HORA 20 HORAS 21 MINUTOS 22 CABO DE ALIMENTA O CA 23 SENSOR REMOTO FONTE DE ALIMENTA O Pod...

Страница 36: ...MENTO DO R DIO Funcionamento geral Coloque o selector de FUN O no modo R DIO Seleccione a banda desejada utilizando o selector de BANDA Ajuste a frequ ncia de r dio para a esta o desejada utilizando o...

Страница 37: ...um lbum desejado pressionando o bot o LBUM Pressione novamente o bot o MODO para confirmar a faixa desejada na mem ria do programa Repita o passo 2 e 3 para introduzir faixas adicionais na mem ria do...

Страница 38: ...o rel gio Pressione o bot o DEFINIR HORA N o liberte o bot o DEFINIR HORA durante a defini o da hora Pressione o bot o HORAS para definir as horas Pressione o bot o MINUTOS para definir os minutos Lib...

Страница 39: ...nktu zwrot w i zbi rki lub skontaktowa si ze sprzedawc od kt rego produkt zosta zakupiony Sprzedawca mo e przekaza produkt do punktu bezpiecznego dla rodowiska recyklingu Na urz dzeniu nie nale y umie...

Страница 40: ...y y napr ane przez przedmioty umieszczane na nich lub pod nimi LINIE ELEKTROENERGETYCZNE Anten zewn trzn nale y umie ci z dala od linii elektroenergetycznych DOSTAWANIE SI DO RODKA PRZEDMIOT W i P YN...

Страница 41: ...IAZDO AUX IN 16 ANTENA FM 17 W CZNIK WY CZNIK 18 GNIAZDA G O NIKA L P 19 USTAWIENIE ZEGARA 20 GODZINY 21 MINUTY 22 PRZEW D ZASILAJ CY 23 CZUJNIK ZDALNEGO STEROWANIA R D O ZASILANIA Urz dzenie jest zas...

Страница 42: ...ub urz dzenie mog nie dzia a prawid owo OBS UGA RADIA Og lna obs uga Ustaw prze cznik FUNKCJI w pozycji trybu RADIO Wybierz dane pasmo przy u yciu prze cznika PASMA Dostosuj cz stotliwo radiow w celu...

Страница 43: ...lub POMI Mo na tak e wybra dany album naciskaj c przycisk ALBUM Naci nij ponownie przycisk TRYB aby potwierdzi wprowadzenie danej cie ki do pami ci programu Powt rz krok 2 i 3 aby wprowadzi dodatkowe...

Страница 44: ...AWIENIE ZEGARA Nie zwalniaj przycisku USTAWIENIE ZEGARA podczas ustawiania zegara Naci nij przycisk GODZINY aby ustawi godziny Naci nij przycisk MINUTY aby ustawi minuty Zwolnij wszystkie przyciski ab...

Страница 45: ...vere un riutilizzo sostenibile delle risorse Consegnare l apparecchio da smaltire ai punti di raccolta autorizzati oppure contattare il rivenditore presso il quale stato acquistato l apparecchio In qu...

Страница 46: ...o che non siano calpestati n rovinati da oggetti posti su di essi o contro di essi LINEE ALIMENTAZIONE Collocare un antenna per esterni lontano delle linee di alimentazione PENETRAZIONE OGGETTI E LIQU...

Страница 47: ...5 INGRESSO AUX 16 ANTENNA FM 17 ALIMENTAZIONE ON OFF 18 SPINOTTI ALTOPARLANTI S D 19 IMPOSTAZIONE ORARIO 20 ORA 21 MINUTI 22 CAVO ALIMENTAZIONE CA 23 SENSORE TELECOMANDO SORGENTE ALIMENTAZIONE possibl...

Страница 48: ...O RADIO Funzionamento generale Portare il selettore FUNZIONE sul modo RADIO Selezionare la banda desiderata con il selettore BANDA Impostare la frequenza radio desiderata con il comando SINTONIZZAZION...

Страница 49: ...album desiderato premendo il tasto ALBUM Premere nuovamente il tasto MODO per confermare il brano desiderato nella memoria programma Ripetere i punti 2 e 3 per inserire brani supplementari alla memori...

Страница 50: ...rilasciare questo tasto durante l IMPOSTAZIONE ORARIO Premere il tasto ORA per impostare l ora Premere il tasto MINUTI per impostare I minuti Rilasciare tutti i tasti per confermare l impostazione Il...

Страница 51: ...51...

Страница 52: ...Tristar Europe B V JulesVerneweg 87 5015 BH Tilburg The Netherlands www tristar eu HF 1254...

Отзывы: