- 6 -
CATC/2WSI Installation and Connection Guide
- 6 -
CATC Easy Touch II Programming
The programming for the interface is self contained within the template file we have provided you. You should have
downloaded and installed the v1.2a update and any additional updates available. Please check
www.support.audioaccess.com
for the latest download.
The below instructions are generic instructions for any interface and template. Please see detailed instructions for
specific instructions for each interface. These are available on the Audioaccess Technical Support website. There are
only three steps necessary to correctly program the CATC and CATC/2WSI.
If you are using the Lutron
Homeworks interface please see the detailed instructions on the Audioaccess Technical Support Website
before continuing.
1.
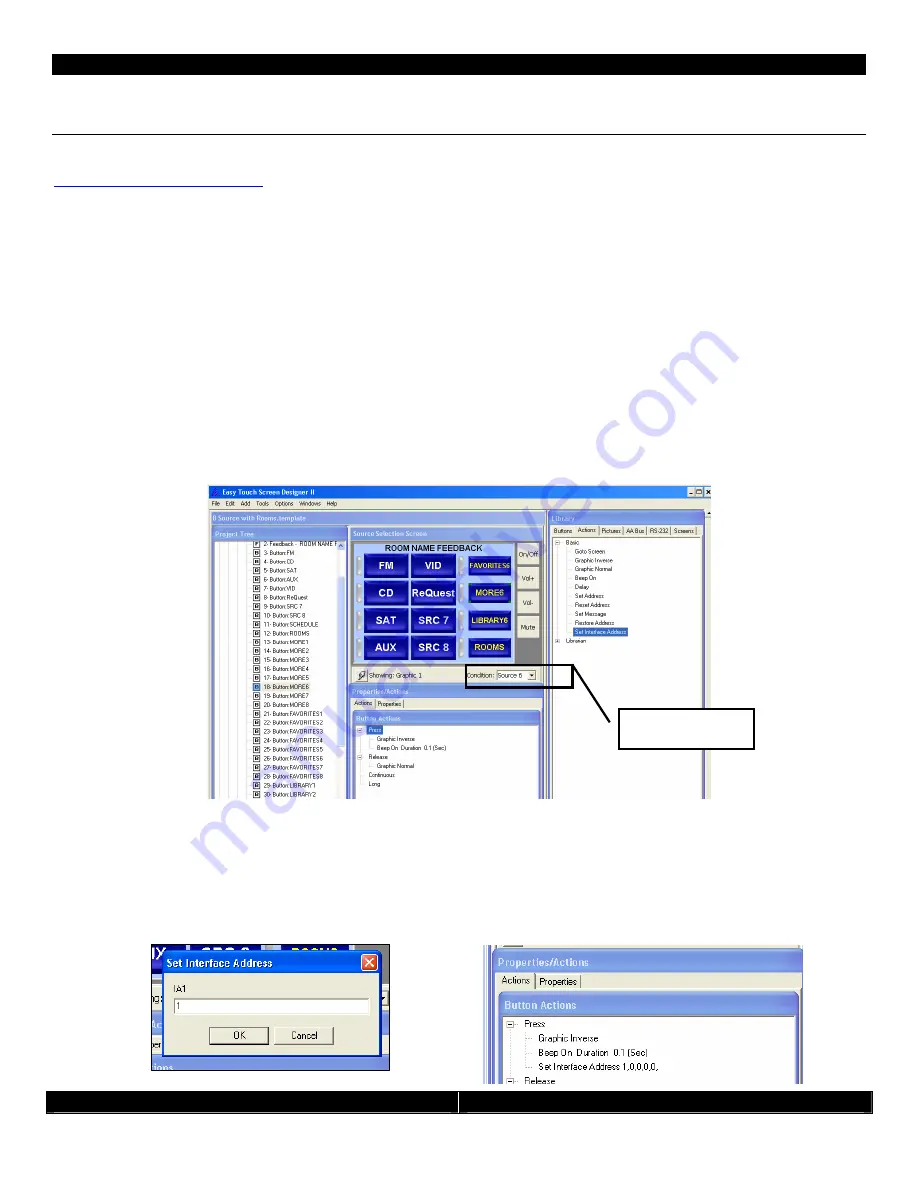
Add the “Set Interface Address” message from the Actions Library onto the Button Press of the correct MORE,
FAVORITES or LIBRARY BUTTON for your installation. This is the button that will be used to GOTO the
navigation and control screens for the connected device. You can rename this button at any time. In this
example I am using Source 6 and Drag+Dropping the “Set Interface Address” action from the Actions Library
(under Basic) to the press of the MORE button.
•
Make sure to use the “Condition” pull down menu to filter the buttons that are being shown on the screen
to match the source # input that you are going to connect to the PX-700. If your device is going to be
Source #6 on the PX-700, you should select “Source 6” on the pull down menu. Please see the CATC
installation guide for detailed information.
2.
When you drag and drop the “Set Interface Address” action onto the “MORE” button you will be prompted to
enter five (5) numbers for IA1, IA2, IA3, IA4 and IA5. When prompted for Interface address enter the number
for IA1 that corresponds to the dip switch setting you set in the hardware setup above and click OK.
If you
are using an Audio ReQuest F.Series, Russound Dual Tuner, or other multiple output device, use
IA2 to specify the output of the unit from 1 to 4.
All other interface address numbers should be set to 0.
The additional place holders will be used for future development.
For example: Interface Address = 1
Your Actions should now look like this:
Screen “Condition”
pull down menu


