background image

18

USING BLUETOOTH HEADPHONES

Establishing a headphone connection

Sound from the player can also be transmitted to a bluetooth headphone via a bluetooth
connection. It is necessary to proceed as follows when connecting for the first time:

1 Switch the headphones on by pressing and holding the symbol 

 on the phone 

designated "R". The green LED on the phone starts to flash.

Note

If the LED doesn't flash, replace the batteries or charge them up via the USB connection.
More detailed information can be found on this in the headphone' user information.

2 In the player menu, select 

Bluetooth - New connection

. In the left upper corner 

of the display a white flashing bluetooth symbol   appears.

3 The player and headphones are creating a connection. This can take a few seconds. 

After successful connection, the colour of the bluetooth symbol changes to blue.

4 Close the player menu. The bluetooth symbol will also be faded out.

Note


If the headphones have previously been connected with the portable DVD player then they
will recognise the player and connect automatically every time the DVD player and
headphones are switched on. 

Severing the bluetooth connection

Should you wish to severe the connection, there are the following options:

1 Switch off the headphones by pressing and holding on the symbol 

 on the side 

designated "L". The green LED on the phone goes out and the sound is played back 
via the player.

2 In the player menu, select 

Bluetooth - Bluetooth off

.

Содержание RSE II

Страница 1: ...Audi Entertainment mobile Operating instructions G ...

Страница 2: ... the sound playback language 13 Calling up information on the disc 14 Ejecting the disc 14 PLAYING BACK AUDIO TITLES IMAGES AND VIDEOS FROM DATA CDS 15 Displaying the contents 15 Switching selection 15 Playing back content 16 Characteristics of individual file types 16 PLAYING BACK USBS AND MEMORY CARDS 17 Inserting the memory medium and playing back files 17 Switching between several memory media...

Страница 3: ...surfaces When setting up the player make sure there is enough space is available for air to circulate around it The player should not be operated directly adjacent to heat sources ATTENTION Connect the player to the power supply using only the connecting cable supplied Make sure that the cable is not damaged and that the plugs are seated firmly Ensure that the supply voltage corresponds to the ope...

Страница 4: ...cial formats or 8 cm diameter CDs are not suitable for playback Clean soiled discs carefully using first a damp then a dry cloth Changes in ambient temperature can cause condensation to form on the disc Dry the disc before use with a soft cloth Avoid touching writing on or damaging the reverse side of a disc or both sides in the case of double sided discs Do not expose the discs to direct sunlight...

Страница 5: ...age Holding down slows the play back Also serves to navigate down the menu 5 Day night sensor as well as sensor for remote control 6 PLAY PAUSE Starts interrupts the playback of a medium Also serves to confirm the current selection in the menu display Holding down switches to or out of standby mode 7 NEXT CLIP Switches to next section music title image Holding down speeds up the playback Also serv...

Страница 6: ...ut 4 AUDIO Analogue audio input output 5 Headphone jack 6 ON OFF switch 7 Mains connection socket 8 DVD drive insert 9 Eject disc 1 Slot for mounting onto the carrier bracket in the car and for inserting the battery 2 Picture stand removable 3 Connection contacts for installation in car 4 Release tab 1 2 3 4 5 6 7 8 9 2 3 4 1 ...

Страница 7: ...p a DVD menu 9 STOP Pre stops stops the playback 10 Numerical entry 0 9 11 NEXT CLIP Switches to next section music title image etc 12 PLAY PAUSE Starts interrupts the playback of a medium 13 PREVIOUS CLIP Switches to previous section music title image etc 14 FORWARD Fast forward playback 15 REWIND Fast reverse playback 16 Cursor buttons Moves the selection to the left right up or down 17 ENTER Co...

Страница 8: ...are obstacles between the remote control and the sensor on the portable DVD player Inserting or replacing the battery 1 Push a fingernail into each of the slots in the battery cover 2 Press the battery compartment cover at slot a lightly to the side and pull the battery holder at slot b out 3 Remove the old battery and place a new lithium battery Cr2025 into the holder The side of the battery mark...

Страница 9: ...ier a so that the counterpart b flips forward arrow 2 Attach the player from the left and push it to the right until it clicks into place 3 Check that the player is firmly seated Note The player is switched on automatically when the car ignition is switched on if the ON OFF switch is ON Demounting the portable DVD player To demount the player proceed as follows 1 Grasp the player with both hands P...

Страница 10: ...her via the respective player Free standing position For use outside the car the portable DVD player can be set upright with the picture stand on the reverse side 1 Fit the picture stand into the slot on the reverse side 2 Swing the tongue out until it clicks into place 3 Turn the tongue round by 90 and stand the player up 4 Check that the player is firmly seated Folding back the picture stand is ...

Страница 11: ... light up The player is ready for use Note When switching on for the first time or after resetting the player settings the language selector appears see Selecting the language on page 20 To switch the player off push down the ON OFF switch on the left side of the player Standby mode The portable DVD player automatically switches to the standby mode after a few minutes when there is no playback or ...

Страница 12: ...pear DVD VCD or CD depending on disc type 3 Playback normally starts automatically the disc menu where available appears in the display If not press PLAY PAUSE at the control panel or on the remote control Note When an audio disc is playing back the screen display ends automatically if no buttons are pressed for about 1 minute Pressing any random button reactivates the display Interrupting resumin...

Страница 13: ... This menu can be activated during playback by pressing DVD MENU on the remote control or by selecting the menu item DVD Option Disc Menu 1 Navigate DVDs by using the buttons and or and to get to the desired item and start the playback with PLAY PAUSE 2 For video CDs with PBC use the numerical buttons on the remote control to select an item Note Video CD playback can also be effected without calli...

Страница 14: ...ack or select the menu item DVD Option Information The information is shown in the upper part of the display 2 Repeated pressing of the INFO button scrolls through the available information and ultimately fades this out Ejecting the disc 1 Press the Disc eject button on the right side of the player Any playback still running is stopped the disc is ejected about half way 2 Remove the disc completel...

Страница 15: ... respective mode Music Photos Videos Recognised folders and files are listed in the middle and right hand columns The currently selected mode the current folder or the current file is highlighted white The current selection is symbolised by an orange bar Switching selection 1 Move the bar up or down within a column by pressing the or button 2 To open a folder press a PLAY PAUSE button The button s...

Страница 16: ...e or resume the playback with PLAY PAUSE 4 To end the playback press STOP The folder structure returns to the display Characteristics of individual file types The display on the screen can change depending on media type With image files you will see a thumbnail of the file in the middle column With music files you will see additional information in the lower part of the screen where available You ...

Страница 17: ...ct on the application Switching between several memory media If several data carriers are inserted or connected into the player the playback can be switched between them as follows 1 Press MENU on the player or remote control The player menu is shown 2 Confirm the current selection mode by pressing PLAY PAUSE on the player or RETURN on the remote control 3 The sub menu appears for selecting the da...

Страница 18: ...r of the display a white flashing bluetooth symbol appears 3 The player and headphones are creating a connection This can take a few seconds After successful connection the colour of the bluetooth symbol changes to blue 4 Close the player menu The bluetooth symbol will also be faded out Note If the headphones have previously been connected with the portable DVD player then they will recognise the ...

Страница 19: ... 9 and 4 3 Settings with connection to an external TV When you connect the portable DVD player to an external TV you can make the appropriate settings in the menu item Setup depending on its data TV System automatic for multi standard TVs e g NTSC or PAL Specification is automatic TV Type setting the width to height ratio 16 9 4 3 letterbox films are played back in the original width to height rat...

Страница 20: ... returned to the factory settings Note Thereafter the language selection list appears on the screen Selecting the language The player menu is available in the following languages English German Spanish French Italian Russian Swedish Dutch Japanese and Chinese The language can be selected in the menu item Language see Player menu overview on page 24 ...

Страница 21: ...t 3 Start the media playback on the portable DVD player Playback from external equipment e g games consoles You can transmit sound or image and sound signal from external playback equipment to the portable DVD player To do this proceed as follows 1 Connect the socket s AUDIO or VIDEO on the portable DVD player see Left and right sides on page 6 via the appropriate audio or video cable with the out...

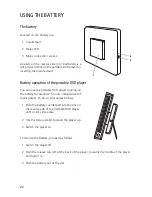
Страница 22: ...ble DVD player running on the battery for around 2 5 hours independent of mains power To do so proceed as follows 1 Push the battery counterpart into the slot on the reverse side of the portable DVD player until it clicks into place 2 Use the picture stand to stand the player up 3 Switch the player on To remove the battery proceed as follows 1 Switch the player off 2 Push the release tab left at t...

Страница 23: ... Notes on using the battery DANGER Do not use the battery if it is damaged deformed or swollen in any way This presents a fire and explosion hazard Batteries do not belong in the household rubbish Spent defective or damaged batteries must be disposed of properly Charge the battery fully before using it for the first time The battery becomes warm during the charging process This is normal If the ba...

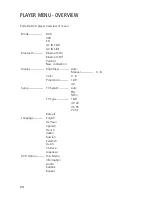
Страница 24: ...h On Bluetooth Off Pairing New connection Display Brightness Color Proportion Auto Manual 0 8 16 9 4 3 0 8 Setup TV System TV Type Default Auto PAL NTSC 16 9 4 3 LB 4 3 PS 2 35 1 Language English German Spanish French Italian Russian Swedish Dutch Chinese Japanese DVD Option Disc Menu Information Audio Subtitle Repeat ...

Страница 25: ...ug is seated properly Remote control not wor king Remote control batteries flat Line of influence barred Replace batteries Test in another location No sound output Volume at 0 Turn up volume Playback has been interrupted Resume playback Headphones are connected or plugged in Unplug headphones Screen is blue text No signal Mode AV IN SEAT is activated without external signal Select another mode fro...

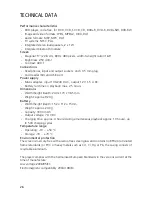
Страница 26: ...time on playback max 2 5 hours Dimensions Width height depth 240 x 173 x 36 5 mm Weight approx 920 g Battery Width height depth 152 112 15mm Weight approx 240 g Capacity 3000 mAh Output voltage 7 4 V DC Charging time approx 4 hours during simultaneous playback approx 10 hours up to 500 charging cycles Temperature range Operating 10 50 C Storage 30 70 C Environmental protection The screen is mercur...

Страница 27: ...Dolby and the double D symbol are trademarks of Dolby Laboratories DivX This equipment contains a copyright safeguarding technology which is protected by DivX Inc DivX DivX Certified and related logos are trademarks of DivX Inc and are used within the scope of a licence All other brand and product names referred to in these operating instructions are trademarks and or registered trademarks of the ...

Страница 28: ...ons 1 This device may not cause harmful interference and 2 this device must accept any interference received including interference that may cause undesired operation IC Statement This device complies with Industry Canada licence exempt RSS standard s Operation is subject to the following two conditions 1 this device may not cause interference and 2 this device must accept any interference includi...

Отзывы: