AU IS05 Скачать руководство пользователя страница 11

9

Ge
tting R

e

ady

ue03̲as32̲9e.fm
[9/14]

~

~

~

~<MFZ>

A

Hold down 

f

 for at least two 

seconds.

The unlock screen is displayed.
Drag 

 to 

 to unlock. If Screen lock 

is set, the Lock No. entry screen is 
displayed.

s

A

Hold down 

f

 for at least two 

seconds.

The phone options screen is displayed.
If you hold down 

f

 on the unlock 

screen, the power is turned off before the 
phone options screen is displayed.

B

Select 

Power off


[

Select

OK

.

If you press 

f

 or no operation is made for a while, the screen is 

turned off temporarily, and then sleep mode is set.

Canceling Sleep Mode

A

While sleep mode is set, press 

f

.

The unlock screen is displayed.

You can switch the display language for function names and other 
items to English.

A

On the desktop, select 

.

B

Select  

(Settings).

C

Select 

 (Language & keyboard).

D

Select 

 (Select language).

E

Select 

English

.

Charging is available by connecting the IS05 to a PC with the SHARP 
microUSB-USB conversion cable 01 (sold separately). From the Main Menu, 
select 

Settings


[

Select 

USB connection


[

Mark 

USB battery charge 

to enable 

the setting.

Turning the Power On/Off

Turning the Power On

The initial setting of the touch panel is executed while the logo 

Android™ au with Google™

 is displayed. Do not touch the screen, otherwise 

touch panel operations may not be performed properly.

After you purchase the IS05, the initial setup screen is displayed 
automatically when turning on the power for the first time.

Unlock screen

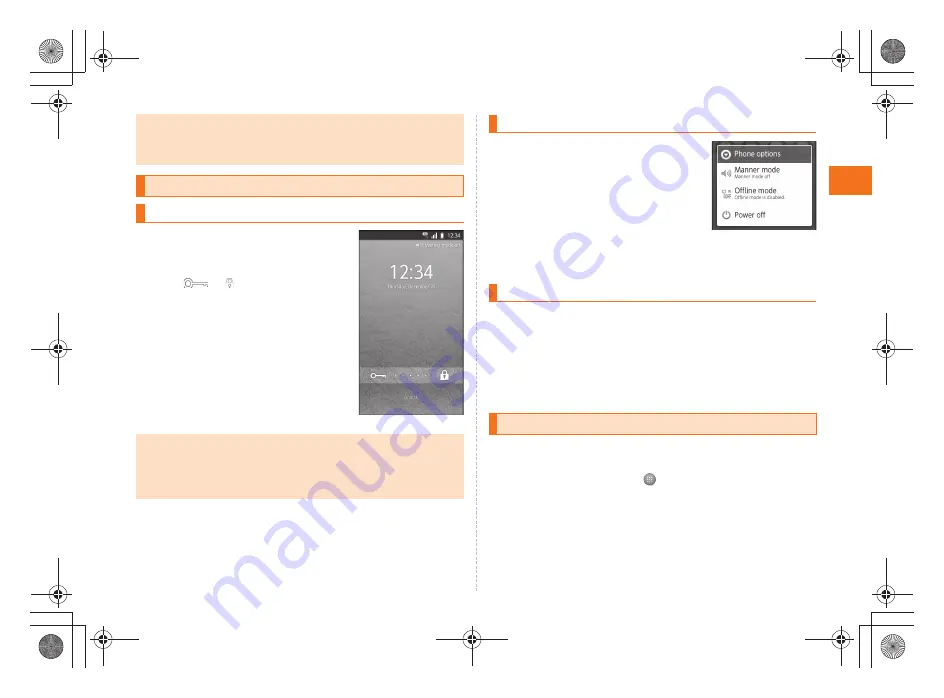
Turning the Power Off

Sleep Mode

Switching the Display Language to English

Phone options screen

設定

言語とキーボード

言語(Language)を選択

as32_ue.book  9 ページ  2011年3月30日 水曜日 午前9時40分

Содержание IS05

Страница 1: ...March 2011 Edition...

Страница 2: ...h is compliant with the Radio Act and may be subject to inspections regulated by the Radio Act When you insert the au IC Card the product number information of your au phone is sent to the au server f...

Страница 3: ...or in hotel lobbies Refrain from talking in a loud voice Obtain the permission of other people before you take their photos with the cell phone s camera Be considerate of people around you Some peopl...

Страница 4: ...every time the power is turned on to prevent unauthorized use of the au IC Card by a third party At the time of purchase the PIN code is not to be required to use phone You can select Lock UIM card an...

Страница 5: ...de is an eight digit number given at the time of purchase and is printed on the back side of the plastic card where your au IC Card is attached When you enter the PUK code set the new PIN code by sele...

Страница 6: ...Characters 27 Entering Emoji D Emoji Symbol Facemark 27 Switching Input Software 28 Making a Call 29 Making an International Call 29 001 International Call Service 29 Answering a Call 30 Putting the C...

Страница 7: ...0 Changing the Wallpaper 50 Initializing microSD Memory Card 50 Restarting with the Reset Button 51 Using Global Passport CDMA 52 For overseas use without anxiety 52 Configuring the Overseas Settings...

Страница 8: ...6 Getting Ready ue03 as32 9e fm 6 14 MFZ Names and Functions of Parts Getting Ready as32_ue book 6...

Страница 9: ...pFlow UI L Home key Use it to display the desktop etc M Back key Returns to the previous page N mSearch key Use it to display the Quick Search Box etc O Mouthpiece Microphone Transmits your voice duri...

Страница 10: ...onversion cable with checking the shape of tip of the adapter B Open the external connection jack HDMI jack cover C Connect the microUSB 18 pin charger conversion cable to the IS05 D Plug the specifie...

Страница 11: ...ames and other items to English A On the desktop select B Select Settings C Select Language keyboard D Select Select language E Select English Charging is available by connecting the IS05 to a PC with...

Страница 12: ...ver Hook a fingertip nail on the concave portion with the center of the battery pack cover pressed A 1 and then remove the battery pack by pulling up in the direction of the arrow A 2 B Remove the bat...

Страница 13: ...A Pull out the tab of the tray and remove the au IC Card Attaching the Battery Pack Before attaching the battery pack make sure that the au IC Card is inserted properly Failure to follow the correct...

Страница 14: ...ory card such as liquid metals or flammable items into the microSD memory card slot of the IS05 It may result in a fire electric shock or malfunction Inserting au IC Card Cutout Using microSD Memory C...

Страница 15: ...and remove the battery pack cover and battery pack B Confirm the direction of the microSD memory card and slowly insert it into the slot until it clicks Insert a microSD memory card until you hear a...

Страница 16: ...SD memory card C Slowly remove the microSD memory card Slowly remove the microSD memory card Some microSD memory cards cannot be unlocked and do not come out smoothly In such case pull it out with you...

Страница 17: ...Keep touching an item or key Slide While your finger is gently touching the display trace it to the desired direction Flick Operate the screen by quickly moving flicking your finger up down right or l...

Страница 18: ...the screen where the menu is available Example In the inbox screen Context Menu The context menu is displayed by long touching an item or a display where the menu is available Example In the characte...

Страница 19: ...uently you use them Example In the photo monitor screen At the time of purchase After the operation of each function TapFlow UI Tap e While displaying the TapFlow UI select All Menu to display all the...

Страница 20: ...running operation are displayed on the left side of the status bar while the status indicators to show the status of the IS05 are on the right side Examples of notification indicator Viewing the Deskt...

Страница 21: ...y level 0 The charge indicator is displayed as an animation Offline mode set Signal strength Level 4 Level 3 Level 2 Level 1 Level 0 Out of service area Indicator Description 3G data receiving status...

Страница 22: ...ng application depending on the information C Manner mode You can set the manner mode D VeilView You can set VeilView E Time Displays the current time You can tap to set the date and time F Clear You...

Страница 23: ...widget on the desktop A widget is an application which can be registered on the desktop Adding Shortcuts Widgets Folders A On the desktop select e Select Add Select Shortcuts Widgets Folders B Select...

Страница 24: ...ition to the Android standard widget Droidget is a program for widgets Widgets for which is displayed in the widget list screen are compatible with the Droidget appears for widgets added to the deskto...

Страница 25: ...Twitter YouTube Use YouTube PC mail Use PC mail Gmail Use Gmail Talk Use Google Talk Icon Application Description Message Ga Maker Edit images to create original images Maps Use Google Maps Places Se...

Страница 26: ...C mail or e mail Browser Browse web sites on the Internet When you use functions from a menu packet communication charges may apply depending on the function If you have not subscribed to IS NET au N...

Страница 27: ...list You can enlarge the candidates list area by tapping Tap to return it to the original display D Back key Undo key Displays the characters assigned to the same key in the reverse rotation You can r...

Страница 28: ...ters entry and lowercase characters entry The display changes as follows each time you tap it Lowercase character entry Uppercase character entry Uppercase character entry lock A On the character entr...

Страница 29: ...n return a character to the previous one by tapping Example When you accidentally enter C although you want to enter B tap to return it to B Undo Function When the software keyboard is 12 Key you can...

Страница 30: ...ng touch the character entry area Select Input method B There are some lists that cannot be displayed and some Emoji D Emoji facemarks symbols that cannot be entered depending on the screen you operat...

Страница 31: ...all over Japan 001 001 international call service Subscription is unnecessary 171 Voice mail for countermeasures against disaster 177 Weather forecast The area code is necessary 117 Time signal 104 D...

Страница 32: ...l Ans memo setting or Manner mode setting A Select e Select Absence Memo during an incoming call You can make a call using Outgoing History Incoming History A On the phone number entry screen select I...

Страница 33: ...Set manner mode to Drive manner mode while driving or riding Hold down f Select Manner mode or hold down d on the unlock screen desktop or Main menu to enable disable manner mode Even in manner mode...

Страница 34: ...Off Protect Unprotect the message not to be automatically deleted Delete Delete the playing message Speaker on Speaker off The message can be heard on the speaker earpiece Operation while playing the...

Страница 35: ...st Tap to display the entry items which are not displayed Tap to add delete the item in the address book edit screen If the phone number is for a fixed line phone enter the phone number starting with...

Страница 36: ...Saved Phone Number Call Call to the selected number Edit and call Display the selected number in the phone number entry screen to make a call Create mail Create a C mail message using the selected pho...

Страница 37: ...ou can also enter an address directly by selecting the enter destination field Using E mail C mail For using e mail C mail overseas refer to supplied Global Passport Owner s Guide Japanese The packet...

Страница 38: ...number by selecting an entry from the send receive history On the send receive history selecting screen select e Select Set secrecy not to display Send Receive history when selecting destinations etc...

Страница 39: ...mail messages from cell phones PHSs or PCs 2 PHS 2 Receive only Mail Messages from Cell Phone or PHS Reject mail messages from PCs spoofing mail messages or auto forwarded mail messages and receive ma...

Страница 40: ...ck the setting status of the mail filters and release all the settings at one time PC Issue One Time Password for PC Setting Issue a one time password to set the mail filter on your PC The password is...

Страница 41: ...ter the second or later account you can register it as a prioritized account by selecting Send email from this account by default C Select Email address Enter mail address D Select Password Enter pass...

Страница 42: ...status panel is displayed C Select mail information The inbox screen is displayed D Select the received mail The received mail message screen is displayed Gmail is a mail service provided by Google Yo...

Страница 43: ...nter the message E Select A Gmail is received When Gmail is received appears on the status bar and the mail ring tone sounds B Tap the status bar The notification status panel is displayed C Select ma...

Страница 44: ...e browser screen select e Select Bookmarks B Select Add The bookmark registration screen is displayed C Select OK Viewing Sites with Browser When browsing a web page with a large amount of data the ap...

Страница 45: ...e subject by default B Select Press b The shutter clicks and the shot image is saved On the photo monitor screen select e Select All Menu Select Save settings Select Auto Save to set to OFF After that...

Страница 46: ...application selection screen is displayed when you select a data It is played or displayed after an application is selected Tap to return to the thumbnail display screen Operations in the one image d...

Страница 47: ...ng Contents Manager Some data displayed in Contents Manager cannot be displayed played on the IS05 Playing Displaying Data You cannot play data on which is displayed Available functions to use while p...

Страница 48: ...prefecture D Select a locality Searching for local channels begins E Select OK The 1Seg menu screen is displayed A From the Main Menu select One Seg The 1Seg menu screen is displayed B Select One Seg...

Страница 49: ...eration Panel Moves the cursor Selects an item Returns to the previous screen Displays the 1Seg operation panel They appear in the portrait position Channel List Select the broadcast station name Swit...

Страница 50: ...use some functions Refer to the supplied Setting Guide Japanese to set au one ID A From the Main Menu select au one Market The au one Market screen is displayed When you activate au one Market for th...

Страница 51: ...stalled applications list is displayed B Select an application The detailed application information is displayed C Select the operation to perform Follow the on screen instructions to perform it Manag...

Страница 52: ...ttings Select microSD phone storage Select Unmount microSD Select OK B Select Format microSD C Select Format microSD Enter Lock No Select OK Select Erase everything Checking Your Profile If au IC Card...

Страница 53: ...battery pack cover from the IS05 rear side Do not remove the battery pack B Press the reset button with a pointed end of an object C Attach the battery pack cover to the IS05 rear side Restarting wit...

Страница 54: ...charges may be incurred from the time that you tap Call To use the IS05 overseas you are required to change to the telecommunications carrier s networks that you connect to at your travel destination...

Страница 55: ...area code and recipient s phone number Select Call 1 Long touch the 0 to enter and the international access code of your travel destination is automatically added when calling 2 If the area code start...

Страница 56: ...since the call is made through Japan Example To have a call made to your au phone in Japan 090 1234 XXXX from the U S A Enter an international access code Japan country code and phone number of au ph...

Страница 57: ...ing the Remote Lock Valid number list Register up to three phone numbers 1 Select Add new 2 Select Direct entry Enter a phone number Select You can select a phone number from Use address book or Use p...

Страница 58: ...Appendix Index Cannot charge the battery pack Are the charging devices connected properly Is the battery pack attached properly Is USB battery charge enabled If a microSD memory card is not inserted t...

Страница 59: ...e you made Switch area for the area where you use the IS05 Cannot operate any key and the screen is frozen Press the reset button with a pointed end of an object The IS05 restarts P 51 Cannot operate...

Страница 60: ...1 Character input 25 Alphanumeric 26 Character entry screen 25 Correcting 27 D Emoji 27 Emoji 27 Facemark 27 Hiragana 26 Kanji 26 Katakana 26 Switching character type 26 Switching input software 28 S...

Страница 61: ...le light 7 Mobile networks Roaming settings 52 Mouthpiece 7 N Names and functions of parts 6 P PC mail 39 Account 39 Receiving 40 Sending 40 Phone 29 001 International Call Service 29 Answering 30 Ans...

Страница 62: ...March 2011 Edition...

Отзывы: