


21
Char
act
er Input
Character Input
Character Entry Modes
When a character entry screen is displayed, you can select
a character entry mode if you press
&
(ChrTyp).
Menu Items
■
漢あ
: Kanji/hiragana mode
カナ
: Double-byte katakana mode
Aa
: Double-byte alphanumeric mode
12
: Double-byte number mode
?&
: Double-byte symbol mode
カナ
: Single-byte katakana mode
Aa
: Single-byte alphanumeric mode
12
: Single-byte number mode
?&
: Single-byte symbol mode
Use
a
to select a character entry mode and then
press
c
(Select).
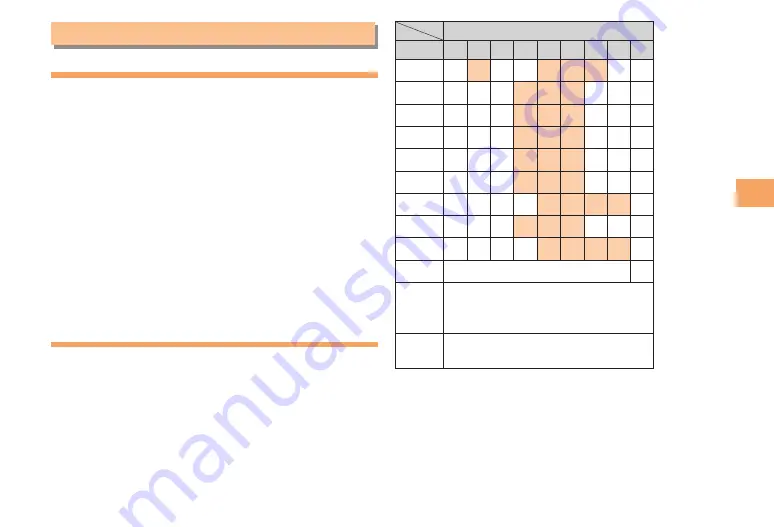
Entering Alphanumeric Characters
You can use the keys
1
to
0
to enter characters.
More than one character is assigned to each key.
The following table shows the key assignment for entering
characters.
Number of Times to Press the Key
Key
1
2
3
4
5
6
7
8
9
1
.
@
-
̲
/
:
~
1
2
a b c
A
B
C
2
3
d e f D
E
F
3
4
g h i G
H
I
4
5
j k l
J
K
L
5
6
m n o M
N
O
6
7
p q r s
P
Q
R
S
7
8
t u v
T
U
V
8
9
w x y z W
X
Y
Z
9
0
Inputs symbols
0
*
Inputs symbols (switches an
unconfirmed character between
uppercase and lowercase).
#
Adds a line break and displays
characters in the opposite order.
When you change your e-mail address, you cannot use
the characters in
■
for the account name (part of the
address to the left of @).


