


Operations
System Settings:
In
Standby
mode, Press '
MENU
' key enter/exit system setup screen.
To choose menu from panel options, press +/- keys or use 'TRACK/CHANNEL' knob. To
choose menu from remote handset, press c/-.
Press 'Enter' key from both front panel/remote handset select menu option.
Menu items 1. Network
2. Time Mode
3. Time Zone
4. Alarm 1 Setting
5, Alarm 2 Setting
6. Snooze Time
7. DST mode (Daylight Saving Time Setting)
1. Network
Before setting using the network option, please check and ensure the system
is connected to network. The connect icon
with be appear at the upper
left corner of LCD display. Three network options can be selected.
●
Manual
– Select this item for networks using fix IP address to connect to internet.
The following items to be entered.
IP Address
: The IP address to be entered must be in the following format. You
cannot use the net audio function with an IP address that is not in the following
format.
CLASS A: 10.0.0.0 - 10.255.255.255
CLASS B: 172.16.0.0 - 172.31.255.255
CLASS C: 192.168.0.0 – 192.168.255.255
NetMask
: Enter the subnet mask provided by your ISP. The subnet mask is
usually 255.255.255.0.
Default Gateway
: Enter the Gateway provided by your ISP.
Primary DNS
: Enter the Domain Name System (DNS) address provided by your
ISP. If connected to a gateway (router), enter the IP address of the gateway.
Secondary DNS
: Enter the secondary DNS address provided by your ISP.
●
Automatic
– Select this item when connect internet via Broadband router with
DHCP (Dynamic Host Configuration Protocol) server enabled.
●
Connect to ISP
– Select this item when the unit connect to ADSL/cable modem
directly. User need to enter “username' and 'password' provided by their ISP.
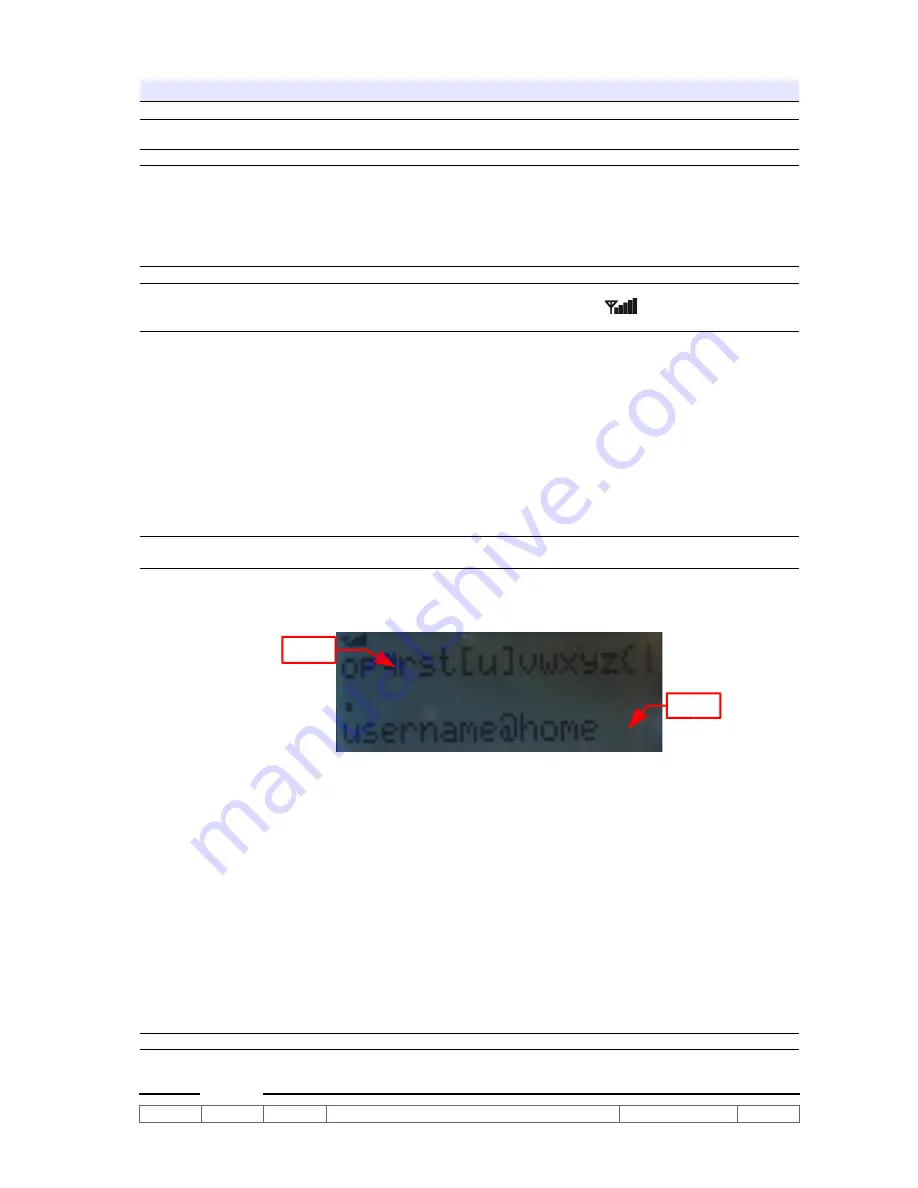
The entry screen is look like this:
Line 1 display all characters can be input by users.
Line 2 display entered user name.
'.' is the cursor position mark.
[ ] mark the selected character.
To select character: Turn 'Track/Channel' knob or press 'C/-' keys.
To confirm the character: Press '/-' keys. Press '' the cursor
will advance to next position. Press 'Volume -' the cursor will move back to
previous position.
To DELETE character, press 'NAP' key.
To INSERT character from current position, press 'SLEEP' key.
To EXIT the user name entry, press 'Play'/'Enter' key. A confirmation screen will
be displayed to save modified user name. User the turning knob to selection the
'YES/NO' option.
A password entry screen display afterward. The input procedures are same as
user name entry screen.
Finally, the system restart automatically.
ATZ
GR-02
Ver 0.4
28 AUG 2006
PROPRIETARY AND CONFIDENTIAL
©
ATZ LTD
Page 4 of 8
Line 2:
Line 1:


