


Digital Video Recorder
61
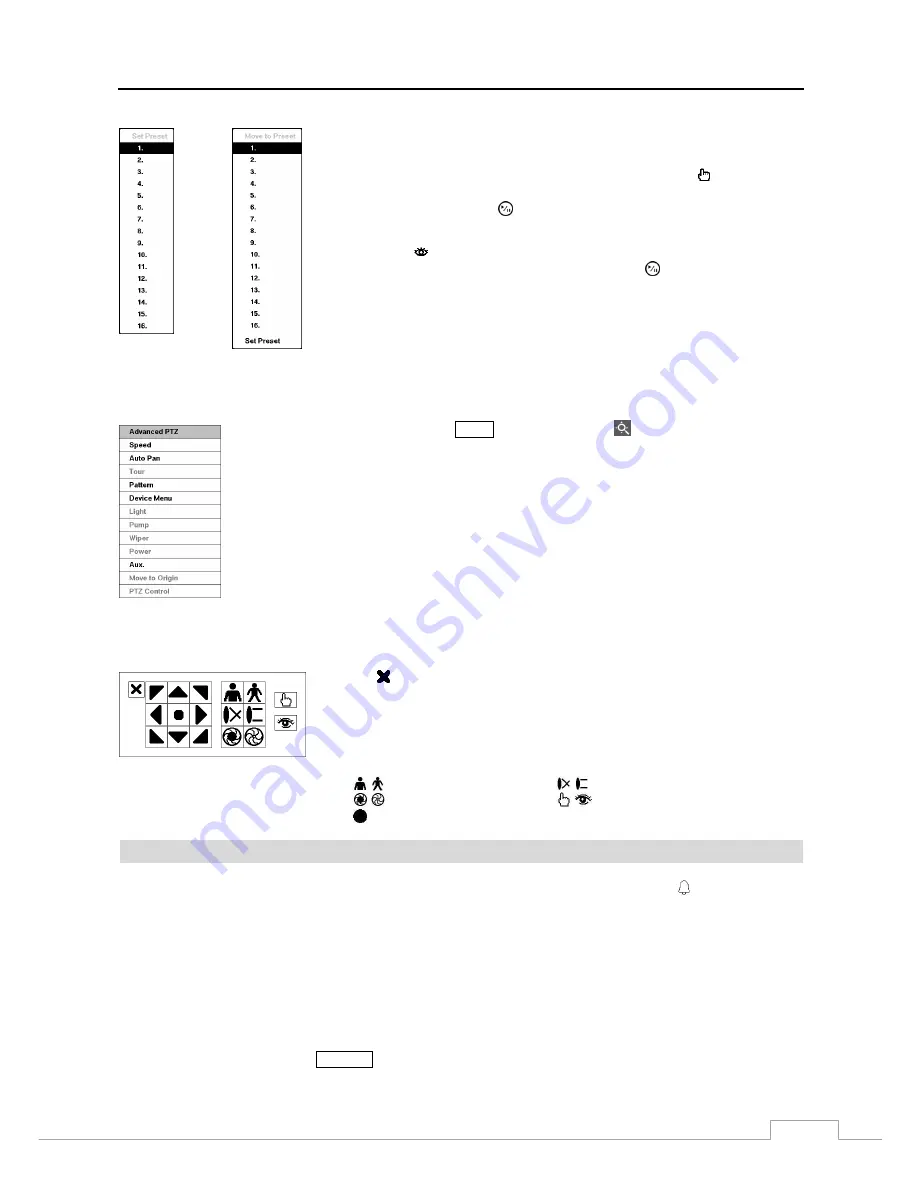
You can save camera position settings as “presets” so that you can go directly
to desired views.
Once you have the camera at the desired settings, press the button, and the
Set Preset
dialog box will appear. Select the number you want to assign to
the preset and press the (Play/Pause) button. Use the virtual keyboard to
enter the preset name.
Press the button to load the PTZ preset and the
Move to Preset
dialog box
will appear. Select the desired preset and press the button to load the preset.
< Set Preset >
< Move to Preset >
Figure 43: PTZ Preset menu.
While in the PTZ mode, pressing the
MENU
button and selecting (Advanced PTZ) in the menu
displaying at the top of the screen displays the Advanced PTZ menu.
Set the feature you wish to control by selecting it from the menu. Refer to the camera manufacturer’s
instructions for the proper settings. Depending on the camera specifications, some features may
not be supported.
NOTE: The Pan/Tilt speed can be controlled by using the mouse. While in the PTZ mode,
clicking the left mouse button on the image and dragging the mouse in the pan/tilt direction
you want to move and then select the speed.
You can use a mouse for convenient PTZ control. Click the left mouse button on the image and move that image in
the direction you want to by dragging the mouse. Use the mouse wheel to zoom in and out. Position the mouse pointer
at the bottom of the screen, and the following PTZ toolbar will display.
Clicking on the left side exits the toolbar. If you want to display the toolbar again,
position the mouse pointer at the bottom of the screen. Change the toolbar location
by clicking the empty space on the left side of the toolbar and drag it to where you
want it located on the screen. Use the arrow buttons on the toolbar to pan or tilt
the camera in the direction you want. The other controls on the toolbar perform as
described below:
Zoom In / Out
Focus Near / Far
Iris Open / Close
Set / Load Preset
Advanced PTZ
Event Monitoring
When an event occurs, the DVR will display the camera associated with the event and the icon displays on screen
if
Event Monitoring On
is selected in the Display setup screen (Main Monitor tab).
How the cameras are displayed depends on the number of cameras associated with the event. If one camera is associated
with the event, the DVR will display the camera full screen. If two to four cameras are associated with the event, the
DVR will display the cameras on a 2x2 screen. If five to nine cameras are associated with the event, the DVR will display
the cameras on a 1+5, 1+7 or 3x3 screen. If 10 or more cameras are associated with the event, the DVR will display
the cameras on a 4x4 screen.
Event monitoring lasts for the dwell time set for event recording. After the dwell time has elapsed, the monitor returns
to the previous screen unless another event has occurred. If you want to return to the live monitoring mode before the
dwell time has elapsed, press the
DISPLAY
button or one of the camera buttons.
Содержание User Manual
Страница 1: ......
Страница 2: ......
Страница 10: ...User s Manual 2 Figure 1 Typical DVR installation...


