


SYSTEM OPERATION
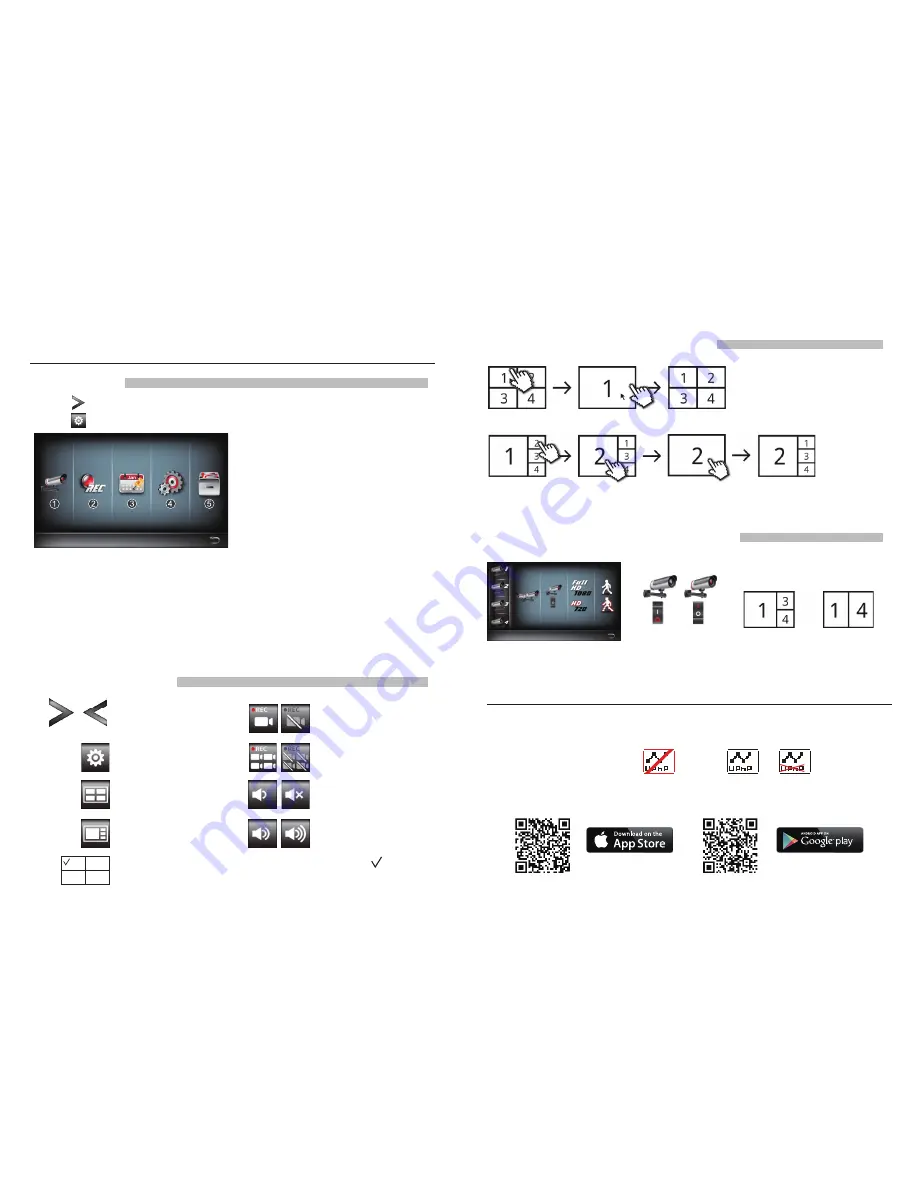
Quick Select Menu
Display/Undisplay Menu
Enter Main Menu
QUAD Display Select
Smart-QUAD Display Select
Single Channel Record/
Stop Single Channel Record
All Channel Record/Stop
All Channel Record
Volume Control
Mute/Vol1
Vol2/Vol3
Main Menu
Main Menu
Camera Setup
Live View with Quad Display
Live View with Dynamic Display
Tap again to return
Turn CH2 off
Tap to turn on /off the camera
Turn CH2/CH3 off
Tap one channel
Live-view full screen
Tap again to return
Tap one channel
Show it at left side
Live-view full screen
SETUP THE HDNVR
1. Tap to extend quick select menu.
2. Tap to enter main menu.
Pair the camera to HDNVR
If you have additional cameras disconnected with HDNVR , follow steps below to pair:
1. Tap the camera setup icon to access the camera pairing screen.
2. Select the Camera channel (Camera 1/2/3/4).
3. Tap the "Camera Pairing" icon.
4. Within 35 seconds, press and hold the pairing button on the back of the camera for
5 seconds. The Green Link LED will light up which indicate the camera is paired successfully.
Tap one quadrant to choose the current channel, and a red check will display.
HDNVR will display audio from the current selected channel.
1.Camera Setup:
Pair camera, and video quality.
2.Recorder Setup:
Setup recording settings such as
date, recorder type, and motion area.
3.Event list:
Event video playback.
4.System Setup:
Setup system time, powersaving
mode, and restore default system settings.
5.Storage Setup:
Management storage.
1.
Connect the device to your router, and make sure DHCP and UPnP service are enabled on
your router setting.
2.
Power up and turn on HDNVR.
In the Live View mode, wait until logo turns or .
This means system is now ready for internet connection. The process takes around 30 seconds.
3.
Download the "WDVR Cam" app and run the app on a phone or tablet.
Andrio
For iOS
For Android