


2-2
2.1. INSTallaTION PROcEDuRES
2.1.1. baTTERy INSTallaTION
a. Install cR123a battery as follows:
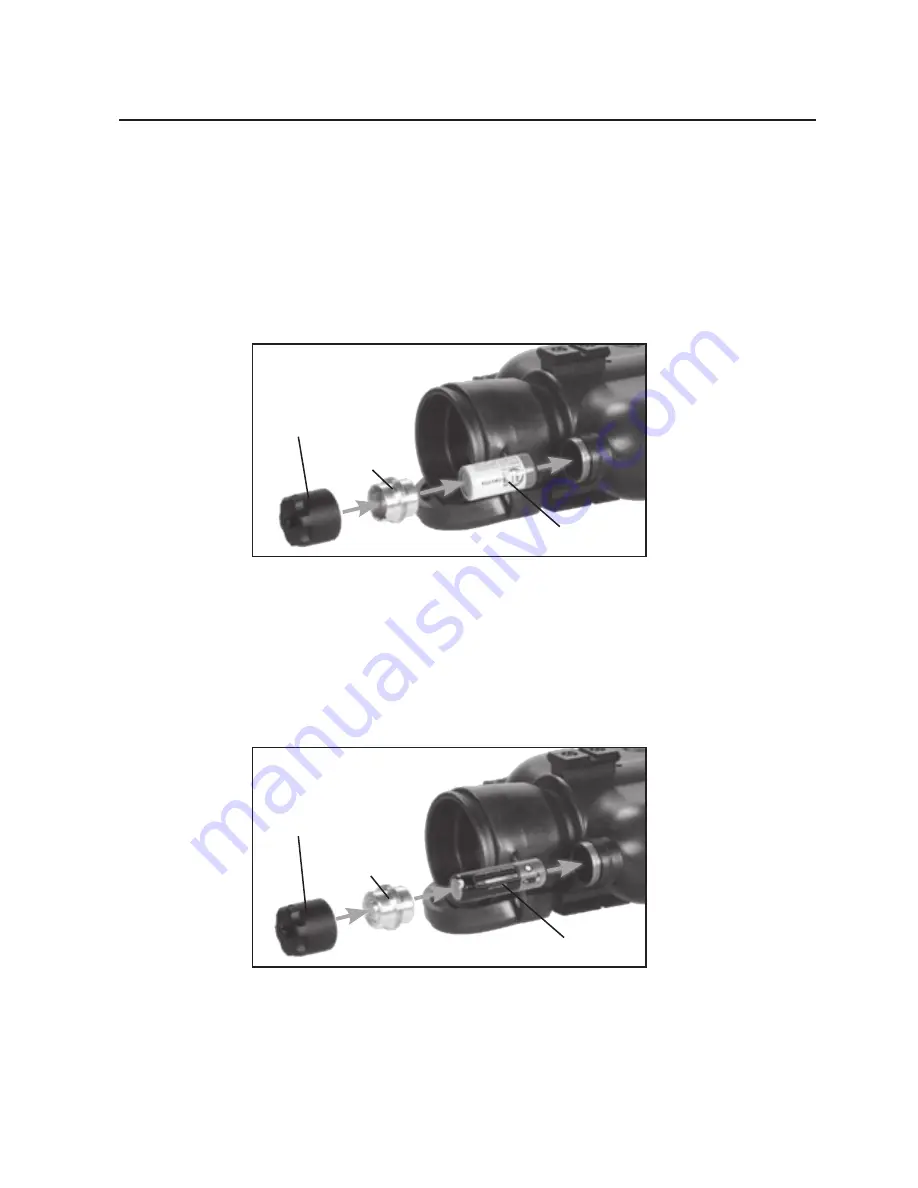
With the battery adapter screwed in the battery housing cap as
shown on Figure 2-1 you can use one Cr123a type battery. put the
Cr123a battery observing the polarity indications on the battery
compartment surface.
FIGuRE 2-1. aa TyPE baTTERy INSTallaTION
b. Install aa standard battery as follows:
to install a aa one, take the battery adapter out of the battery hous-
ing cap, turn it over, and screw its smaller threading into the same
battery cap. now you can put the aa battery observing the polarity
indications on the battery compartment surface.
FIGuRE 2-2. cR123a TyPE baTTERy INSTallaTION
Battery
aDapter
Battery
HoUSING
Cap
aa type Battery
Battery
aDapter
Battery
HoUSING
Cap
Cr123a type Battery
Содержание VOYAGER 3
Страница 7: ...1 1 SECTION I introduction ...
Страница 19: ...2 1 SECTION II operating instructions ...
Страница 29: ...3 1 SECTION III OPERATIONAL DEFECTS ...
Страница 35: ...4 1 SECTION IV maintenance instructions ...
Страница 42: ...4 8 3 Clean the bi ocular and accessories 4 Replace all items in the case ...
Страница 45: ...4 11 4 2 3 1 5 6 8 9 10 11 Figure B 1 NIGHT VISION bi ocular and aCCESSORIES 7 ...
Страница 46: ...4 12 ...


