background image

3

The eyepiece is attached to the body of the unit by three small set screws. By loosening the set 

screws you can easily slide out the eyepiece section of the unit. If there is resistance when you 

slide out the eyepiece stop and make positive that the set screws are sufficiently loosened.

NOTE:

 You do 4 not have to remove the set screws completely, they are very small and easy to 

misplace.
Once the eyepiece section has been removed from your Aries 208/238, you may now clean the 

dust off the glass surfaces as well as the phosphor screen of the light intensifier tube.

CAUTION:

 Use only Photographic lens cleaning tissue on these surfaces. Be careful not to 

scratch or smudge any of these surfaces. When using compressed air to blow dust away, make 

sure to avoid inverting the can while spraying. This can cause frozen propellant to exit the can, 

which can cause problems with the glass and phosphor screen.

MOUNTING YOUR WEAPON SCOPE

1. Slightly loosen horizontal and vertical fixator screws on the dove tail clamps, allowing the 

clamps to slide on the rail.
2. Place the scope on dovetail mount, making certain that the mount aligns with the receptor 

attachment screw groove. Adjust as necessary.
3. Tighten horizontal fixator screws.
4. Remove Aries 208/238 with entire mounting mechanism. Tighten vertical and horizontal 

fixator screws.
5. Remount 

ARIES 

208/238 and tighten receptor attachment screws.

NOTE:

 Receptor attachment screw

s may need to be tightened af

ter continuo

us shooting.

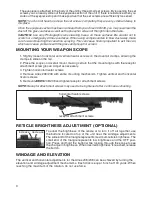
RETICLE BRIGHTNESS ADJUSTMENT (OPTIONAL)

To adust the brightness of the reticle or to turn it of f all together, use 

the buttons located on top of the unit near the windage adjustments. 

The wide end of the triangle represents maximum reticle brightness. The 

small end of the triangle represents low brightness and the OFF posi-

tion. Press and hold the button while looking through the scope to see 

the change in brightness. When desired brightness is reached, release 

the button.

WINDAGE AND ELEVATION

The vertical and horizontal adjustments for the Aries 208/238 can be achieved by turning the 

elevation and windage adjustment mechanisms. Each click is equal .5 inch at 100 yards. When 

reaching the maximum of the rotation, do not use force.

increase decrease

horizontal fixator screws

receptor attachment screws

Содержание Aries Mk208

Страница 1: ...AMERICAN TECHNOLOGIES NETWORK CORP u s e r s g u i d e Aries Mk 208 238 ...

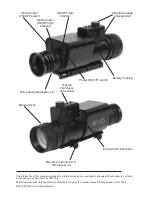
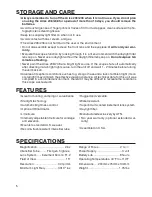
Страница 2: ...liability for any errors or inaccuracies that may appear in this book 2001 ATN Corp All right reserved Fully adjustable diopter 5 Mounts to standard U S 7 8 weaver rail Internal windage and elevation Manual focus Reticle brightness adjustment Battery housing Infra red IR illuminator Power ON OFF switch IR illuminator ON OFF switch IR illuminator ON OFF light indicator ON OFF light indicator ...

Страница 3: ...rain the image is sharp NOTE You will need to focus the diopter during daylight with the filter on Next focus the front lens until the image and the grain are both sharp When you are in low light conditions and the daylight filter is off you may focus the front lens to receive a sharp image the diopter should not be adjusted NOTE The front lens should be readjusted as you view objects at different...

Страница 4: ...de on the rail 2 Place the scope on dovetail mount making certain that the mount aligns with the receptor attachment screw groove Adjust as necessary 3 Tighten horizontal fixator screws 4 Remove Aries 208 238 with entire mounting mechanism Tighten vertical and horizontal fixator screws 5 Remount ARIES 208 238 and tighten receptor attachment screws NOTE Receptor attachment screws may need to be tig...

Страница 5: ...bject landscape etc to the image intensifier tube photocathode The intensified image is then formed on the phosphor screen Next the image is magnified by the ocular lens eyepiece giving you the intensified image TROUBLESHOOTING Q Flashes flickers or clicking occur while operating S If it occurs within the first five minutes of inserting new batteries it is normal and the device will resume normal ...

Страница 6: ...off and wait 1 2 minutes before turning the unit back on Adverse atmospheric conditions such as fog smog or haze and a lack of ambient light moon or starlight may diminish the effective viewing distance All technical data for this unit was compiled in a controlled environment therefor it may be difficult to recreate the conditions this scope was tested in FEATURES Great for hunting camping or surv...

Страница 7: ...particular purpose shall apply to the product All such implied warranties are hereby and expressly disclaimed LIMITATION OF LIABILITY ATN will not be liable for any claims actions suits proceedings costs expenses damages or liabilities arising out of the use of this product Operation and use of the product are the sole respon sibility of the Customer ATN s sole undertaking is limited to providing ...

Страница 8: ...nden Ave Suite 1B South San Francisco CA 94080 phone 800 910 2862 650 875 0130 fax 650 875 0129 European Office phone 44 0 870 0111286 fax 44 0 845 3349142 The following countries can use our toll free number 00 800 9102 8620 Austria France Germany Holland Italy Spain Sweden Switzerland www atncorp com 2001 ATN Corporation ...

Отзывы: