42
Atmel AVR2052
8200M-AVR-11/11
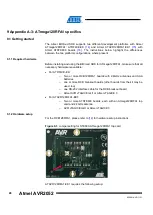
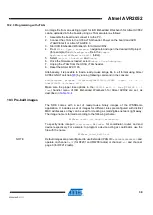
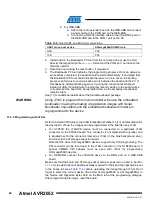
configure the voltage provided by the STK600 for the ATxmega socket card. For
that, perform the following steps:
a. Attach the STK600 to a PC using a USB cable.
b. In Atmel AVR Studio, open
Tools > Program AVR > Connect…
dialogue.
c. Choose the correct Platform = STK600, and press
Connect
.
d. Update the STK600 firmware, if suggested.
e. Go to the
HW Settings
tab.
f. Specify the required voltage in the VTarget field, and press
Write
.
Please note that the voltage should be less than 3.6V (for example,
3.0V).
You need to perform this procedure once for each ATSTK600 board.
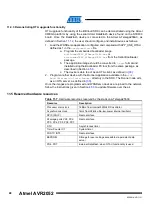
11.1.2.1 OTAU hardware setup
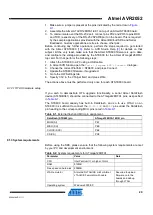
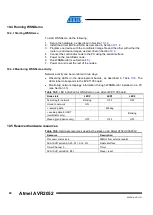
If you wish to demonstrate OTA upgrade functionality, a serial Atmel DataFlash
device (AT45DB041) shall be connected to the Atmel ATxmega256A3/Atmel
ATxmega256D3 pins specified in
The Atmel STK600 board already has built-in DataFlash, and so to use OTAU on an
STK600, it is sufficient to connect the
SI
,
SO
,
SCK
, and
/CS
pins under the DataFlash
pin heading to the corresponding MCU pins noted in
Table 11-1.
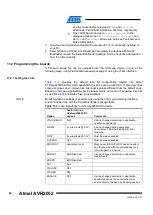
External flash and MCU pin assignment.
DataFlash pin
ATxmega256A3/D3 MCU pin
MOSI
PD5
MISO
PD6
CLOCK
PD7
CS
PD4
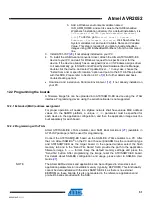
11.1.3 System requirements
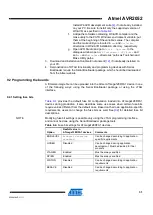
Before using the SDK, please ensure that the following system requirements are met
by your PC and development environment.
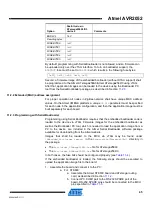
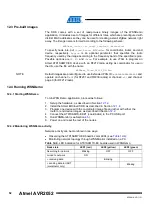
Table 11-2.
System requirements for ATxmega256A3/D3.
Parameter
Value
Note
CPU
Intel Pentium III, or higher,
800MHz
RAM
128MB
Free space on hard disk
50MB
JTAG emulator
Atmel AVR JTAGICE mkII
or Atmel JTAGICE 3
emulator with cable
Required to upload firmware onto
the boards and debug through
JTAG (see Section
Operating system
Windows 2000/XP
IDE
Atmel AVR Studio 5 and
WinAVR 20100110
(1)
OR
IAR Embedded Workbench
AVR 5.51
(with IAR C/C++ Compiler
for AVR v5.51.0.50312
(1)
)
Required to upload firmware
images through JTAG and
develop applications using the
API (see Section

