


3
Connecting
The captive screw connectors have
a contact bar that is adjusted to
compress the wire against the top
contact plate. Use the screws at the
top of the connector to compress
the wire against the contact plate.
When connecting the cables to the female captive screw connector it is important that the wires be
terminated correctly. The female captive screw connector has a contact plate at the top and must
have the wires touching it for signal to pass. When wired correctly
(see picture A)
the signal will pass,
incorrectly
(see picture B)
no signal will pass.
Clockwise
Counter
Clockwise
Turn the screws clockwise to
raise the contact bar to the
upper contact plate and hold
the wires in place.
Turn the screws counter
clockwise to lower the
contact bar to release the
wires.
A
B
atlona.com
Toll free: 1-877-536-3976
Local: 1-408-962-0515
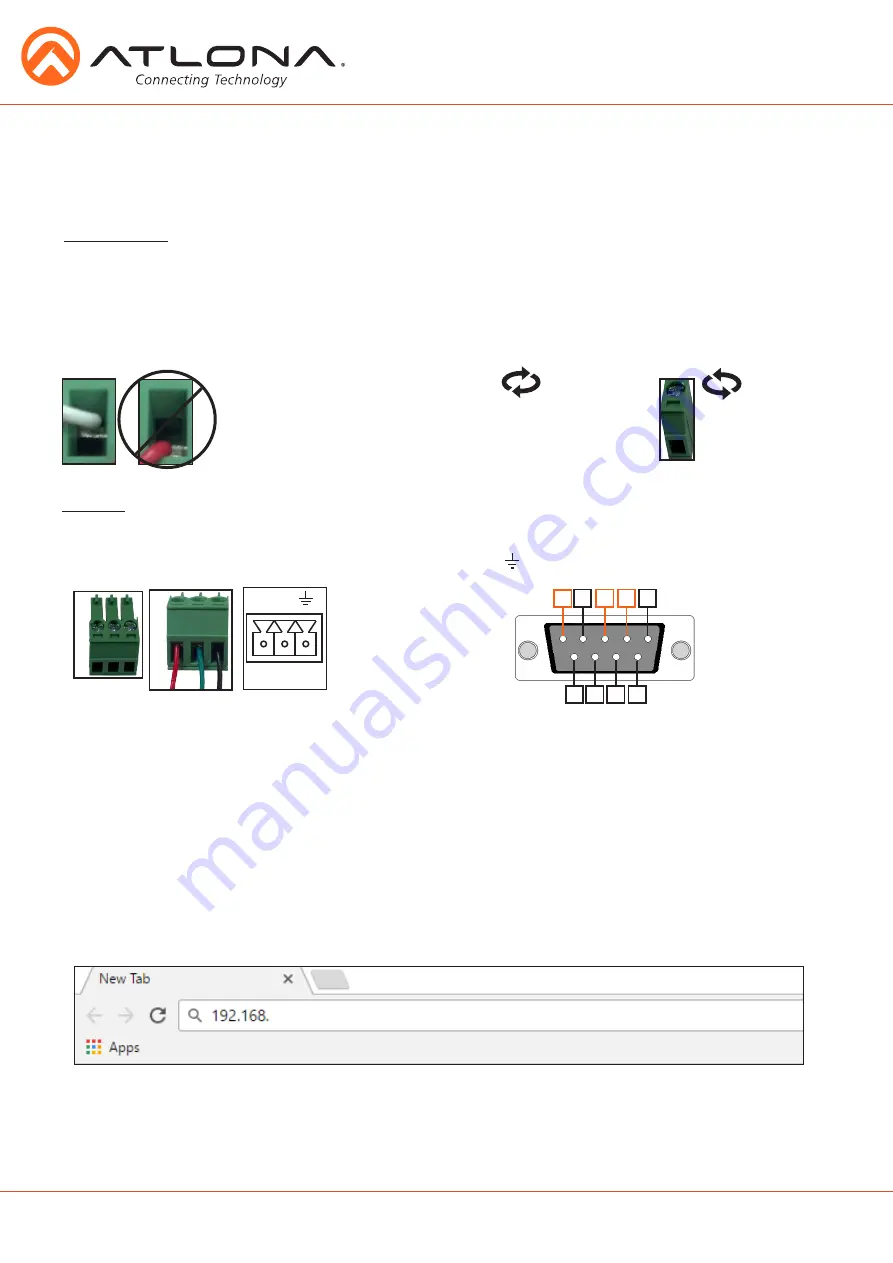
RS-232 captive screw connector is included. RS-232 pin out will be determined by the RS-232
cable and will connect as Rx
(receiver)
,
Tx
(transmitter)
,
and
(ground)
.
(See picture 1)
RS-232
Typical pin out:
2 - TX - Transmitter
3 - RX - Receiver
5 - GND - Ground
Pin out color will differ
per RS-232 cable.
1
5 4 3 2
9 8 7 6
1
RS-232
RS-232
RX TX
The captive screw connectors allow you to cut cables to a suitable length, reducing cable clutter
while providing a more reliable connection.
Captive Screw
Note:
IP addresses may also be found using common free IP scanner software such as “Advanced IP Scanner”
*
Atlona does not assume responsibility for damage caused by other programs installed onto a computer, verify programs before installing
*
webGUI
Atlona has created an easy to use webGUI for setup and changes to the configuration of the
HDVS-200-TX-WP.
To begin, plug a LAN cable into the LAN port of the HDVS-200-TX-WP and the network switch,
then type the IP address of the unit into a web browser of a PC connected to the same network
(as
seen below)
.
Important:
If any stability issues are experienced, disable any anti-virus or firewall that may interfere with
network communication to the switcher. Once set up is done and the switcher webGUI is no
longer being used, the firewall and anti-virus can be re-enabled.


