


AT-ANC-108D
15
Button
Mapping
Each button on the AT-ANC-108D will be assigned to a particular function, depending upon which device is selected
from the Device Type drop-down list, under the
Configuration page (page 23)
of AMS.
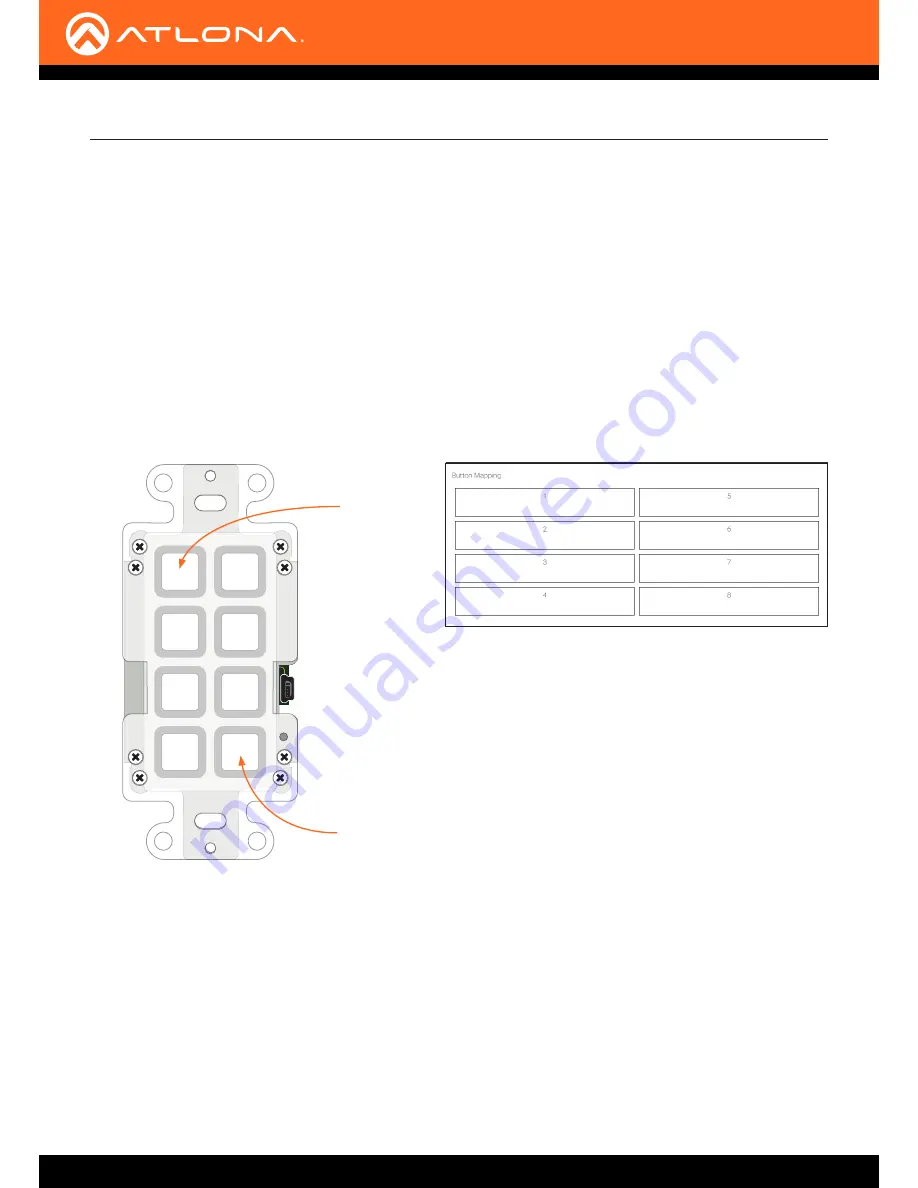
Before selecting the device to be mapped, make sure the AT-ANC-108D is in the proper orientation: Button 1 is in
the upper-left corner of the unit; Button 8 will be in the lower-right corner of the unit, as shown below. The mini-USB
port should be on the right side of the unit, as it faces forward.
The AMS button numbering, as displayed in the
Configuration
page of AMS (on the right), matches the numbering
scheme of each button on the AT-ANC-108D. The first column of buttons is numbered 1 through 4, and the second
column of buttons is numbered 5 through 8.
Basic Operation
LAN
AT-ANC-108D
DC 5V
- +
Proper Orientation
Mapping a Device to the AT-ANC-108D
Button 1
AT-ANC-108D (front view)
AMS Button Mapping
Button 8
1.
Login to AMS. Refer to
Accessing AMS (page 18)
, if necessary.
2. Click
CONFIGURATION
in the menu bar.
3. Click the
Device Type
drop-down list and select the device to be mapped to the AT-ANC-108D. Move the
mouse up or down the list until the desired device is highlighted. In the example, on the next page, the AT-UHD-
CLSO-612ED will be selected.
4. Click the highlighted device to select it.