background image

- 19 -

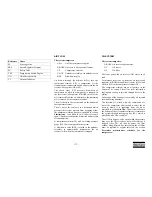
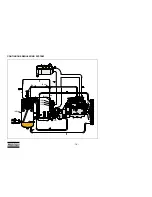
The system comprises:

RV

Regulating valve

UA

Unloader assembly

SR

Speed regulator

The compressor is provided with a continuous
regulating system. This system is provided with a
blow-down valve which is integrated in the unloader
assembly (UA). The valve is closed during operation
by air receiver pressure and opens by air receiver
pressure via the compressor element when the
compressor is stopped.

When the air consumption increases, the air receiver
pressure will decrease and vice versa. This receiver
pressure variation is sensed by the regulating valve
which, by means of control air to the unloader,
matches the air output to the air consumption. The air
receiver pressure is maintained between the pre-
selected working pressure and the corresponding
unloading pressure.

When starting the compressor, the unloader valve
(UV) is kept open by spring force, the engine runs at
maximum speed. The compressor element (CE) takes
in air and pressure builds up in the receiver (AR).

The air output is controlled from maximum output
(100%) to no output (0%) by:

1. Speed control of the engine between maximum 

load speed and unloading speed (the output of a 
screw compressor is proportional to the rotating 
speed).

2. Air inlet throttling.

3. Blow off valve (BOV).

If the air consumption is equal to or exceeds the
maximum air output, the engine speed is held at
maximum load speed and the unloading valve is fully
open.

If the air consumption is less than the maximum air
output, the regulating valve supplies control air to
unloader valve (UV) to reduce the air output and
holds air receiver pressure between the normal
working pressure and the corresponding unloading
pressure of approx. 1.5 bar (22 psi) above the normal
working pressure.

When the air consumption is resumed, the blow off
valve (BOV) closes and the unloader valve (UV)
gradually opens the air intake and the speed regulator
(SR) increases the engine speed.

The construction of the regulating valve (RV) is such
that any increase (decrease) of the air receiver
pressure above the pre-set valve opening pressure
results in a proportional increase (decrease) of the
control pressure to the unloading valve and the speed
regulator.

Part of the control air is vented to atmosphere, and
any condensate discharged, through the vent holes
(VH).

XA(S) 137 DDG - XA(S) 300 DD7G:

When the generator is switched on, the solenoid valve
(SVa) via the speed regulator (SR) controls the motor
and allows it to reach maximum speed (the normal
control system is switched off).

Содержание XA(S) 137 DD

Страница 1: ...Atlas Copco Instruction Manual XA S 137 DD XA S 300 DD7 Engine Deutz XA S 137 DDG XA S 300 DD7G BF4M2011 XAHS 107 DD XAHS 250 DD7 Instruction Manual for Portable Compressors English ...

Страница 2: ......

Страница 3: ... COPCO PORTABLE AIR DIVISION www atlascopco com Printed matter N 2954 3170 01 04 2008 Instruction Manual for Portable Compressors XA S 137 DD XA S 300 DD7 XA S 137 DDG XA S 300 DD7G XAHS 107 DD XAHS 250 DD7 ...

Страница 4: ...tions additions or conversions made without the manufacturer s approval in writing While every effort has been made to ensure that the information in this manual is correct Atlas Copco does not assume responsibility for possible errors Copyright 2008 Atlas Copco Airpower n v Antwerp Belgium Any unauthorized use or copying of the contents or any part thereof is prohibited This applies in particular...

Страница 5: ...6 3 1 2 Air flow 17 3 1 3 Oil system 17 3 1 4 Continuous regulating system 18 3 2 Electrical system 20 3 2 1 Description 23 3 3 Markings and information labels 24 4 Operating instructions 25 4 1 Parking towing and lifting instructions 25 4 1 1 Parking instructions 25 4 1 2 Towing instructions 26 4 1 3 Height adjustment 27 4 1 4 Lifting instructions 27 4 2 Starting Stopping 28 4 2 1 Before starting...

Страница 6: ...e adjustment 47 6 7 1 Test procedure of brake cable adjustment 48 6 7 2 Brake cable adjustment 49 7 Problem solving 50 8 Available options 53 9 Technical specifications 54 9 1 Torque values 54 9 1 1 For general applications 54 9 1 2 For important assemblies 54 9 2 Settings of shutdown switches and safety valves 55 9 3 Compressor Engine Generator specifications 56 9 3 1 Reference conditions 56 9 3 ...

Страница 7: ... on live electrical components Skill level 3 Electrical technician An electrical technician is trained and has the same qualifications as both the operator and the mechanical technician In addition the electrical technician may carry out electrical repairs within the various enclosures of the unit This includes work on live electrical components Skill level 4 Specialist from the manufacturer This ...

Страница 8: ...transfer surfaces cooler fins intercoolers water jackets etc regularly See the maintenance schedule See the Preventive maintenance schedule for the compressor 8 All regulating and safety devices shall be maintained with due care to ensure that they function properly They may not be put out of action 9 Care shall be taken to avoid damage to safety valves and other pressure relief devices especially...

Страница 9: ... ample capacity tested and approved according to local safety regulations shall be used 7 Lifting hooks eyes shackles etc shall never be bent and shall only have stress in line with their design load axis The capacity of a lifting device diminishes when the lifting force is applied at an angle to its load axis 8 For maximum safety and efficiency of the lifting apparatus all lifting members shall b...

Страница 10: ...pipes or the engine exhaust Do not smoke when fuelling When fuelling from an automatic pump an earthing cable should be connected to the unit to discharge static electricity Never spill nor leave oil fuel coolant or cleansing agent in or around the unit 14 All doors shall be shut during operation so as not to disturb the cooling air flow inside the bodywork and or render the silencing less effecti...

Страница 11: ...or correct the dangerous condition before restarting Make sure that all electric connections are securely tightened 33 Avoid overloading the generator The generator is provided with circuit breakers for overload protection When a breaker has tripped reduce the concerned load before restarting 34 If the generator is used as stand by for the mains supply it must not be operated without control syste...

Страница 12: ...aning 16 When performing any operation involving heat flames or sparks on a machine the surrounding components shall first be screened with non flammable material 17 Never use a light source with open flame for inspecting the interior of a machine 18 When repair has been completed the machine shall be barred over at least one revolution for reciprocating machines several revolutions for rotary one...

Страница 13: ...4 EEC annex II 2 Maintenance installation requirements 1 The vessel can be used as pressure vessel or as separator and is designed to hold compressed air for the following application pressure vessel for compressor medium AIR OIL and operates as detailed on the data plate of the vessel the maximum working pressure ps in bar psi the maximum working temperature Tmax in C F the minimum working temper...

Страница 14: ...ystem has no oil pump The oil is removed from the air in the air oil vessel at first by centrifugal force secondly by the oil separator element The vessel is provided with an oil level indicator Regulation The compressor is provided with a continuous regulating system and a blow down valve which is integrated in the unloader assembly The valve is closed during operation by air receiver pressure an...

Страница 15: ... is not engaged automatically Bodywork The bodywork has openings at the shaped front and rear end for the intake and outlet of cooling air and hinged door for maintenance and service operations The bodywork is internally lined with sound absorbing material Lifting eye A lifting eye is accessible when the small door at the top of the unit is unlocked Control panel The control panel grouping the air...

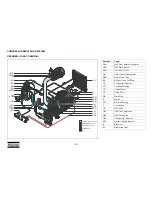
Страница 16: ... Main Parts E EP AOV VI SV OLG FPco RV AR CP OFce CE FT AF FCft A FF DSe FCeo OCce OCe BH TB F D VV G CPg XA S 137 DDG XA S 300 DD7G XA S 137 DD XA S 300 DD7 and XAHS 107 DD XAHS 250 DD7 with some options ...

Страница 17: ...Dipstick E Engine EP Exhaust Pipe F Fan FCeo Filler Cap engine oil FCft Filler Cap fuel tank FF Fuel Filter FPco Filler Plug oil compressor element FT Fuel Tank G Generator Reference Name OCce Oil Cooler compressor element OCe Oil Cooler engine OFce Oil Filter compressor element OLG Oil Level Gauge compressor element RV Regulating Valve SV Safety Valve TB Towbar VI Vacuum Indicator VV Vacuator Val...

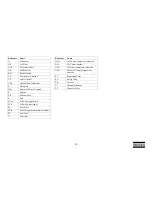
Страница 18: ...ce Name AFce Air Filter Compressor Engine AFE Air Filter Element AOV Air Outlet Valves AR Air Receiver Oil Separator BDV Blow Down Valve BV By Pass Valve Oil Filter CE Compressor Element CH Coupling Housing CP Control Panel CV Check Valve DP Drain Plug E Engine EW Electrical Wiring F Cooling Fan OC Oil Cooler OFC Oil Filter Compressor OFE Oil Filter Engine OSE Oil Separator Element PSE Pressure Sw...

Страница 19: ...he compressor is stopped OIL SYSTEM The system comprises AR OSE Air receiver oil separator OC Oil cooler OF Oil filter The lower part of the air receiver AR serves as oil tank Air pressure forces the oil from the air receiver oil separator AR OS through the oil cooler OCce and oil filter OF to the compressor element CE The compressor element has an oil gallery in the bottom of its casing The oil f...

Страница 20: ... 18 CONTINUOUS REGULATING SYSTEM BOV UV UA VH RV AR CE SVa SR ...

Страница 21: ...f a screw compressor is proportional to the rotating speed 2 Air inlet throttling 3 Blow off valve BOV If the air consumption is equal to or exceeds the maximum air output the engine speed is held at maximum load speed and the unloading valve is fully open If the air consumption is less than the maximum air output the regulating valve supplies control air to unloader valve UV to reduce the air out...

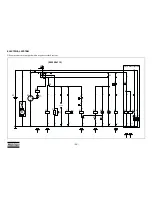
Страница 22: ...1 d10 d6 d6 a8 a8 b3 d10 d7 b3 c1 12 12 18 17 1 1 16 16 P3 K6 P2 S6 K5 K5 K6 11 9 9 9 10 15 14 13 5 6 7 4 3 2 1 3 3 3 3 8 12 12 12 12 12 12 12 12 12 G2 K0 K1 H2 K3 S5 H1 K2 K1 K3 Auxiliary V2 K0 33 S1 0 1 3 2 30 32 31 P1 M1 M S4 K2 P S3 S2 Y1 K4 F1 D B D G1 V1 K4 9822 0841 15 Cold Start Option ...

Страница 23: ...art of M1 K1 Relay K2 Relay K3 Relay K4 Relay K5 K6 Relay heater plug M1 Starter motor P1 Hourmeter P2 P3 Heater plug S1 Contactswitch Off On Override Start S2 Temperature switch engine S3 Oil pressure switch S4 Temperature Lamptest switch S5 Temperature switch compressor S6 Coldstart switch V1 Diode V2 Diode Y1 Fuel solenoid valve ...

Страница 24: ... b0 b54 W1 b0 b0 N 16A 16A 16A Q1 16A N N W1 U1 V1 W V U 8 7 6 5 4 3 2 1 K5 MX c0 c0 c0 c0 c0 c0 c6 c6 c0 c0 c0 c6 c54 G3 U1 V1 W1 N G 16A L1 L2 L3 N N L3 L2 L1 X1 1 c0 c6 c54 16A L3 N N L2 X1 3 c0 c0 c0 c6 c54 16A L1 L2 L3 N N L3 L2 L1 X1 2 PE D1 K6 R 11 12 14 R T PE A1 A2 L XA S 137 DDG XA S 300 DD7G This generator is built to supply a sheer alternating current IT network ...

Страница 25: ...witched off by turning switch S6 to position 0 In the case of an insulation fault lamp H2 of the system is activated When the red lamp H2 is active a reset can only be made by stopping and restarting the unit Reference Name D1 Diode G3 Generator H3 Lamp Power control K5 Contactor 4 pole K6 Insulation Monitoring Relay Q1 Main circuit breaker 4 pole S6 Thermal contact N O S7 Switch Generator compres...

Страница 26: ...r loaded Runlamp Airfilter Compressor temperature too high Rotation direction Inlet Outlet Compressor oil drain Read the instruction manual before starting Service every 24 hours Warning Part under pressure Do not stand on outlet valves Start Stop indication of switch Do not run the compressor with open doors Lifting permitted Use diesel fuel only 4 75 bar 69 psi Tyre pressure Sound power level in...

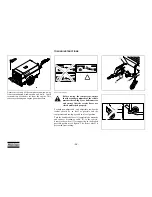
Страница 27: ...evel as possible however it can be operated temporarily in an out of level position not exceeding 15 If the compressor is parked on sloping ground immobilize the compressor by placing wheel chocks available as option in front of or behind the wheels The operator is expected to apply all relevant safety precautions including those mentioned on the pages 5 11 of this book Before putting the compress...

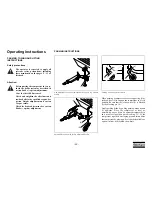
Страница 28: ...ould be as level as possible and the compressor and towing eye end in a level position Push the hand brake lever 1 completely downwards and connect breakaway cable 2 to the vehicle Secure jockey wheel 3 or support leg in the highest possible position see figure The jockey wheel is prevented from turning Before towing the compressor ensure that the towing equipment of the vehicle matches the towing...

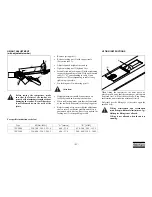
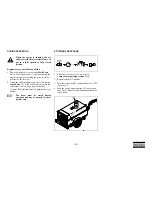
Страница 29: ...hile driving If necessary tighten the locking nut 2 corresponding to table LIFTING INSTRUCTIONS When lifting the compressor the hoist has to be placed in such a way that the compressor which must be placed level will be lifted vertically Keep lifting acceleration and retardation within safe limits Preferably use the lifting eye 1 herefore open the small door 2 Before towing the compressor make sur...

Страница 30: ...ient fuel Top up if necessary Consult the Engine Operation Manual for the type of fuel 5 Drain any water and sediment from the fuel filter until clean fuel flows from the drain cock 6 Press vacuator valves VV of the air filters to remove dust 7 Check the air filter vacuum indicators VI If the yellow piston reaches the red marked service range replace the filter element Reset the indicator by pushi...

Страница 31: ...position 1 lamp H2 general alarm lamp will go on 2 Check correct operation of alarm lamps H1 and H2 by pushing lamp test button S4 Both alarm lamps red should go on 3 Turn start switch S1 further clockwise into position 3 The starter motor will set the engine in motion The maximum allowed starter time where the starter motor is running continuously is 20 seconds If the engine does not catch a new ...

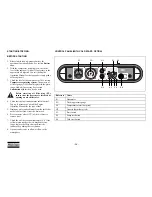
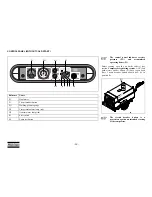
Страница 32: ...ROL PANEL WITHOUT COLD START Reference Name P1 Hourmeter F1 Circuit breaker button PG Working pressure gauge H1 Temperature alarm lamp red H2 General alarm lamp red S1 Start switch S4 Lamp test button P1 PG H1 H2 S1 S4 1 0 2 3 The control panel indicates receiver pressure PG and accumulated operating hours P1 The circuit breaker button is a protection against unintended starting of the compressor ...

Страница 33: ...arter motor will set the engine in motion The maximum allowed starter time where the starter motor is running continuously is 20 seconds If the engine does not catch a new attempt can be made after 30 seconds waiting The temperature alarm lamp H1 and the general alarm lamp H2 will go out as soon as the engine has been started 4 The start switch automatically springs back to position 1 Lamp H1 only...

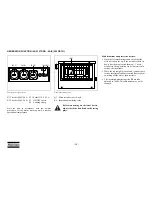
Страница 34: ...tion can be indicative of a serious electrical fault When the red lamp H9 is activated it means that a serious insulation fault has occurred Reset by first switching off the motor then restart it The insulation monitoring relay K8 must be adjusted to 10 kΩ This adjustment may not be changed X1 1 Socket 400 V 16 A X1 3 Socket 230 V 16 A X1 2 Socket 400 V 16 A S1 ON OFF switch K1 Earthing clamp X1 3...

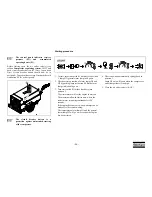
Страница 35: ...r element Reset the indicators by pushing the reset button STOPPING PROCEDURE 1 Close the air outlet valves see section Compressor regulating system AOV 2 Run unloaded for 3 minutes 3 Turn the start switch S1 counterclockwise CCW to position 0 4 Push the circuit breaker button F1 once open hood first Circuit breaker button should now be in position A When the engine is running the air outlet valve...

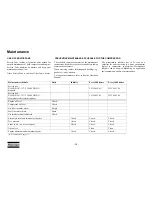
Страница 36: ... to compressor applications Maintenance schedule can be adapted depending on application environment and quality of maintenance PREVENTIVE MAINTENANCE SCHEDULE FOR THE COMPRESSOR Maintenance schedule Daily Initially Every 500 hours Every 1000 hours Service pak XA H S 107 137 250 300 DD 7 G Standard 2912 4490 05 2912 4491 06 Service pak XA H S 107 137 250 300 DD 7 G Heavy duty filter system option ...

Страница 37: ... adjustment adjustable towbar Check Grease Grease Shutdown switches Check Pressure drop over separator element 2 Measure Replace 6 Fan V belts 3 Adjust Adjust Fuel tank Clean Clean Compressor oil Change Compressor oil filter Replace Air filter elements 1 Replace Safety cartridges 1 option Replace Engine oil 3 4 Change Change Engine oil filter 3 Replace Replace Fuel filter 3 5 Replace Replace Fuel ...

Страница 38: ...AROIL provides wear protection under extreme conditions Powerful oxidation resistance high chemical stability and rust inhibiting additives help reduce corrosion even within engines left idle for extended periods PAROIL contains high quality anti oxidants to control deposits sludge and contaminants that tend to build up under very high temperatures PAROIL s detergent additives keep sludge forming ...

Страница 39: ... circulation of the synthetic oil Then drain the synthetic oil again and fill again with new synthetic oil To set correct oil levels proceed as in normal instruction Mineral compressor oil PAROIL M Synthetic compressor oil PAROIL S Mineral engine oil PAROIL 15W40 Synthetic engine oil PAROIL 5W40 Liter US gal Order number can 5 1 3 1615 5947 00 can 20 5 3 1615 5948 00 barrel 210 55 2 1615 5949 00 L...

Страница 40: ...he Engine Operation Manual and top up with oil if necessary CHECK COMPRESSOR OIL LEVEL With the unit standing level check the level of the compressor oil The pointer of the oil level gauge 1 must register in the upper extremity of the green range Add oil if necessary Never mix oils of different brands or types Use only non toxic oils where there is a risk of inhaling delivered air Before removing ...

Страница 41: ... Catch the oil in a drain pan Screw out the filler plug to speed up draining Tighten the plugs after draining 3 Remove the oil filter 1 e g by means of a special tool Catch the oil in a drain pan 4 Clean the filter seat on the manifold taking care that no dirt drops into the system Oil the gasket of the new filter element Screw it into place until the gasket contacts its seat then tighten one half...

Страница 42: ...ELECTROLYTE Electrolyte in batteries is a sulphuric acid solution in distilled water The solution must be made up before being introduced into the battery Remove any dirt from the coolers with a fibre brush Never use a wire brush or metal objects 1 To avoid damaging the coolers angle between jet and coolers should be approx 90 do not use jet at max power Protect the electrical and controlling equi...

Страница 43: ...um jelly STORAGE Run the compressor regularly e g twice a week until warm Load and unload the compressor a few times to operate the unloading and regulating components Close the air outlet valves after stopping SERVICE PAKS A Service Pak is a collection of parts to be used for a specific maintenance measure It guarantees that all necessary parts are replaced at the same time keeping down time to a...

Страница 44: ... by the tension of the spring in the regulating valve RV This tension can be increased to raise the pressure and decreased to lower it by turning the adjusting wheel clockwise and anti clockwise respectively AOV RV E SVa SR The solenoid valve SVa is only present at units equipped with a generator XA S 137 DDG XA S 300 DD7G ...

Страница 45: ...ngine E run at maximum speed The working pressure must be Y bar e adjust if necessary with regulating valve RV see table 5 Check the engine maximum speed Adjust the maximum speed by means of adjusting eccentric nut on top of speed regulator SR 6 Close the outlet valves AOV check that the pressure is between Z1 and Z2 bar e see table Lock the regulating valve RV by fixing the lock nut X Y Z1 Z2 XA ...

Страница 46: ...g can not be avoided care should be taken that the filter element 4 is not washed out Please note that engine damage can cause considerable costs which makes the cost of a new filter element seam insignificant Safety cartridges 3 can not be cleaned but must be exchanged Please note that a cleaned element will never match the service life and performance of a new element Take the element from the a...

Страница 47: ...ee section Replacing the air filter element REPLACING THE AIR FILTER ELEMENT New elements must also be inspected for tears or punctures before installation Discard the element 4 when damaged In heavy duty applications it is recommended to install a safety cartridge which can be ordered with part no 2914 9311 00 A dirty safety cartridge 3 is an indication of a mal functioning air filter element Rep...

Страница 48: ...e once a year according to the local regulations This check cannot be done on the machine and must be carried out on a proper test bench FUEL SYSTEM Replacing the filter element 1 Unscrew the filter element 1 from the adapter head 2 Clean the adapter head sealing surface Lightly oil the gasket of the new element and screw the latter onto the header until the gasket is properly seated then tighten ...

Страница 49: ...e Turn the adjusting bolt 1 clockwise with a wrench till the wheel locks up Center the brake shoes by actuating the parking brake several times Turn the adjusting bolt anti clockwise until the wheel is running free in direction of travel approx 1 full turn of the adjusting bolt Check the position of the equalizer see section Brake cable adjustment 6 with the parking brake actuated Perpendicular po...

Страница 50: ...3 Apply the hand brake lever 4 Push the compressor a few centimeters backwards so that the brake lever is automatically pulled further up 5 Check the position of the arrow marking 1 at the catch lock in combination with the arrow marking 2 at the toothed sector according to A B C D 2 1 B Acceptable C Too loose adjust brake cables Section Brake cable adjustment D Too tight adjust brake cables Secti...

Страница 51: ...equalizer 6 must remain perpendicular to main brake cable 5 2 Apply the hand brake lever several times and repeat the adjustment Tighten the nuts with their lock nuts 2 Remove the jack and the blocks 3 Road test the compressor and brake several times Check brake shoe and brake cable adjustment and if necessary adjust Hand brake lever downward brake not operated 1 Brake cable 4 Brake cable nut 2 Lo...

Страница 52: ...ator drive belt broken or slipping b Alternator regulator defective a Check and correct if necessary b Have assembly repaired 4 Hourmeter P1 does not count running time a Hourmeter P1 defective a Replace 5 Engine is running but shuts down immediately after start button S has been released a Start button S released too soon b Insufficient engine oil pressure c Fuel tank contains insufficient fuel a...

Страница 53: ... and their fittings Stop leaks and if necessary consult Atlas Copco c Check and if necessary consult Atlas Copco 12 Working pressure rises during operation and causes safety valve to blow a Regulating valve incorrectly set or defective b Air leaks in regulating system c Unloading valve stuck d Safety valve defective a Check and if necessary consult Atlas Copco b Check hoses and their fittings Stop...

Страница 54: ...ufficient engine cooling b Engine oil cooler clogged externally a Relocate compressor b Clean engine oil cooler Refer to section Cleaning coolers 16 Compressor overheating a Insufficient compressor cooling b Oil cooler clogged externally c Oil level too low a Locate compressor away from walls when banked with other compressors leave space between them b Clean oil cooler Refer to section Cleaning c...

Страница 55: ...eyes Atlas Copco DIN Ball Italian GB NATO AC France Towbar support Support leg Jockey wheel Road signalisation Full B Safety Wheel chocks Safety cartridge Refinery equipment Spark arrestor Inlet shut down valve Air quality equipment Aftercooler water separator Aftercooler water separator fine filter PD Aftercooler water separator fine filter DD PD Aftercooler water separator fine filter PD reheate...

Страница 56: ...alue Nm lbf ft M6 15 11 07 M8 39 28 78 M10 78 57 56 M12 135 99 63 M14 210 154 98 M16 345 254 61 Assemblies Torque value Nm lbf ft Wheel nuts 120 88 56 15 Bolts axle beams 205 151 29 20 Bolts towbar axle 80 59 04 10 Bolts towbar bottom 205 151 29 20 Bolts towing eye towbar 80 59 04 10 Bolts lifting eye flywheel housing 205 151 29 20 Bolts engine drive housing M12 80 59 04 10 Bolts engine drive hous...

Страница 57: ...00 DD7 XA S 137 DDG XA S 300 DD7G XAHS 107 DD XAHS 250 DD7 Engine oil pressure bar e 6 6 6 psi 87 87 87 Engine oil temperature C 120 120 120 F 248 248 248 Compressor temperature C 120 120 120 F 248 248 248 Safety valve opening pressure EC type bar e 10 10 15 ASME type psi 150 150 218 ...

Страница 58: ...rating outside the canopy Designation XA S 137 DD XA S 300 DD7 XA S 137 DDG XA S 300 DD7G XAHS 107 DD XAHS 250 DD7 230 400 V 3 phase Absolute inlet pressure bar e 1 1 1 psi 14 5 14 5 14 5 Relative air humidity 0 0 0 Air inlet temperature C 20 20 20 F 68 68 68 Nominal effective working pressure bar e 7 7 12 psi 102 102 174 ...

Страница 59: ...ver pressure compressor unloaded bar e 8 5 8 5 13 5 psi 123 123 196 Maximum ambient temperature at sealevel EC standard C 48 48 49 F 118 118 120 aftercooler option C 40 40 41 F 104 104 106 Maximum ambient temperature at sealevel NON EC standard C 53 53 53 F 127 127 127 aftercooler option C 45 45 45 F 113 113 113 Minimum starting temperature C 10 10 10 F 14 14 14 Minimum starting temperature with c...

Страница 60: ...PERATURE IN F TEMPERATURE IN C 6000 5000 4000 3000 2000 1000 0 14 32 50 68 86 104 122 10 0 0 0 10 0 20 0 30 0 40 0 50 0 16 405 13 124 9 843 6 562 3 281 0 ft 07 bar e 3 aug 07 XAS 137 DdG XAS 300 DD7G 102 psi ALTITUDE IN M ALTITUDE IN FT TEMPERATURE IN F TEMPERATURE IN C 6000 5000 4000 3000 2000 1000 0 14 32 50 68 86 104 122 10 0 0 0 10 0 20 0 30 0 40 0 50 0 16 405 13 124 9 843 6 562 3 281 0 ft 12 ...

Страница 61: ...HS 250 DD7 230 400 V 3 phase Engine shaft speed normal and maximum r min 2400 2400 2400 Engine shaft speed compressor unloaded r min 1800 1700 1800 Engine shaft speed generator at maximum load r min 2400 Free air delivery 1 standard EC l s 125 96 93 cfm 265 203 197 NON EC l s 127 98 95 cfm 269 208 201 with aftercooler EC l s 120 92 88 cfm 254 195 186 NON EC l s 122 94 90 cfm 259 199 191 ...

Страница 62: ... 75 FAD kg h 9 7 9 7 lb h 21 4 21 4 at 50 FAD kg h 8 0 8 0 lb h 17 6 17 6 at 25 FAD kg h 5 7 5 7 lb h 12 6 12 6 at unload kg h 5 0 5 0 lb h 11 0 11 0 Specific fuel consumption standard EC g m3 25 8 34 6 lb 103 cu ft 1 61 2 16 NON EC g m3 25 4 33 9 lb 103 cu ft 1 58 2 12 with aftercooler EC g m3 26 9 36 6 lb 103 cu ft 1 68 2 29 NON EC g m3 26 4 35 8 lb 103 cu ft 1 65 2 24 ...

Страница 63: ...S 107 DD XAHS 250 DD7 230 400 V 3 phase Typical oil content of compressed air mg m3 5 5 5 oz 103 cft 0 005 0 005 0 005 Engine oil consumption maximum g h 58 58 58 oz h 2 05 2 05 2 05 Compressed air temperature at outlet valves standard C 90 90 90 F 194 194 194 with aftercooler C 30 30 F 86 86 Sound pressure level Lp measured according to ISO 2151 EPA under free field conditions at 7 m distance ISO...

Страница 64: ...D7 Make Deutz Type BF4M2011 Coolant Oil Number of cylinders 4 Bore mm 94 in 3 70 Stroke mm 112 in 4 41 Swept volume l 3 1 cu in 189 7 Output according to DIN 6271 at normal shaft speed kW 58 BHP 77 8 Load factor 50 Designation XA S 137 DD XA S 300 DD7 XA S 137 DDG XA S 300 DD7G XAHS 107 DD XAHS 250 DD7 Capacity of oil sump Initial fill l 11 US gal 2 91 Refill max 1 l 6 5 US gal 1 72 ...

Страница 65: ...XAHS 250 DD7 Capacity of compressor oil system l 13 US gal 3 43 Net capacity of air receiver l 35 US gal 9 25 Capacity of fuel tank l 130 US gal 34 Air volume at inlet grating approx 1 m3 s 2 5 cfm 88 with brakes towbar fixed adjustable Length mm 3768 4278 in 148 3 168 4 Width mm 1676 1676 in 66 66 Height mm 1479 1479 in 58 2 58 2 Weight ready to operate kg 1500 1450 lb 3306 9 3196 7 ...

Страница 66: ...3 phase Number of poles 4 Rated current In 1ph 3ph A 16 16 Thermal release It 1ph 3ph A 16 32 Magnetic release Im A 3 5 In Designation 230 400V 3 phase Rated continuous active power COP kW 9 6 Rated power factor lagging 0 8 Rated continuous apparent power 3ph COP kVA 12 Rated voltage 3ph line to line V 400 Rated current 3ph A 17 Rated continuous apparent power 1ph COP kVA Rated voltage 1ph line to...

Страница 67: ...fication number 7 A Maximum permitted total weight of the vehicle B Maximum permitted axle load C Maximum permitted load on the towing eye 8 Model 9 Working pressure 10 Speed 11 Engine power 12 Manufacturing year 13 CE mark in accordance with Machine Directive 89 392 EC 14 Register number or number of notified body 1 2 3 4 5 6 7 8 9 10 11 12 14 13 ...

Страница 68: ...aterials for recycling in the future is forseen DISPOSAL OF MATERIALS Dispose contaminated substances and material separately according to local applicable environmental legislations Before dismantling a machine at the end of its operating lifetime drain all fluids and dispose of according the applicable local disposal regulations Remove the batteries Do not throw batteries into the fire explosion...

Страница 69: ... 67 Maintenance Log Compressor Customer Serial number Service hours Maintenance action Date By initials ...

Страница 70: ... 68 Notes ...

Страница 71: ......

Страница 72: ...www atlascopco com ...

Отзывы: