background image

ENGLISH 

A05-1XAX-C0X_MX02 

15 


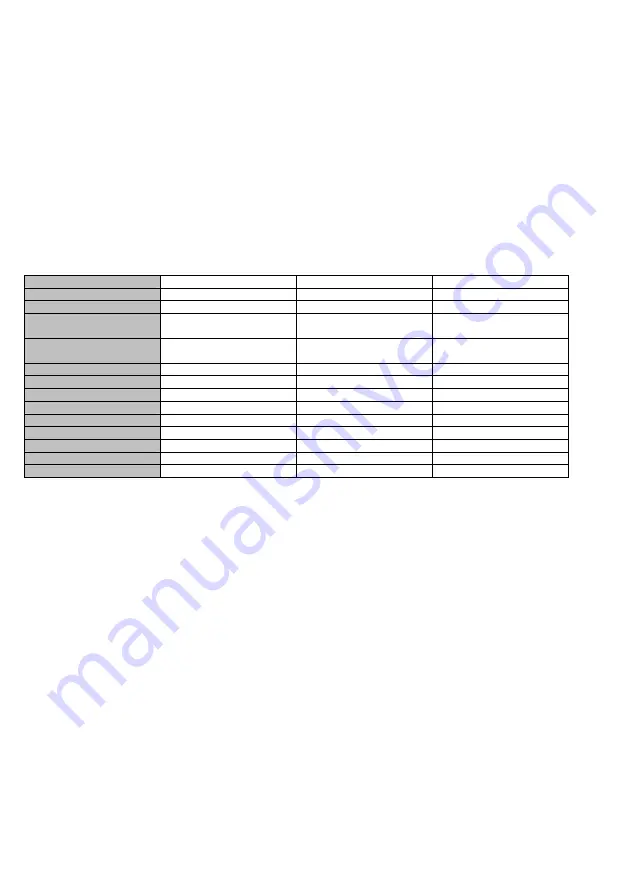
Maximum power cons. 

<30 W


<40 W


<45 W


Stand-by power cons. 

<5 W 

<5 W 

<5 W 

Off mode powert cons. 

<3 W 

<3 W 

<3 W 

Power supply for 
adapter 

100V

~

240 VAC 60/50 Hz 

100 V

~

240 VAC 60/50Hz 

100 V

~

240 VAC 60/50 Hz 

Power supply for 
monitor 

12 VDC 3.3 A 

12 VDC  4.2 A 

12 VDC 4.2 A 

Power saving control 

Yes Yes Yes 

Norms 

CE CE CE 

Storage temperature 

-20°C

~+55°C

 -20°C

~+55°C

 -20°C

~+55°C


Operating temperature 

5°C

~40°C

 5°C

~40°C


5°C

~40°C


Humidity 

10%

~85%

 10%

~85%

 10%

~85%


Unpacking dimension 

360 x 150 x 350 mm 

393 x 150 x 390 mm 

430 x 150 x 420 mm 

Packing dimension 

418 x 165 x 395 mm 

455 x 165 x 440 mm 

490 x 165 x 465 mm 

Net weight 

3.5 kg 

5.0 kg 

6.0kg 

Gross weight 

5.0 kg 

7.0 kg 

8.0kg 

Note: These specifications are subject to change without notice. 


Содержание A05-15AX-C03

Страница 1: ...LCD Monitor multi language manual I See S series A05 15AX C03 A05 17AM C04 A05 19AM C05...

Страница 2: ......

Страница 3: ...stallation 3 2 1 Install the base 3 2 2 Install the monitor 4 2 3 Self test pattern 5 2 4 Adjust picture 5 3 Operations of the monitor 5 3 1 Power on off switch 5 3 2 Power LED indicator 5 3 3 OSD con...

Страница 4: ...MPORTANTI PER LA SICUREZZA 17 1 Introduzione 18 1 1 Informazioni generali 18 1 2 Carattristiche principali 18 1 3 Check List 19 2 Installazione 19 2 1 Installare la base 19 2 2 Installazione del monit...

Страница 5: ...5 Guida al timing 28 3 6 Plug Play 29 3 7 Risparmio energetico 29 3 8 Regolazione volume 30 4 Specifiche 30 5 Risoluzione problemi 32 FRANCAIS IMPORTANT INSTRUCTIONS DE SECURITE 33 1 Introduction 34...

Страница 6: ...s de contr le OSD 38 3 3 1 Touche auto 38 3 3 2 Touches 38 3 3 3 Touche entr e 38 3 3 4 Menu OSD 38 3 3 5 Table des fonctions 39 3 3 6 Fonctions sp ciales 41 3 4 Mode S curit 43 3 5 Modes support s 43...

Страница 7: ...separation distance of at least 30 cm from all persons FCC Warning This equipment has been tested and found to comply with the regulations for a Class B digital device pursuant to Part 15 of the FCC R...

Страница 8: ...ther similar surface Do not place the monitor near or over heat source or place in a built in installation 9 Keep 2 inches or 5 cm away from the wall or other goods 10 This monitor can only use the po...

Страница 9: ...nd protect it from strong light overheating and damp environment 21 This monitor must be stored in temperature 20 C 55 C Otherwise it may cause permanent damage 1 Introduction 1 1 General information...

Страница 10: ...io cable 7 User s manual 8 Warranty certification If any of above listed items is missing please contact your dealer for technical support or customer service 2 Installation The following chapters exp...

Страница 11: ...other into the monitor and lock the two bolts 2 Power cord connection connect the AC adapter and AC power source with power cord then connect the AC adapter output to the power input of the monitor 3...

Страница 12: ...in the best visual display you must adjust it please refer to chapter 3 Operation of the monitor 3 Operations of the monitor 3 1 Power on off switch This is a slight touch digital control key It is us...

Страница 13: ...or right decrease adjustment and choose the menu function The contrast and the brightness can be set by key directly 3 3 3 Enter key Confirmation key to display the OSD menu and complete the confirma...

Страница 14: ...6 Selected function name 17 Resolution 18 H frequency 19 V frequency 20 Progressive bar of adjustment 21 Percentage of adjustment 22 Title 3 3 5 Function table Display contents Function AUTO ADJUSTMEN...

Страница 15: ...e 9300K COLOR TEMPERATURE Set 9300k color temperature 7800K COLOR TEMPERATURE Set 7800k color temperature 6500K COLOR TEMPERATURE Set 6500k color temperature USER MODE Set user mode AUTO COLOR BALANCE...

Страница 16: ...adjustment mode After a few seconds the monitor will be in the best visual display mode Color adjustment when the function is selected the monitor will come into the sub menu there are five functions...

Страница 17: ...y the relative options will flash then adjust it by pressing key push ENTER again to exit Language There are six language to select ENG English FRE Frech DEU German ITA Italian ESP Spanish PYC Russian...

Страница 18: ...rotect the monitor the following image will be displayed on the screen After a few seconds the monitor will enter turn off mode You must restart the computer and reset the frequency range 3 5 Timing g...

Страница 19: ...79 4 1024 x 768 60 65 48 363 5 1024 x 768 70 75 56 476 6 XGA 1024 x 768 75 78 75 60 023 3 6 Plug Play This monitor meets the standard of VESA DDC When using video card with VESA DDC1 2B it will auto s...

Страница 20: ...clude power adapter s consumption Model A05 17AM C04 Mode Power indicator Power consumption On Green or blue 40 W Stand by suspend Red flashing 5 W Off Off 3 W include power adapter s consumption Mode...

Страница 21: ...st 450 1 500 1 600 1 Brightness 250 cd m 2 300 cd m 2 250 cd m 2 Response time 25 ms 12 ms 12 ms Display colors 16 7 M 16 7 M 16 7 M Viewing angle H 75 75 V 75 60 H 75 75 V 75 60 H 75 75 V 75 60 H Fre...

Страница 22: ...A 12 VDC 4 2 A Power saving control Yes Yes Yes Norms CE CE CE Storage temperature 20 C 55 C 20 C 55 C 20 C 55 C Operating temperature 5 C 40 C 5 C 40 C 5 C 40 C Humidity 10 85 10 85 10 85 Unpacking...

Страница 23: ...and check if signal cable is well connected with monitor Picture faintness to big or small In OSD menu select to make the monitor ad just automatically Picture too dark Push key to adjust brightness...

Страница 24: ...non coprirle durante il funzionamento e non porre il monitor vicino a fonti di calore o racchiuderlo in spazi angusti 9 Tenere il monitor ad almeno 8 cm Di distanza da pareti o altri oggetti 10 Il mo...

Страница 25: ...periodi prolungati di non utilizzo 20 Posizionare il monitor in area ventilata e proteggerlo da forti fonti luminose di calore o di umidit 21 Il monitor pu essere immagazzinato a temperature comprese...

Страница 26: ...gnal cable 6 Audio cable 7 User s manual 8 Warranty certification Se uno di questi componenti dovesse mancare contattare il delaer di riferimento o l assistenza tecnica Atlantis Land 2 Installazione I...

Страница 27: ...collegare quindi l alimentatore al monitor utilizzando l apposito jack 3 Connessione del cavo audio inserire un capo del cavo audio fornito a corredo solo modelli multimediali nell ingresso audio del...

Страница 28: ...posizioner in modalit di risparmio energetico Il LED posto sul pannello frontale diventer rosso e lampeggiante Appena il monitor sar in grado di rilevare un segnale video torner a visualizzare l imma...

Страница 29: ...i sicurezza consigliabile disconnettere l alimentatore della presa elettrica quando il monitor non utilizzato 3 3 Tasti di controllo OSD 3 3 1 Tasto Auto Premere questo tasto per una regolazione autom...

Страница 30: ...asto 4 Posizione orizzontale 5 Posizione verticale 6 Clock 7 Fase 8 Nitidezza 9 Regolazione colore 10 Volume 11 Tempo di visualizzazione OSD 12 Posizionamento e regolazione OSD 13 Richiamo 14 Lingue 1...

Страница 31: ...Muove l immagine sopra e sotto CLOCK Regola la frequenza sul pixel FASE Regola la fase sul pixel NITIDEZZA Regola la nitidezza dell immagine COLORE Regolazione colore TEMPERATURA COLORE 9300K Pone a 9...

Страница 32: ...siziona verticalmente l OSD TRAPARENZA OSD Regolazione trasparenza OSD RICHIAMO Richiama i parametri iniziali LINGUA Seleziona la lingua dell OSD USCITA Esce dal Men 3 3 6 Funzioni speciali Auto Regol...

Страница 33: ...utomaticamente la tensione di riferimento per i colori bianco e nero Regolazione R G B Quando viene selezionata la modalit USER MODE il menu OSD entrer automaticamente nella modalit di configurazione...

Страница 34: ...azione nitidezza Questa impostazione serve ad impostare il livelo di nitidezza dell immagine all interno dello schermo 3 4 Safety mode Quando il segnale video non ha frequenze compatibile con quelle s...

Страница 35: ...cale Hz Pixel Clock Mhz F Orizzontale KHz 1 60 25 175 31 5 2 72 31 5 37 9 3 VGA 640 x 480 75 31 5 37 5 4 60 40 37 9 5 72 50 48 1 6 SVGA 800 x 600 75 49 5 46 9 7 60 65 48 4 8 1024 x 768 70 75 56 5 9 10...

Страница 36: ...una scheda video compatibile con lo standard VESA DDC1 2B il monitor in grado di riconoscere automaticamente risoluzione frequenza livello di tensione in uscita e altri parametri senza che l utente de...

Страница 37: ...5W Spento Spento 3W incluso il consumo dell alimentatore 3 8 Regolazione volume Il volume pu essere regolato tramite l apposita voce presente nel men OSD 4 Specifiche Modello A05 15AX C03 A05 17AM C04...

Страница 38: ...er jack Consumo massimo 30 W 40 W 45 W Consumo in stand by 5 W 5 W 5 W Consumo da spento 3 W 3 W 3 W Tensione ingresso alimentatore 100V 240 VAC 60 50 Hz 100 V 240 VAC 60 50Hz 100 V 240 VAC 60 50 Hz T...

Страница 39: ...scheda grafica funzioni e che il cavo del segnale sia correttamente connesso Immagine distorta o errata Premere il pulsante per la regolazione automatica Immagine troppo scura Utilizzare i tasti e per...

Страница 40: ...une bonne ventilation 8 Le c ble d alimentation utilis doit tre celui fourni avec le produit afin d assurer une utilisation s re et d viter les incidents Demander votre d taillant en cas de doutes ven...

Страница 41: ...l acquisition de cet cran LCD Nous vous demandons de lire attentivement cette section du manuel pour une prise en main rapide du produit et des op rations effectuer IMPORTANT CONSERVER L EMBALLAGE COM...

Страница 42: ...it comprendre les l ments suivants 9 Moniteur couleur TFT avec sa base et la vis de montage 10 Adaptateur secteur 11 C ble secteur 12 C ble vid o VGA 13 C ble audio 14 Manuel utilisateur 15 Certificat...

Страница 43: ...Vissez les deux vis du connecteur b Connexion de l alimentation connectez le c ble d alimentation DC au connecteur DC puis le c ble d alimentation au secteur c Connexion du c ble audio reliez une des...

Страница 44: ...mmuter en mode normal 2 4 Ajuster l affichage Pour obtenir le meilleur r glage r f rez vous au chapitre ci dessous 3 Op rations 3 1 Bouton Marche Arr t De type sensitif il sert allumer ou teindre le m...

Страница 45: ...ou de r duire les r glages de choisir les fonctions du menu et de r gler directement le contraste et la luminosit 3 3 3 Touche entr e Touche de confirmation sauvegarde des r glages et d appel d l OSD...

Страница 46: ...la function s lectionn e 17 R solution 18 Fr quence horizontale 19 Fr quence verticale 20 Barre de r glage 21 Pourcentage du r glage 22 Title 3 3 5 Table des fonctions Icone Fonction AUTO REGLAGE Pour...

Страница 47: ...0K Pr r glage de la temp rature de couleur 7800K COULEUR 6500K Pr r glage de la temp rature de couleur 6500K MODE UTILISATEUR Pour les r glages personnalis s de la couleur BALANCE AUTO Pour la balance...

Страница 48: ...menu OSD SORTIE Pour sortir du menu 3 3 6 Fonctions sp ciales Auto Ajustement Lorsque vous s lectionnez cette fonction le moniteur ajuste automatiquement les caract ristiques d affichage votre carte...

Страница 49: ...n clignote ajustez avec les touches puis Entr e pour sauvegarder et fermer Langue Six langues peuvent tre s lectionn es ENG Anglais FRE Fran ais DEU Allemand ITA Italien ESP Espagnol PYC Russe TUR Tur...

Страница 50: ...et l image suivante appara tra Apr s quelques secondes le moniteur passera en mode Arr t Vous devrez red marrer l ordinateur et r gler correctement sa partie graphique 3 5 Modes support s Mod le A05...

Страница 51: ...x 400 70 28 322 31 468 2 VGA 640 x 480 60 25 175 31 469 3 SVGA 800 x 600 60 3 40 37 879 4 1024 x 768 60 65 48 363 5 1024 x 768 70 75 56 476 6 XGA 1024 x 768 75 78 75 60 023 3 6 Plug Play Ce moniteur...

Страница 52: ...od le A05 17AM C04 Mode Voyant LED Consommation lectrique Marche Vert ou bleu 40W Veille Rouge clignotant 5W Arr t Eteinte 3W incluant la consommation de l adaptateur Mod le A05 19AM C05 Mode Voyant L...

Страница 53: ...75 75 V 75 60 H 75 75 V 75 60 Fr quence Horizontale 30 60 KHz 30 81 KHz 30 80 KHz Fr quence Verticale 55 75 Hz 55 75 Hz 55 75 Hz Plug Play Oui Oui Oui Signal d entr e Analogique Analogique Analogique...

Страница 54: ...ement 5 C 40 C 5 C 40 C 5 C 40 C Humidit 10 85 10 85 10 85 Dimensions du moniteur 360 x 150 x 350 mm 393 x 150 x 390 mm 430 x 150 x 420 mm Dimensions du carton 418 x 165 x 395 mm 455 x 165 x 440 mm 49...

Страница 55: ...trop petite ou trop grande Pressez la touche AUTO pour que l cran se cale sur les bons r glages Image trop sombre Pressez la touche AUTO pour que l cran se cale sur les bons r glages Surchauffe Conse...

Страница 56: ......

Страница 57: ...Atlantis Land S p A Viale De Gasperi 122 20017 Mazzo di Rho MI E Mail info atlantis land com WWW http www atlantis land com...

Отзывы: