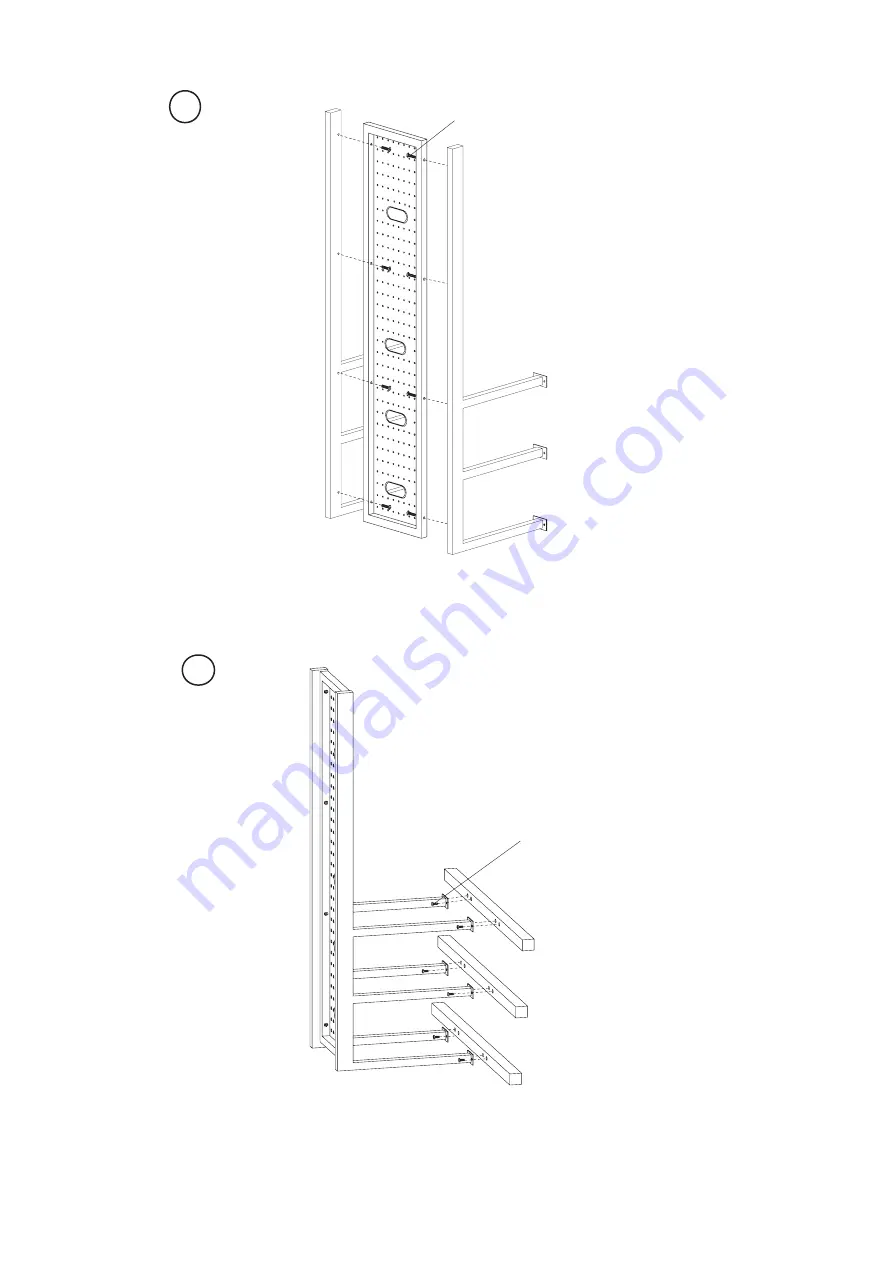
1
A
B
C
1-Attach frames (B) & (C) to the back panel (A) with screws (J).
J*8
2
D
I*12
2-Fasten beams (D) to the frames (B & C) with screws (I).
-3-
Страница 1: ...ORMATION PLEASE READ AND KEEP FOR FUTURE REFERENCE Fits PLASMA or LCD TV s THAT MEASURE 37 to 42 inches If parts are missing DO NOT return to the store To order missing replacement parts or assembly a...
Страница 2: ...t is empty of TV or other electronic components Care Instructions Use electrostatic dust cloths to clean furniture Do not set hot or cold containers directly on the furniture surface It is strongly re...
Страница 3: ...A B C D E 1 1 1 H G 1 1 F Components parts list Item Qty Part List 2 3 3 2 8 4 Components parts list Item Qty I 12 2 J K L M N 6 15 O P 5 1 Tool needed not included Q R S 1 1 1 1 T...
Страница 4: ...1 A B C 1 Attach frames B C to the back panel A with screws J J 8 2 D D D B C I 12 2 Fasten beams D to the frames B C with screws I 3...
Страница 5: ...4 3 3 Place pads N on the beams D and frames B C Apply pads O at the bottom of the unit N 15 O 5 C B D D D 4 4 Attach holder F to panel A with screws L Place glass E on the pads A F L 4 E E E...
Страница 6: ...E E 5 5 Fasten the glass E on the beams with screws M Do not over tighten screws M 6 6 6 Fasten two TV mounting brackets H on the back panel of the TV Detail assembly instructions refer to next pages...
Страница 7: ...non abrasive surface making sure to lay padding undermeath it so as not to damage the screen 3 Place left Mounting Rail and Right Mounting Rail in the appropriate position making sure they are CENTER...
Страница 8: ...y the type of TV that you have These diagrams are not designed to show the exact positioning they are only to be used as a guide SECURE MACHINE SCREWS FULLY BUT DO NOT OVER TIGHTEN 7 Insert Machine Sc...
Страница 9: ...7 A H side view F 8 After mounting the brackets H to TV hang TV onto holder F see 7 A 8 9 9 Attach holder G to bracket H fix holder G and wall strap S to panel A with washer T and screws K G A K 2 H s...
Страница 10: ...pencil Drill a hole Note Screwing wall anchor into stud is very important in properly securing the stand R Q Q R on the pencil mark made on the wall with a 10mm size Drill Bit Insert plastic anchor Q...
Страница 11: ...eipt If parts are missing DO NOT return to the store To order missing replacement parts or for assembly assistance please contact customer_relations atlantic inc com Or call 1 800 747 2660 M F 8am 5pm...