


AF-ATC Page 4 of 4
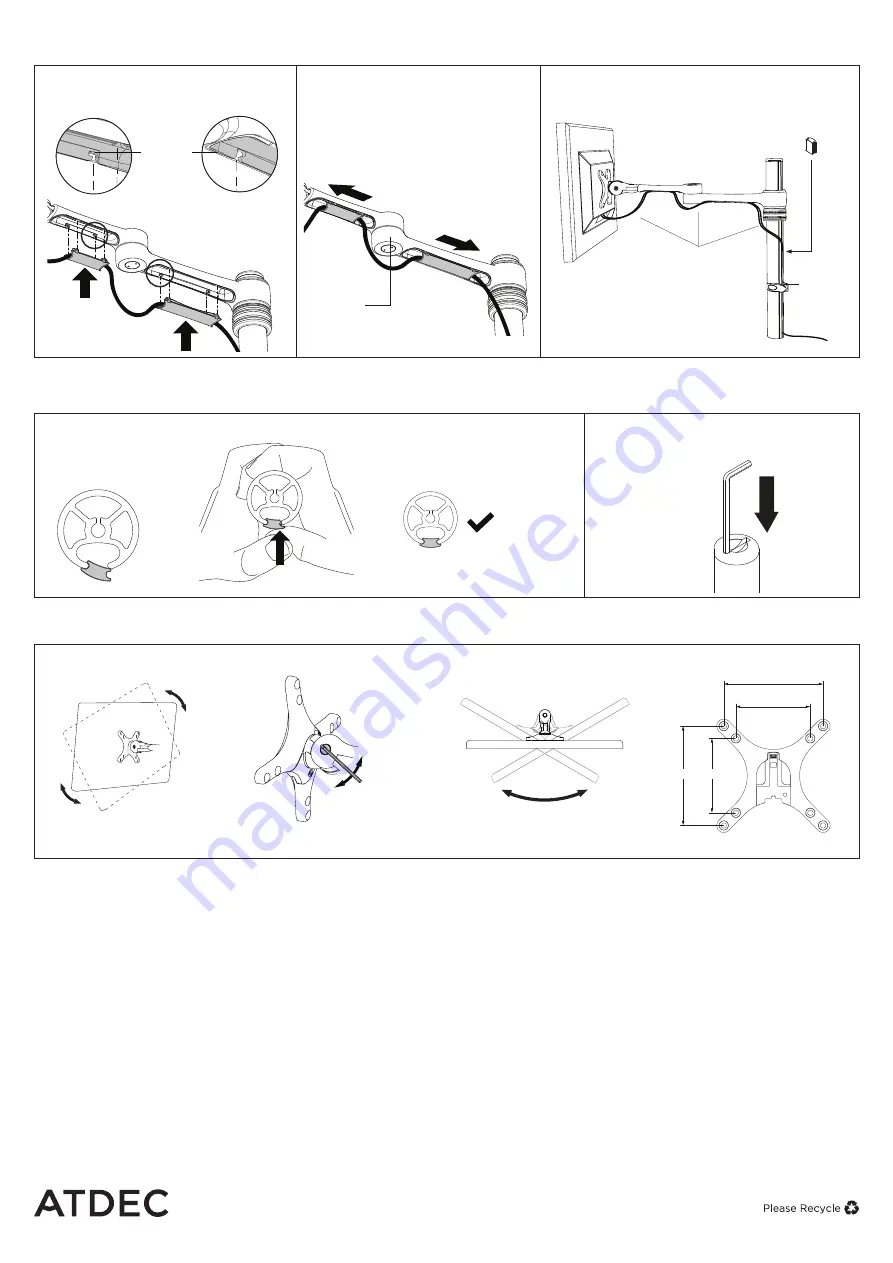
Cable
Stop
Cable
Clip
Note: Ensure enough cable
slack is given to allow for
movement.
Lock Slot
Elbow Joint
‘click’
‘click’
Lock Slot
Elbow Joint
‘click’
‘click’
9.1
After plugging in your cables,
install the Cable Covers.
Insert Cable Covers
up into Lock Slots.
9.2
Push Cable Covers away from
Elbow Joint to secure in place.
9.3
Cable Clips and Cable Stops can be installed
to further manage cables.
9.
Cable Management
10.
Insert Cable Stops
Note:
Press down firmly onto
the other edge of the Cable
Stop and hold. This allows the
rear profile to flex in place
10.1
Insert Cable Stop on one edge
of the Pole Slot
10.2
Insert allen key into top cap
on pole
11.
Adjusting the Display Bracket
Allen Key
Storage
atdec.com | atdec.co.uk | atdec.com.au
No portion of this document or any artwork contained herein should be reproduced in any way without
the express written consent of Atdec Pty Ltd. Due to continuing product development, the manufacturer
reserves the right to alter specifications without notice. ©20180723
Portrait/ Landscape
Tilt
(Screen angle up/down)
Pan
(Screen angle left/right)
No Allen Key
necessary
No Allen Key necessary
Note:
Support Screen
when adjusting tilt.
100mm
75mm
100mm
75mm
5mm
Allen Key
Tighten
Loosen
VESA
75 x 75 / 100 x 100mm


