AD-TVC Page 2 of 2
Assembly instructions
atdec.com | atdec.co.uk | atdec.com.au
No portion of this document or any artwork contained herein should be reproduced in any way without
the express written consent of Atdec Pty Ltd. Due to continuing product development, the manufacturer
reserves the right to alter specifications without notice. ©20180730
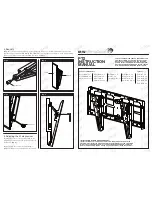
1.
Attach wheels to base.
2.
Attach lower columns to base using
6x M8x14 screws and spring washers..
3.
Attach shelf assembly.
Note:
The shelf can be installed at one
of three heights from the floor: 559mm,
772mm or 902mm.
Note:
Not all displays will require the
use of spacers shown here.
Note:
The installation is now complete!
B
J
L
M
F
A
J
C
L
E
P
N
J
H
L
K
D
G
E
P
N
J
H
L
K
D
G
E
P
N
J
H
L
K
D
G
E
P
N
J
H
L
K
D
G
E
P
N
J
H
L
K
D
G
B
J
L
M
F
A
J
C
L
B
J
L
M
F
A
J
C
L
4.
Screw 2x upper columns to lower
columns, then secure in place with screws.
8.
Fasten the screws attached to the rear
of the bracket to secure them in place.
6.
Mount the display to the brackets
using the suitable screws and spacers.
7.
Install the display by hooking the brackets
to the rail. Place the end caps into the top of
each column.
5.
Install the rail at the desired height.


