


ROG CROSSHAIR VIII FORMULA
2-13
Chapter 2
2.2
BIOS update utility
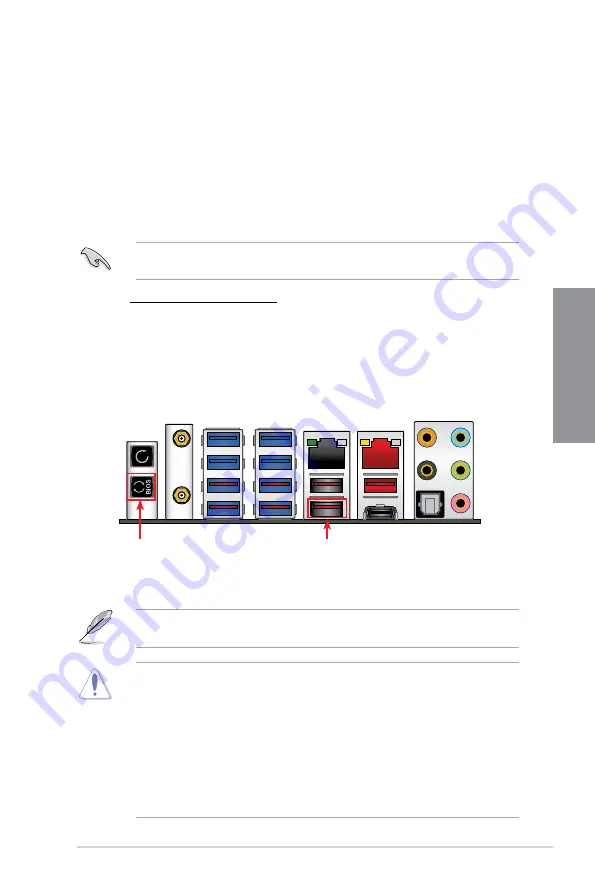
USB BIOS Flashback
USB BIOS Flashback allows you to easily update the BIOS without entering the existing
BIOS or operating system. Simply insert a USB storage device to the USB port, press the
USB BIOS Flashback button for three seconds, and the BIOS is updated automatically.
To use USB BIOS Flashback:
1.
Insert a USB storage device to the USB Flashback port.
We recommend you to use a USB 2.0 storage device to save the latest BIOS version for
better compatibility and stability.
2. Visit
https://www.asus.com/support/
and download the latest BIOS version for this
motherboard.
3.
Rename the file as
C8F.CAP
, then copy it to your USB storage device.
4.
Shut down your computer.
5.
Press the BIOS Flashback button for three seconds until the Flashback LED blinks
three times, indicating that the BIOS Flashback function is enabled.
•
Do not unplug portable disk, power system, or press the CLR_CMOS button while
BIOS update is ongoing, otherwise update will be interrupted. In case of interruption,
please follow the steps again.
•
If the light flashes for five seconds and turns into a solid light, this means that
the BIOS Flashback is not operating properly. This may be caused by improper
installation of the USB storage device and filename/file format error. If this scenario
happens, please restart the system to turn off the light.
•
Updating BIOS may have risks. If the BIOS program is damaged during the process
and results to the system’s failure to boot up, please contact your local ASUS Service
Center.
For more BIOS update utilities in BIOS setup, refer to the section
3.11 Updating BIOS
in
Chapter 3.
6.
Wait until the light goes out, indicating that the BIOS updating process is completed.
USB BIOS Flashback button
USB BIOS Flashback port
Содержание ROG CROSSHAIR VIII FORMULA
Страница 1: ...Motherboard ROG CROSSHAIR VIII FORMULA ...
Страница 48: ...2 4 Chapter 2 Basic Installation Chapter 2 To install an AIO cooler AIO_PUMP CPU_OPT CPU_FAN ...
Страница 50: ...2 6 Chapter 2 Basic Installation Chapter 2 2 1 4 DIMM installation To remove a DIMM ...
Страница 52: ...2 8 Chapter 2 Basic Installation Chapter 2 2 1 6 SATA device connection OR ...
Страница 92: ...3 30 Chapter 3 BIOS Setup Chapter 3 ...
Страница 94: ...4 2 Chapter 4 RAID Support Chapter 4 ...
Страница 106: ...A 12 Appendix Appendix ...


