3-30
Chapter 3: BIOS setup
Chapter 3
SATA Mode [AHCI Mode]
Allows you to set the SATA configuration.
[Disabled]
Disables the SATA function.
[IDE Mode]
Set to [IDE Mode] when you want to use the Serial ATA hard disk drives as
Parallel ATA physical storage devices.
[AHCI Mode]
Set to [AHCI Mode] when you want the SATA hard disk drives to use the
AHCI (Advanced Host Controller Interface). The AHCI allows the onboard
storage driver to enable advanced Serial ATA features that increases
storage performance on random workloads by allowing the drive to
internally optimize the order of commands.
[RAID Mode]
Set to [RAID Mode] when you want to create a RAID configuration from the
SATA hard disk drives.
S.M.A.R.T. Status Check [Enabled]
S.M.A.R.T. (Self-Monitoring, Analysis and Reporting Technology) is a monitor system. When
read/write of your hard disk errors occur, this feature allows the hard disk to report warning
messages during the POST.
Configuration options: [Disabled] [Enabled]
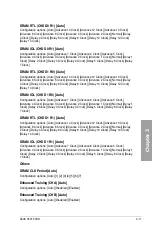
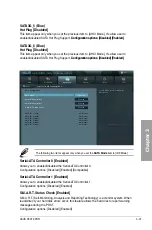
SATA6G_1 (Gray)
Hot Plug [Disabled]
This item appear only when you set the previous item to [AHCI Mode]. It’s allow user to
enabled/disabled SATA Hot Plug Support. Configuration options: [Disabled] [Enabled].
Configuration options: [Disabled] [Enabled].
SATA6G_2 (Gray)
Hot Plug [Disabled]
This item appear only when you set the previous item to [AHCI Mode]. It’s allow user to
enabled/disabled SATA Hot Plug Support. Configuration options: [Disabled] [Enabled].
Configuration options: [Disabled] [Enabled].
SATA3G_3 (Blue)
Hot Plug [Disabled]
This item appear only when you set the previous item to [AHCI Mode]. It’s allow user to
enabled/disabled SATA Hot Plug Support. Configuration options: [Disabled] [Enabled].
Configuration options: [Disabled] [Enabled].
SATA3G_4 (Blue)
Hot Plug [Disabled]
This item appear only when you set the previous item to [AHCI Mode]. It’s allow user to
enabled/disabled SATA Hot Plug Support. Configuration options: [Disabled] [Enabled].
Configuration options: [Disabled] [Enabled].
Содержание P9X79 PRO
Страница 1: ...Motherboard P9X79 PRO ...
Страница 20: ...1 8 Chapter 1 Product Introduction Chapter 1 ...
Страница 58: ...2 38 Chapter 2 Hardware information Chapter 2 9 7 8 5 6 Triangle mark B A B A ...
Страница 60: ...2 40 Chapter 2 Hardware information Chapter 2 1 2 3 To remove a DIMM 2 3 4 DIMM installation B A ...
Страница 63: ...ASUS P9X79 PRO 2 43 Chapter 2 2 3 6 ATX Power connection 2 OR OR 1 ...
Страница 64: ...2 44 Chapter 2 Hardware information Chapter 2 2 3 7 SATA device connection OR 2 OR 1 ...
Страница 158: ...4 34 Chapter 4 Software support Chapter 4 ...
Страница 166: ...5 8 Chapter 5 Multiple GPU technology support Chapter 5 ...


