


4-50
Chapter 4: Software support
Chapter 4
5.
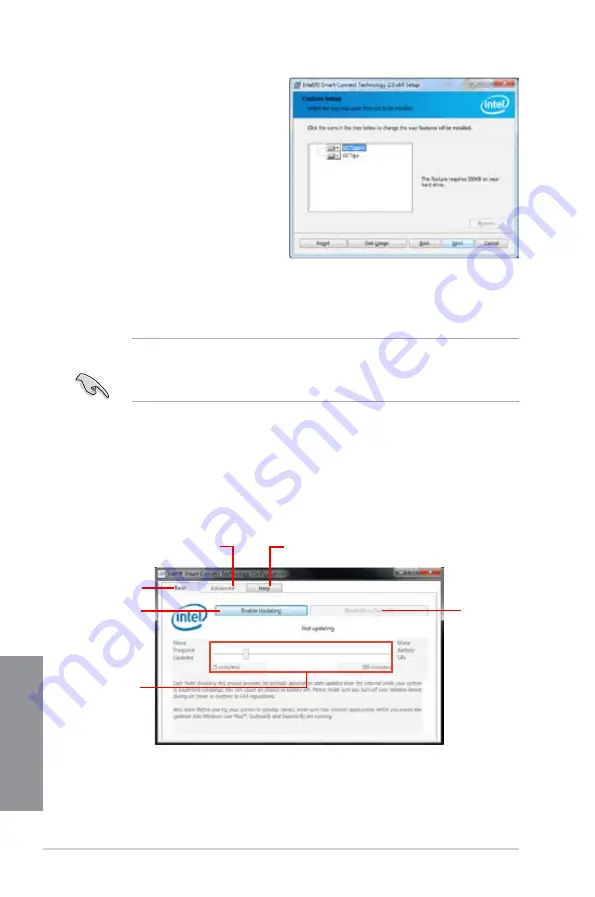
Select all and click
Next
for
Custom
Setup
.
6.
Click
Install
to proceed the installation.
7.
Click
Yes
to restart your system, and for
the newly installed Intel
®
Smart Connect Technology to take effect.
Using the Intel
®
Smart Connect Technology
•
Before the system goes to sleep mode, ensure to keep your applications on the
desktop, and enter the applications, passwords.
•
Ensure that the internet is in connection when enabling the Intel
®
Smart Connect
Technology.
1.
Click
Start > All Programs > Intel > Intel
®
Smart Connect Technology
.
2.
In the
Basic
tab, click
Enable Updating
. When enabled, the
Advanced
tab is available for
advanced function settings.
Click to enable
or disable the
function
When the scroll bar
is activated, adjust
the waking up time
period for Internet
data update.
Click to configure
the basic settings
The Advanced tab is activated
when updating is enabled
Click to view version
information and help topics
When updating is
enabled, click to
reset all settings
to default.
Содержание P8Z77-I DELUXE
Страница 1: ...Motherboard P8Z77 I DELUXE ...
Страница 12: ...xii ...
Страница 50: ...2 30 Chapter 2 Hardware information Chapter 2 5 4 A B C ...
Страница 52: ...2 32 Chapter 2 Hardware information Chapter 2 To uninstall the CPU heatsink and fan assembly 2 A B B A 1 ...
Страница 53: ...ASUS P8Z77 I DELUXE 2 33 Chapter 2 1 2 3 To remove a DIMM 2 3 4 DIMM installation B A ...
Страница 56: ...2 36 Chapter 2 Hardware information Chapter 2 2 3 6 ATX Power connection 1 2 OR ...
Страница 57: ...ASUS P8Z77 I DELUXE 2 37 Chapter 2 2 3 7 SATA device connection 2 OR 1 ...
Страница 59: ...ASUS P8Z77 I DELUXE 2 39 Chapter 2 2 3 9 Expansion Card installation To install PCIe x16 cards ...
Страница 66: ...2 46 Chapter 2 Hardware information Chapter 2 ...
Страница 172: ...5 6 Chapter 5 Multiple GPU technology support Chapter 5 ...
Страница 178: ...A 6 Appendices Appendices ...


